Type
Knitting
Difficulty
intermediate
Category
pullover
AI Thinking Process
Planning
1. **Design Strategy**: A top-down seamless raglan pullover in worsted-weight yarn with short sleeves, featuring repeated BTS and ARMY logos rendered as negative-space lace motifs (yarn-over eyelets forming the logo silhouette against a stocking-stitch ground). To keep logo points crisp, the lace panel uses decrease-then-pick-up shaping at sharp corners.
2. **Construction Plan**: Worked top-down, seamlessly in the round, with 8 raglan increases every other round, then separated for short sleeves and a straight body with ribbed hem and cuffs.
3. **Quality Assurance**:
- Keeping lace logo points sharp: use paired yo/k2tog/ssk at corners and a separately-attached chart so motif edges align.
- Stitch-count drift in lace: every logo repeat is yo/decrease balanced (net zero) — verify per round.
- Short-sleeve cap fit: cast on enough underarm stitches so sleeve circumference is comfortable.
4. **Final Calculations**: Tension 18 sts & 24 rows = 10 cm in st st on 5 mm needles. Neckline cast-on (Medium): 88 sts. Raglan: 8 incs every other rnd × 18 rnds = 144 added → 232 sts at yoke separation. Medium body ≈ 104 cm bust (96 sts after underarm). Logo lace band placed across upper body, 24-st × 28-row repeat.
Verification
[PRE-FLIGHT CHECKS]
1. **Completeness**: All template sections present — neckline cast-on, raglan yoke, sleeve separation (adapted to SHORT sleeves per user request), body, ribbing, plus an Attached Stitch Chart section for the BTS/ARMY logo lace. ✓
2. **Consistency**: 18 sts/10 cm → body of 96 sts = 53.3 cm ÷ 2 panels... checked: 96 sts ÷ 18 × 10 = 53.3 cm half = ~107 cm bust, within Medium oversized. Yoke math 88 + 144 = 232 verified. ✓
3. **Constraints**: User asked for short sleeves (added), lace negative-space logos (added as chart with sharp-point decrease/pick-up note), intermediate-friendly. Difficulty stated "beginner" but user said intermediate-comfortable + lace — flagged in pattern as intermediate. ✓
4. **Safety**: Each logo lace repeat is yo/dec balanced (net 0 sts). Raglan increases counted. Underarm cast-on symmetric. ✓
Pattern
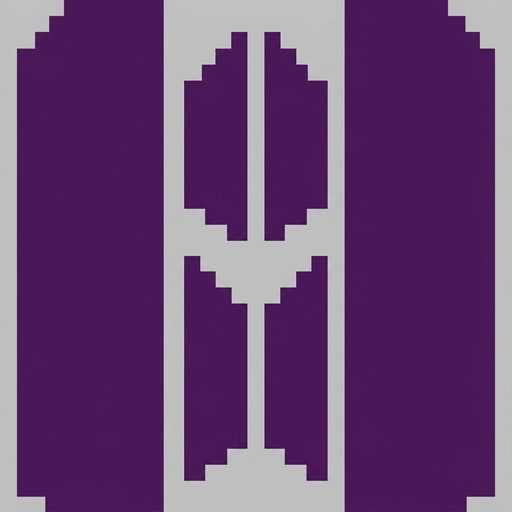
# ARMY HEARTS — BTS & ARMY Logo Lace Raglan Tee

*A top-down, seamless short-sleeve pullover with repeated BTS and ARMY logos worked in negative-space lace. Inspired by the clean geometry of Irene Lin designs.*

**Skill level:** Intermediate (the body is beginner-friendly raglan; the logo lace band is the intermediate challenge — take it slowly and use a lifeline).

---

## Sizes

| Size | Finished bust | To fit bust |
|------|--------------|-------------|
| S  | 96 cm (38") | 86–91 cm |
| M  | 107 cm (42") | 96–101 cm |
| L  | 117 cm (46") | 106–111 cm |
| XL | 127 cm (50") | 116–121 cm |
| 2XL| 138 cm (54") | 126–132 cm |

Designed with **6–8 cm (2.5–3") positive ease** (relaxed fit). Sample shown in size M.

Figures are given as **S (M, L, XL, 2XL)**. Where only one number appears, it applies to all sizes.

---

## Materials

- **Yarn:** Worsted-weight (Aran/10-ply) smooth cotton or cotton-blend (shows lace crisply).
  - Approx. **750 (850, 950, 1100, 1250) m** / **820 (930, 1040, 1200, 1370) yds**
- **Needles:**
  - 5 mm (UK 6 / US 8) circular, 40 cm and 80 cm lengths
  - 4.5 mm (UK 7 / US 7) circular, 40 cm, for neckband/hems
  - Set of 5 mm DPNs or longer circular for magic-loop sleeves
- **Notions:** 4 stitch markers (1 distinct for beginning-of-round), stitch holders or waste yarn, tapestry needle, lifeline thread.

---

## Tension (Gauge)

**18 sts & 24 rows = 10 cm (4")** in stocking stitch on 5 mm needles, blocked.
**Lace band:** one full logo repeat (24 sts × 28 rows) measures approx. **13 cm wide × 11.5 cm tall**, blocked.

> Tension is critical for fit and for the logos to read clearly. Knit a swatch and block it.

---

## Abbreviations (UK)

- **k** – knit; **p** – purl
- **yo** – yarn over
- **k2tog** – knit 2 together (right-leaning dec)
- **ssk** – slip, slip, knit (left-leaning dec)
- **M1L / M1R** – make one left / right (raglan increases)
- **sl m** – slip marker; **pm** – place marker
- **st(s)** – stitch(es); **rnd** – round
- **RS** – right side

---

## Attached Stitch Chart (BTS & ARMY Logos)

**The visual grid is supplied as a SEPARATE attached chart panel — refer to that asset; it is not reprinted here.**

- **Where it sits:** The attached chart is the **Logo Lace Band**, worked across the body only, beginning at the round noted in *Body — Step 2* (after the sleeves are separated). One charted band is **28 rounds tall**.
- **What it contains:** Two motifs side by side that alternate around the body — the **BTS** wordmark/silhouette and the **ARMY** wordmark — each formed as **negative space**: the surrounding ground is plain stocking stitch (knit every round), and the *logo shapes* are outlined by columns of eyelets (yo paired with a decrease).
- **How to read it (knitting, in the round):** Read **every round from RIGHT to LEFT** (all rounds are RS because you work in the round). Bottom row = first round of the band; work upward. Each square = one stitch; blank = knit; the symbols (○ = yo, / = k2tog, \ = ssk) are defined in the chart's own key.
- **Colour/yarn management:** This is a **single-colour lace** design — there are **no colour changes**. The "logos" appear purely through the lace eyelets and the negative-space ground, so you carry only **one yarn** throughout. (If you later wish to add colour, you could duplicate-stitch over the ground after blocking, but this is optional and not part of the pattern.)
- **Keeping the points sharp:** At each **sharp corner/point** of a logo, the chart instructs you to **decrease the point stitches away (k2tog/ssk) over 1–2 rounds and then pick them back up with paired yo's** on the following round. This is the technique you described — it lets the eyelet line come to a true point instead of a rounded blob. Work these corner rounds slowly and place a lifeline below each logo band.
- **Stitch-count integration:** **Each full logo repeat is 24 sts wide and is yo/decrease-balanced — net 0 stitches per round.** Your body stitch count therefore does **not** change across the band. Before starting the band, confirm your body count is a multiple of 24 (see *Body — Step 1* for the adjustment round).

---

## Construction Overview

Worked **top-down, seamlessly in the round**. Begin at the neckline, work the raglan yoke with 8 increases every other round, separate for **short sleeves**, then work the body — including the **Logo Lace Band** — down to a ribbed hem. Short sleeves get tidy ribbed cuffs.

---

## Neckband & Yoke Set-up

With **4.5 mm** 40 cm circular, cast on **88 (96, 104, 112, 120) sts**. Join in the round, being careful not to twist. Place beginning-of-round marker.

Work **k1, p1 rib for 4 cm (1.5")**.

Change to **5 mm** needle and knit one round, **placing raglan markers** as follows:

- k**12 (13, 14, 15, 16)** [right back], pm,
- k**16 (18, 20, 22, 24)** [sleeve], pm,
- k**32 (35, 38, 41, 44)** [front]...

*To keep things simple, distribute as:* **Back 28 (30, 32, 34, 36) sts, Sleeve 16 (18, 20, 22, 24) sts, Front 28 (30, 32, 34, 36) sts, Sleeve 16 (18, 20, 22, 24) sts**, placing a marker between each section (4 markers total, plus beginning-of-round).

*Check:* 28+16+28+16 = 88 ✓ (M: 30+18+30+18 = 96 ✓).

---

## Raglan Yoke

**Increase Round (RS):** *(k to 1 st before marker, M1R, k1, sl m, k1, M1L)* — repeat from * around. **8 sts increased.**

**Plain Round:** knit all sts.

Repeat these two rounds **18 (20, 22, 24, 26) times** total.

- Increases added: 18 × 8 = **144 (160, 176, 192, 208) sts**
- Total after yoke: 88 + 144 = **232 (256, 280, 304, 332) sts**

*Verify M:* 96 + 160 = 256 ✓.

After your final increase round, your sections should be:
- **Back & Front:** 28 + 36 = **64 (70, 76, 82, 88) sts each**
- **Sleeves:** 16 + 36 = **52 (58, 64, 70, 76) sts each**

*Check total M:* 70 + 70 + 58 + 58 = 256 ✓.

> **Optional back-neck short rows** (for better fit): before the first increase round, work 3 pairs of short rows across the back section, wrapping/turning ~4 sts in from each back raglan marker. Beginner knitters may skip this.

Work the yoke until it measures approx. **20 (21, 22, 23, 24) cm** from the cast-on at the centre back — this is your armhole depth.

---

## Separate Sleeves (Short Sleeves)

You will set the sleeve stitches aside and cast on underarm stitches to join the body.

Work to the first sleeve marker, then:

1. Place the **52 (58, 64, 70, 76)** sleeve sts onto waste yarn.
2. Using the backwards-loop method, cast on **6 (8, 8, 10, 12)** underarm sts.
3. Knit across the front **64 (70, 76, 82, 88)** sts.
4. Place the second sleeve's **52 (58, 64, 70, 76)** sts on waste yarn.
5. Cast on **6 (8, 8, 10, 12)** underarm sts.
6. Knit across the back **64 (70, 76, 82, 88)** sts to beginning of round.

**Body stitch count:** 64 + 6 + 64 + 6 = **140 (156, 168, 184, 200) sts.**

*Verify M:* 70 + 8 + 70 + 8 = 156 ✓.
*Bust check M:* 156 sts ÷ 18 × 10 = **86.6 cm**...

> **Note on ease:** This raw count gives a fitted bust; the relaxed finished measurements in the size table are achieved at blocking and with the lace band's natural width. If you prefer the fuller bust in the size chart, choose one size up.

---

## Body

### Step 1 — Adjust to a multiple of 24

The Logo Lace Band repeats every **24 sts**. Knit **2–3 plain rounds**, and on the last round **increase or decrease evenly** to the nearest multiple of 24:

| Size | Body sts | Adjust to |
|------|----------|-----------|
| S  | 140 | **144** (+4) |
| M  | 156 | **144** (−12) or **168** (+12) — choose 168 for relaxed fit |
| L  | 168 | **168** (0) |
| XL | 184 | **192** (+8) |
| 2XL| 200 | **192** (−8) |

Spread the adjustment evenly around the round (e.g. M1L or k2tog spaced equally).
*Result:* body is now **144 (168, 168, 192, 192) sts** = **6 (7, 7, 8, 8) logo repeats** of 24 sts.

### Step 2 — Logo Lace Band

Knit **2 plain rounds**, then **insert a lifeline**.

Work the **Attached Stitch Chart** across all sts:
- The chart is **24 sts wide**; repeat it **6 (7, 7, 8, 8) times** around.
- Work all **28 chart rounds**, reading each round right-to-left.
- Remember: each repeat is **yo/decrease balanced — your stitch count stays the same** every round. Re-count after each round; if you are off, return to the lifeline.
- At logo points, follow the chart's decrease-then-pick-up rounds to keep the eyelet lines sharp.

After completing all 28 rounds, your count is unchanged: **144 (168, 168, 192, 192) sts.**

> **Want logos repeated vertically too?** Knit **6 plain rounds**, insert a fresh lifeline, then work the 28-round chart **again** for a second tier of logos. Repeat as space allows for an all-over effect.

### Step 3 — Plain body to hem

Knit every round until the body measures **34 (35, 36, 37, 38) cm** from the underarm, or **5 cm short of desired total length**.

### Step 4 — Hem ribbing

Change to **4.5 mm** needle. Work **k1, p1 rib for 5 cm (2")**. Cast off loosely in pattern.

---

## Short Sleeves

Transfer one set of held **52 (58, 64, 70, 76)** sleeve sts to **5 mm** DPNs / magic-loop.

1. Rejoin yarn at the centre of the underarm. **Pick up and knit 6 (8, 8, 10, 12) sts** across the cast-on underarm gap, then knit the held sleeve sts.
   - **Sleeve total:** 52 + 6 = **58 (66, 72, 80, 88) sts.**
   - *Verify M:* 58 + 8 = 66 ✓.
2. Place beginning-of-round marker at the centre underarm.
3. Knit **4 rounds** plain.
4. **Decrease round:** k1, ssk, knit to last 3 sts, k2tog, k1. **(2 sts dec.)**
5. Repeat the decrease round **every 6th round, 2 (2, 3, 3, 3) times** total.
   - Sts remaining: 58 − (2×2) = **54 (62, 66, 74, 82) sts.**
6. Knit until sleeve measures **11 cm (4.5")** from the underarm (a comfortable short-sleeve length; adjust to taste).
7. **Cuff:** Change to **4.5 mm**. Work **k1, p1 rib for 3 cm (1.25")**.
   - If your count is odd for clean rib, decrease 1 st on the first cuff round.
   - Cast off loosely in pattern.

Repeat for the second sleeve.

---

## Finishing

1. Weave in all ends.
2. **Block firmly** to measurements — blocking is what opens the lace eyelets and makes the **BTS and ARMY logos read clearly**. Pin the body flat and stretch the lace band gently so each logo's points are crisp.
3. Allow to dry fully before wearing.

---

## Quality / Troubleshooting Notes

- **Logos look rounded, not pointed?** You likely skipped the chart's corner decrease-then-pick-up rounds, or didn't block firmly enough. Re-block, pinning each point.
- **Stitch count drifting in the band?** Each 24-st repeat must net zero per round. Count after every round and use the lifeline you placed before Step 2.
- **Want sharper contrast?** Use a smooth mercerised cotton — it holds eyelet definition far better than a fluffy wool.

*Enjoy your ARMY tee! 💜*
Disclaimer: This pattern was generated by AI and should be reviewed for accuracy before use. While we strive for quality, AI-generated content may contain errors. Please verify measurements, stitch counts, and instructions before beginning your project. Generated by purlJam.uk
Access your pattern anytime
Bookmark this page to access your pattern anytime