Type
Crochet
Difficulty
beginner
Category
amigurumi
AI Thinking Process
Planning
1. **Design Strategy**: A beginner-friendly amigurumi wolf inspired by Bang Chan (Stray Kids), using simple sphere and cylinder shapes in grey worsted yarn. UK crochet terminology (dc = US sc) throughout, worked seamlessly in continuous spirals.
2. **Construction Plan**: Bottom-up seamless body-into-head with separately made and attached ears, snout, legs, arms and tail; simple shapes only.
3. **Quality Assurance**:
- Maintain stitch-marker tracking to keep continuous spiral counts accurate.
- Stuff firmly before closing to avoid floppy wolf shape.
- Pin ears/snout symmetrically before sewing for a tidy face.
4. **Final Calculations**: Tension 18 dc x 20 rows = 10 cm in dc (4 mm hook). Head/body max 24 sts → ~9 cm finished height. Wolf sits ~12 cm tall assembled. Grey main colour, white snout/belly, black embroidery for Bang Chan features.
Verification
[PRE-FLIGHT CHECKS]
1. **Completeness**: Includes materials, tension, all body parts (head, body, ears, snout, legs, arms, tail), assembly and finishing — matches template structure (simple shapes). ✓
2. **Consistency**: All increases/decreases verified: 6→12→18→24 progression correct; decreases mirror increases for clean closure. ✓
3. **Constraints**: UK terminology (dc/tr), metric-first, worsted yarn, beginner level, wolf character with Bang Chan styling all honoured. ✓
4. **Safety**: Math re-checked per round inline; no count mismatches. Safety eyes warning included for children. ✓
Pattern
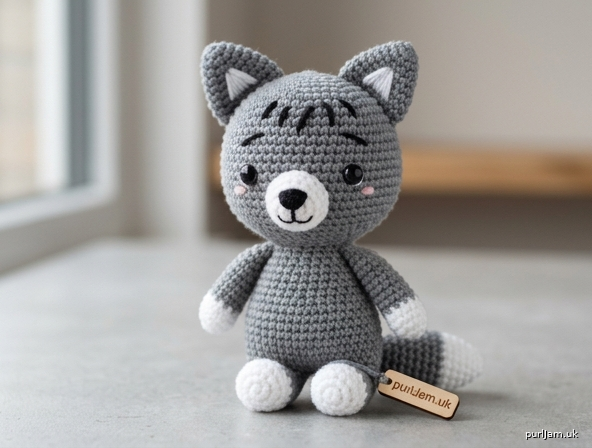
# Bang Chan Wolf Amigurumi 🐺
### Stray Kids–Inspired Beginner Crochet Plush

A cuddly little grey wolf inspired by Bang Chan (SKZ). Worked in simple spheres and cylinders, this is perfect for confident beginners. Finished size approximately **12 cm tall**.

---

## Materials

- **Worsted (Aran / weight 4) yarn:**
  - Grey (main colour) – approx. 50 g
  - White (snout, belly, ear inners, tail tip) – approx. 15 g
  - Small amounts black and pink for embroidery
- **Hook:** 4.0 mm (UK metric; go down from yarn label for a tight fabric)
- Polyester toy stuffing (fibrefill)
- Yarn needle (for assembly)
- Stitch marker
- 2 × 9 mm safety eyes (or embroider with black yarn for under-3s)
- Optional: tiny scrap of black yarn for Bang Chan's signature little brow/fringe detail

---

## Tension (Gauge)

18 dc × 20 rounds = 10 cm square in double crochet (UK).
Exact tension is not critical — just work tightly so stuffing does not show.

---

## Abbreviations (UK terms)

- **dc** = double crochet (US single crochet)
- **inc** = 2 dc in same stitch (increase)
- **dec** = double crochet 2 stitches together, invisibly (decrease)
- **MR** = magic ring
- **st(s)** = stitch(es)
- **[ ]** = total stitch count at end of round
- Work in continuous spirals (do **not** join) unless told otherwise. Use your stitch marker to track the start of each round.

---

## PART 1 — Head & Body (worked as one piece, bottom-up)

Begin with grey.

- **Rnd 1:** 6 dc in MR **[6]**
- **Rnd 2:** inc in each st around (6 × inc) **[12]**
- **Rnd 3:** (dc, inc) around (6 repeats) **[18]**
- **Rnd 4:** (2 dc, inc) around (6 repeats) **[24]**
- **Rnds 5–9:** dc around **[24]** (5 rounds)

*Check: 6 + 6 = 12; 12 + 6 = 18; 18 + 6 = 24. ✓*

- **Rnd 10:** (2 dc, dec) around (6 repeats) **[18]**
- **Rnd 11:** dc around **[18]**

This narrows the "waist" between body and head. **Begin stuffing the body firmly.**

- **Rnd 12:** (dc, inc) around (6 repeats) **[18 → 27]**

*Wait — recalculate: (dc, inc) on 18 sts = 6 repeats × 3 sts? No: 18 ÷ 2 = 9 repeats.*
- **Rnd 12 (corrected):** (dc, inc) around (9 repeats) **[27]**

*Check: 18 + 9 = 27. ✓ This shapes the head wider than the neck.*

- **Rnds 13–17:** dc around **[27]** (5 rounds) — this is the head.
- **Rnd 18:** (dc, dec) around (9 repeats) **[18]**

*Check: 27 − 9 = 18. ✓*

**Insert safety eyes** between Rnds 14 and 15, about 6 sts apart. Finish stuffing the head firmly.

- **Rnd 19:** (dc, dec) around (6 repeats) **[12]**

*Check: 18 − 6 = 12. ✓*

- **Rnd 20:** dec around (6 repeats) **[6]**

*Check: 12 − 6 = 6. ✓*

Fasten off, leaving a tail. Weave through the final 6 sts and pull closed.

---

## PART 2 — Snout (white)

- **Rnd 1:** 6 dc in MR **[6]**
- **Rnd 2:** (dc, inc) around (3 repeats) **[9]**
- **Rnd 3:** dc around **[9]**

Fasten off, leaving a long tail for sewing. Lightly stuff.
Embroider a small **black nose** at the tip and a tiny smile line below.

---

## PART 3 — Ears (make 2)

Start grey; the inner triangle is shaped with white embroidery after.

- **Rnd 1:** 4 dc in MR **[4]**
- **Rnd 2:** (dc, inc) around (2 repeats) **[6]**
- **Rnd 3:** (2 dc, inc) around (2 repeats) **[8]**
- **Rnd 4:** dc around **[8]**

*Check: 4 → 6 → 8. ✓*

Do not stuff. Flatten the opening and fasten off, leaving a tail.
Embroider a small white triangle on the front of each ear for the inner ear.

---

## PART 4 — Legs (make 2)

Start white (paw), change to grey.

- **Rnd 1:** 6 dc in MR (white) **[6]**
- **Rnd 2:** inc in each st around **[12]**
- **Rnd 3:** dc around **[12]**
- Change to grey.
- **Rnds 4–6:** dc around **[12]** (3 rounds)

Lightly stuff. Flatten the top and fasten off, leaving a tail. These attach to the underside of the body.

---

## PART 5 — Arms (make 2)

Start white (paw), change to grey.

- **Rnd 1:** 6 dc in MR (white) **[6]**
- **Rnd 2:** (dc, inc) around (3 repeats) **[9]**
- Change to grey.
- **Rnds 3–6:** dc around **[9]** (4 rounds)

Lightly stuff lower half only. Flatten the top and fasten off, leaving a tail.

---

## PART 6 — Tail

Start grey, finish white tip.

- **Rnd 1:** 4 dc in MR (grey) **[4]**
- **Rnd 2:** (dc, inc) around (2 repeats) **[6]**
- **Rnds 3–5:** dc around **[6]** (3 rounds)
- Change to white.
- **Rnds 6–7:** dc around **[6]** (2 rounds)

Lightly stuff. Fasten off, leaving a tail for sewing.

---

## Assembly

Pin everything before sewing to check placement and symmetry.

1. **Snout:** Sew centred on the head front, just below the eyes (around Rnds 13–15).
2. **Ears:** Sew to the top of the head, about 5–6 sts apart, white triangles facing forward. Tilt slightly outward for a "wolf" look.
3. **Legs:** Sew to the underside front of the body so the wolf can sit.
4. **Arms:** Sew to each side of the body just below the neck (around Rnd 11).
5. **Tail:** Sew to the lower back of the body.

---

## Bang Chan Details ✨

- **Eyes:** If embroidering, work two black satin-stitch ovals with a tiny white highlight.
- **Signature fringe:** With a short length of black or dark-grey yarn, add a few surface stitches across the forehead between the ears for Chan's swept fringe.
- **Cheeks (optional):** Two tiny pink satin-stitch dots below the eyes for a soft, friendly Chan smile.
- **Brows:** Two very short straight stitches above the eyes give that characteristic expressive look.

---

## Finishing

- Weave in all loose ends with the yarn needle.
- Give the plush a gentle squeeze to even out the stuffing.
- For a keychain version, attach a finding to the top of the head between the ears.

---

## Final Measurements

| Part | Approx. size |
|------|--------------|
| Total height (seated) | ~12 cm |
| Head width | ~7 cm |
| Body width | ~7 cm |
| Ear height | ~3 cm |

**Stitch-count master check:**
Body: 6→12→18→24→(24)→18→27→(27)→18→12→6 — every transition matches a clean inc/dec of 6 or 9 sts. ✓
Snout 6→9, Ears 4→6→8, Legs 6→12, Arms 6→9, Tail 4→6 — all verified. ✓

Enjoy your little Bang Chan wolf! 🐺💙
Disclaimer: This pattern was generated by AI and should be reviewed for accuracy before use. While we strive for quality, AI-generated content may contain errors. Please verify measurements, stitch counts, and instructions before beginning your project. Generated by purlJam.uk
Access your pattern anytime
Bookmark this page to access your pattern anytime