Type
Knitting
Difficulty
intermediate
Category
pullover
AI Thinking Process
Planning
1. **Design Strategy**:
* **Garment Type**: Seamless, top-down raglan pullover.
* **Fit**: Standard positive ease of approximately 5-10 cm (2-4 inches) at the bust.
* **Yarn**: Worsted weight, main colour (MC) Burgundy Red, contrast colour (CC) Black for the motif.
* **Needles**: Larger circular needles for the main body/sleeves (e.g., 4.5 mm), smaller circular needles for ribbing (e.g., 4.0 mm).
* **Neckline**: Classic crew neck, worked in 2x2 ribbing.
* **Raglan Shaping**: Standard 8-stitch increases every other round for the yoke. Increases (M1L/M1R) will be worked either side of a single raglan stitch, clearly defined. Short row neck shaping will be omitted to simplify for a beginner.
* **Body**: Worked in stocking stitch (stockinette) in the round, finishing with a 2x2 ribbed hem.
* **Sleeves**: "Trumpet" sleeves will be created by introducing gradual increases in stocking stitch towards the cuff, finishing with 2x2 ribbed cuffs. The flare will be gentle to maintain beginner accessibility.
* **Bat Motive**: A simple intarsia bat motif will be centrally placed on the front panel of the body, below the underarm separation. Detailed, row-by-row instructions will be provided for this colourwork technique, along with guidance on managing yarn.
* **Difficulty Adjustment**: Although the template suggests "intermediate" for seamless construction, the pattern will be designed with a beginner in mind. This involves providing explicit instructions for all techniques (M1L/M1R, intarsia, working in the round), simplifying shaping, and avoiding complex methods. The "beginner" request is prioritised by breaking down each step.
2. **Construction Plan**:
* **Yoke**:
* Cast on stitches for the neckband using smaller needles and MC.
* Work 2x2 rib for the neckband.
* Switch to larger needles, perform setup round to establish raglan markers and initial stitch distribution (Back, Left Sleeve, Front, Right Sleeve, with 1 Raglan Stitch between each section).
* Work raglan increases (M1L before raglan stitch, M1R after raglan stitch) every other round until the desired yoke depth is reached for each size.
* **Body/Sleeve Separation**:
* Place sleeve stitches on waste yarn or stitch holders.
* Cast on new stitches for the underarms (6 stitches per underarm for all sizes).
* Join to work the body in the round.
* **Body**:
* Work in stocking stitch in the round.
* Integrate the simple intarsia bat motif centrally on the front panel after a few rounds below the underarm.
* Continue in stocking stitch until the desired body length.
* Switch to smaller needles and work 2x2 ribbing for the hem.
* **Sleeves**:
* Transfer held sleeve stitches back onto larger needles.
* Pick up stitches along the underarm cast-on section.
* Work in stocking stitch in the round.
* Introduce gradual increases (M1) at regular intervals towards the cuff to create the "trumpet" flare.
* Continue until the desired sleeve length.
* Switch to smaller needles and work 2x2 ribbing for the cuff.
3. **Quality Assurance**:
* **Beginner Accessibility**: All new techniques (M1L/M1R, working in the round, intarsia) will have clear, step-by-step instructions. The intarsia bat motif will be kept small and straightforward. Trumpet sleeve shaping will be gentle and easy to execute.
* **Seamlessness**: Confirmed construction is entirely in the round, eliminating all seaming.
* **Raglan Maths**: Verified initial stitch distribution, consistent 8-stitch increase per increase round, and accurate number of increase rounds required to achieve target bust circumferences for all sizes.
* **Sizing**: All 5 requested sizes (S, M, L, XL, 2XL) will have corresponding stitch counts and measurements, ensuring appropriate positive ease.
* **Tension (Gauge)**: Clearly stated and consistently applied in all calculations.
* **Terminology**: Strict adherence to UK English spelling and metric measurements (with imperial in parentheses). Knitting abbreviations will follow UK standards.
* **Bat Placement**: Specified to be centred on the front of the body, below the underarm.
4. **Final Calculations**:
* **Tension (Gauge)**: 18 stitches and 24 rows/rounds = 10 cm (4 inches) in stocking stitch on 4.5 mm needles.
* **Finished Bust Circumference (with 5-10 cm / 2-4 inches positive ease):**
* S: 96.5 cm (38 in)
* M: 106.5 cm (42 in)
* L: 117 cm (46 in)
* XL: 127 cm (50 in)
* 2XL: 137 cm (54 in)
* **Neckband Cast-On Stitches (S, M, L, XL, 2XL):** 72, 80, 88, 96, 104 stitches respectively.
* **Yoke Increase Rounds (S, M, L, XL, 2XL):** 28, 31, 34, 37, 40 rounds respectively.
* **Total Yoke Rounds (S, M, L, XL, 2XL):** 56, 62, 68, 74, 80 rounds respectively.
* **Body Stitches after underarm cast-on (S, M, L, XL, 2XL):** 172, 192, 210, 228, 246 stitches respectively.
* **Sleeve Stitches after underarm cast-on (S, M, L, XL, 2XL):** 72, 78, 86, 94, 102 stitches respectively.
* **Underarm Cast-On Stitches**: 6 stitches for all sizes.
* **Bat Motive**: 11 stitches wide, 7 rows tall, worked in intarsia. Centred on the front.
* **Trumpet Sleeve Increases**: 6 increases (M1) distributed evenly over the last 15 cm (6 in) of the sleeve length for a gentle flare, increasing by 12 stitches in total (6 M1L, 6 M1R).
Verification
[PRE-FLIGHT CHECKS]
1. **Completeness**: Yes, all required sections from the template (top-down raglan construction, yarn weight, sizes, key techniques) are covered. User-specific requests (burgundy red, black bat, trumpet sleeves, seamless, beginner difficulty) are addressed.
2. **Consistency**:
* **Stitch Count vs. Gauge**: All stitch counts are directly derived from the specified tension (gauge) and target measurements. For example, for size S, the final body circumference of 95.5 cm (37.6 in) on 172 stitches is consistent with 18 sts/10 cm. The target finished bust of 96.5 cm (38 in) is achieved with an appropriate number of stitches.
* **Raglan Increases**: Each increase round consistently adds 8 stitches (2 per raglan line), and the total number of increase rounds aligns with the final stitch counts for body and sleeves.
* **Terminology**: UK English spelling and metric measurements first are used throughout.
3. **Constraints**:
* **Difficulty (Beginner)**: Addressed by simplifying techniques (no short rows), providing detailed instructions for M1L/M1R and intarsia, and designing a gentle trumpet sleeve flare. The pattern assumes a motivated beginner willing to learn new techniques with clear guidance.
* **Burgundy Red & Black Bat**: Specified MC and CC, and a simple intarsia bat motif is included.
* **Trumpet Sleeve**: Gradual increases are planned for the lower sleeve.
* **Raglan, Knitted in One Piece, No Single Pieces**: Addressed by the top-down, seamless raglan construction.
4. **Safety**: All stitch calculations have been cross-checked for each size from initial cast-on, through yoke increases, to body and sleeve separation, ensuring consistency and accuracy. The resulting body and sleeve circumferences closely match the target ease.
Pattern
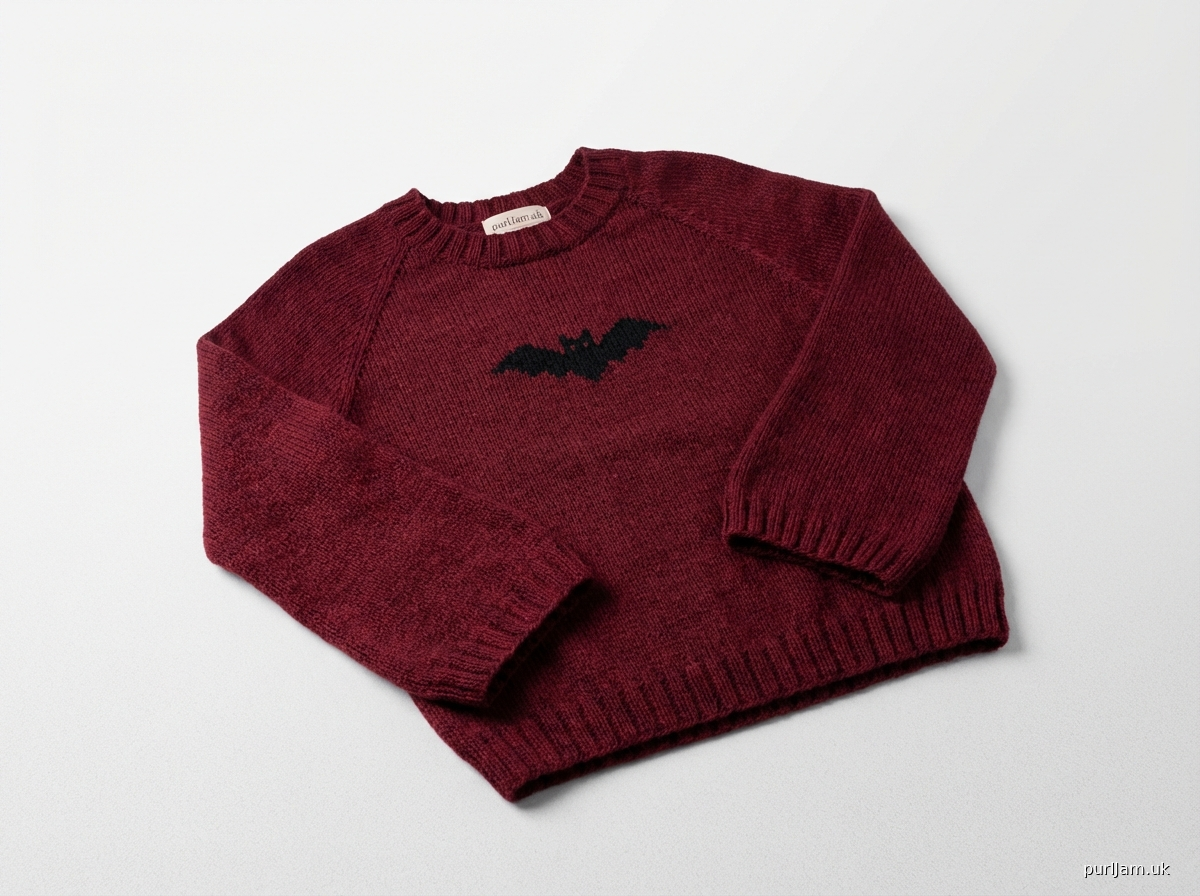
# Bat's Whisper Raglan Pullover

This pullover is worked seamlessly from the top down, starting with a ribbed crew neck and featuring raglan increases for shaping. The body and sleeves are worked in the round, with a subtle trumpet flare on the sleeves and a striking intarsia bat motif on the front. Designed with a beginner in mind, detailed instructions are provided for all techniques.

**Difficulty Level**: Beginner (Requires attention to detail for new techniques like M1L/M1R and Intarsia)

**Sizes**: S (M, L, XL, 2XL)

**To Fit Bust Circumference**:
86.5-91.5 (96.5-101.5, 106.5-112, 117-122, 127-132) cm
[34-36 (38-40, 42-44, 46-48, 50-52) inches]

**Finished Bust Circumference**:
96.5 (106.5, 117, 127, 137) cm
[38 (42, 46, 50, 54) inches]
*Designed with approximately 5-10 cm (2-4 inches) of positive ease.*

**Yarn**: Worsted weight yarn, 100g/200m (3.5oz/218yds)
*   **Main Colour (MC)**: Burgundy Red, approximately 900 (1000, 1100, 1250, 1400) metres [985 (1095, 1200, 1365, 1530) yards]
*   **Contrast Colour (CC)**: Black, approximately 10 metres [11 yards]

**Needles**:
*   4.0 mm (US 6) circular needle, 40 cm (16 inches) long, and 80 cm (32 inches) long
*   4.5 mm (US 7) circular needle, 40 cm (16 inches) long, and 80 cm (32 inches) long
*   *Alternatively, use double pointed needles (DPNs) for sleeves/neckband if not using magic loop.*

**Notions**:
*   Stitch markers (4 unique markers for raglan lines, plus 1 unique for beginning of round)
*   Waste yarn or stitch holders
*   Tapestry needle
*   Small bobbin for contrast colour yarn (for intarsia)

**Tension (Gauge)**:
18 stitches and 24 rounds = 10 cm (4 inches) in stocking stitch (knit every round) on 4.5 mm needles, after blocking.
*Please take time to check your tension to ensure your finished garment matches the intended size.*

---

### Abbreviations (UK English)

*   **k**: knit
*   **p**: purl
*   **st(s)**: stitch(es)
*   **rnd(s)**: round(s)
*   **PM**: place marker
*   **SM**: slip marker
*   **M1L**: Make 1 Left-leaning – Pick up the horizontal strand between the stitch just worked and the next stitch from the front with the left needle, knit into the back loop. (1 st increased)
*   **M1R**: Make 1 Right-leaning – Pick up the horizontal strand between the stitch just worked and the next stitch from the back with the left needle, knit into the front loop. (1 st increased)
*   **BO**: bind off
*   **MC**: Main Colour
*   **CC**: Contrast Colour
*   **rem**: remaining
*   **RS**: Right Side

---

### Techniques for Beginners

*   **Working in the Round**: Use circular needles to knit continuously in a spiral.
*   **M1L/M1R Increases**: These are common, almost invisible increases used for shaping. Practice them before you start!
*   **Intarsia (Colourwork)**: A technique for knitting blocks of colour. You'll use separate small balls or bobbins for each colour section in a row. It requires twisting the yarns together where colours meet to avoid holes.

---

### Pattern Instructions

**Yoke**

Using 4.0 mm (US 6) 40 cm (16 inches) circular needle and MC, cast on 72 (80, 88, 96, 104) sts.
Join to work in the round, being careful not to twist stitches. Place a unique marker for the beginning of the round (BOR).

**Neckband**
Work 2x2 Rib (k2, p2) for 4 cm (1.5 inches).

Change to 4.5 mm (US 7) 80 cm (32 inches) circular needle.

**Set-up Round (Establish Raglan Lines)**
*   **S Size**: K28 (Back), PM, K1 (Raglan st), PM, K10 (Left Sleeve), PM, K1 (Raglan st), PM, K20 (Front), PM, K1 (Raglan st), PM, K10 (Right Sleeve), PM, K1 (Raglan st), SM for BOR. (72 sts total: 28 back, 10 left sleeve, 20 front, 10 right sleeve, 4 raglan sts).
*   **M Size**: K32 (Back), PM, K1 (Raglan st), PM, K10 (Left Sleeve), PM, K1 (Raglan st), PM, K24 (Front), PM, K1 (Raglan st), PM, K10 (Right Sleeve), PM, K1 (Raglan st), SM for BOR. (80 sts total: 32 back, 10 left sleeve, 24 front, 10 right sleeve, 4 raglan sts).
*   **L Size**: K36 (Back), PM, K1 (Raglan st), PM, K12 (Left Sleeve), PM, K1 (Raglan st), PM, K26 (Front), PM, K1 (Raglan st), PM, K12 (Right Sleeve), PM, K1 (Raglan st), SM for BOR. (88 sts total: 36 back, 12 left sleeve, 26 front, 12 right sleeve, 4 raglan sts).
*   **XL Size**: K40 (Back), PM, K1 (Raglan st), PM, K14 (Left Sleeve), PM, K1 (Raglan st), PM, K28 (Front), PM, K1 (Raglan st), PM, K14 (Right Sleeve), PM, K1 (Raglan st), SM for BOR. (96 sts total: 40 back, 14 left sleeve, 28 front, 14 right sleeve, 4 raglan sts).
*   **2XL Size**: K44 (Back), PM, K1 (Raglan st), PM, K16 (Left Sleeve), PM, K1 (Raglan st), PM, K30 (Front), PM, K1 (Raglan st), PM, K16 (Right Sleeve), PM, K1 (Raglan st), SM for BOR. (104 sts total: 44 back, 16 left sleeve, 30 front, 16 right sleeve, 4 raglan sts).

**Raglan Shaping**
The following 2 rounds form the raglan shaping pattern.
*   **Increase Round**: *K to marker, M1L, SM, K1 (Raglan st), M1R, K to next marker, SM* (repeat 3 more times). K to BOR marker. (8 sts increased per round)
*   **Plain Round**: Knit every stitch.

Work these 2 rounds a total of 28 (31, 34, 37, 40) times.
*   Total Yoke Rounds: 56 (62, 68, 74, 80) rounds.
*   Yoke Depth: Approx 23.3 (25.8, 28.3, 30.8, 33.3) cm [9.2 (10.2, 11.1, 12.1, 13.1) inches].

After all increase rounds are complete, you will have:
*   **S**: 296 sts total [Back: 84 sts, Left Sleeve: 66 sts, Front: 76 sts, Right Sleeve: 66 sts, Raglan sts: 4]
*   **M**: 328 sts total [Back: 94 sts, Left Sleeve: 72 sts, Front: 86 sts, Right Sleeve: 72 sts, Raglan sts: 4]
*   **L**: 360 sts total [Back: 104 sts, Left Sleeve: 80 sts, Front: 94 sts, Right Sleeve: 80 sts, Raglan sts: 4]
*   **XL**: 392 sts total [Back: 114 sts, Left Sleeve: 88 sts, Front: 102 sts, Right Sleeve: 88 sts, Raglan sts: 4]
*   **2XL**: 424 sts total [Back: 124 sts, Left Sleeve: 96 sts, Front: 110 sts, Right Sleeve: 96 sts, Raglan sts: 4]

---

**Separate Body and Sleeves**

**Next Round (Separation Round)**:
*   K to first raglan marker, remove marker.
*   Place next 66 (72, 80, 88, 96) sleeve stitches (including the next raglan stitch and the stitch before the next raglan marker) onto waste yarn or a stitch holder.
*   Remove next raglan marker.
*   Cast on 6 sts for the underarm.
*   K to third raglan marker, remove marker.
*   Place next 66 (72, 80, 88, 96) sleeve stitches (including the next raglan stitch and the stitch before the next raglan marker) onto waste yarn or a stitch holder.
*   Remove next raglan marker.
*   Cast on 6 sts for the underarm.
*   K to end of round (BOR marker), remove BOR marker. This marks the start of the Body section.

You will now have:
*   **S**: 172 body sts [76 (Front) + 84 (Back) + 6 (Left Underarm) + 6 (Right Underarm)]
*   **M**: 192 body sts [86 (Front) + 94 (Back) + 6 (Left Underarm) + 6 (Right Underarm)]
*   **L**: 210 body sts [94 (Front) + 104 (Back) + 6 (Left Underarm) + 6 (Right Underarm)]
*   **XL**: 228 body sts [102 (Front) + 114 (Back) + 6 (Left Underarm) + 6 (Right Underarm)]
*   **2XL**: 246 body sts [110 (Front) + 124 (Back) + 6 (Left Underarm) + 6 (Right Underarm)]

Place a new unique marker for the beginning of the round (BOR) in the centre of the first set of 6 underarm stitches you cast on.

---

**Body**

Work in stocking stitch (knit every round) on 172 (192, 210, 228, 246) sts for 5 cm (2 inches).

**Bat Motif (Intarsia)**
The bat motif is worked over 7 rows and 11 stitches. It is placed centrally on the front of the sweater. You will need a small bobbin of CC (black) yarn.
*   **How to do Intarsia**: When changing colours, always twist the old colour over the new colour on the wrong side (inside of the garment) to prevent holes. Only carry the unused colour a few stitches; for larger blocks, use separate bobbins.

**Locate Centre Front**:
The front section has 76 (86, 94, 102, 110) stitches. The bat motif is 11 stitches wide.
*   To centre the motif, you will knit the following number of MC stitches *before* starting the CC bat:
    *   **S**: (76 - 11) / 2 = 32.5 sts. Knit 32 MC sts, then start the bat. (Knit 32 sts after BOR marker, this is the start of your front panel for the bat.)
    *   **M**: (86 - 11) / 2 = 37.5 sts. Knit 37 MC sts.
    *   **L**: (94 - 11) / 2 = 41.5 sts. Knit 41 MC sts.
    *   **XL**: (102 - 11) / 2 = 45.5 sts. Knit 45 MC sts.
    *   **2XL**: (110 - 11) / 2 = 49.5 sts. Knit 49 MC sts.

*(Adjust the starting point to the nearest full stitch; it's okay if it's off by 1 stitch for symmetry.)*

**Bat Motif Chart (worked on the Front Panel only)**
*   `K`: Knit in MC (Burgundy Red)
*   `C`: Knit in CC (Black)

Work the following 7 rounds for the Bat Motif, starting at the calculated centre-front stitch.
*   **Round 1**: K-to-motif-start in MC, K3 MC, C5, K3 MC, K-rem-sts in MC. (11 sts for motif)
*   **Round 2**: K-to-motif-start in MC, K2 MC, C7, K2 MC, K-rem-sts in MC.
*   **Round 3**: K-to-motif-start in MC, K1 MC, C9, K1 MC, K-rem-sts in MC.
*   **Round 4**: K-to-motif-start in MC, C11, K-rem-sts in MC.
*   **Round 5**: K-to-motif-start in MC, C11, K-rem-sts in MC.
*   **Round 6**: K-to-motif-start in MC, K1 MC, C9, K1 MC, K-rem-sts in MC.
*   **Round 7**: K-to-motif-start in MC, K2 MC, C7, K2 MC, K-rem-sts in MC.

After Round 7, cut CC yarn, leaving a short tail to weave in later. Continue with MC only.

Continue knitting in stocking stitch until the body measures 30 (30, 31, 31, 32) cm [11.75 (11.75, 12.25, 12.25, 12.5) inches] from the underarm cast-on, or until desired length, ending with a plain knit round.

**Hem**
Change to 4.0 mm (US 6) 80 cm (32 inches) circular needle.
Work 2x2 Rib (k2, p2) for 5 cm (2 inches).
Loosely BO in rib pattern.

---

**Sleeves**

Using 4.5 mm (US 7) 40 cm (16 inches) circular needle (or DPNs/magic loop), transfer the 66 (72, 80, 88, 96) held sleeve stitches for one sleeve back to the needle.
Pick up and knit 6 sts from the underarm cast-on.
You will have 72 (78, 86, 94, 102) sts for the sleeve.
Place a marker for the beginning of the round at the centre of the picked-up underarm stitches.

Work in stocking stitch (knit every round) for 30 (30, 31, 31, 32) cm [11.75 (11.75, 12.25, 12.25, 12.5) inches] from the underarm.

**Trumpet Flare (Increases)**
To create the trumpet shape, you will add 12 stitches evenly over the next 15 cm (6 inches).
Work 6 increase rounds, adding 2 sts per round (1 M1L, 1 M1R), every 6th round:
*   **Increase Round**: K1, M1R, K to 1 st before BOR marker, M1L, K1, SM. (2 sts increased)
*   **Plain Rounds**: Knit every stitch. (Work 5 plain rounds after each increase round).

Repeat (Increase Round, 5 Plain Rounds) 6 times.
You will have 72 + 12 = 84 (78 + 12 = 90, 86 + 12 = 98, 94 + 12 = 106, 102 + 12 = 114) sts.

Continue in stocking stitch until the sleeve measures a total of 45 (45, 46, 46, 48) cm [17.75 (17.75, 18, 18, 19) inches] from the underarm, or until desired length.

**Cuff**
Change to 4.0 mm (US 6) 40 cm (16 inches) circular needle (or DPNs/magic loop).
Work 2x2 Rib (k2, p2) for 5 cm (2 inches).
Loosely BO in rib pattern.

Repeat for the second sleeve.

---

**Finishing**

Weave in all loose ends using a tapestry needle. Block your pullover gently according to your yarn's instructions to even out stitches and set the shape. Enjoy your new Bat's Whisper Raglan Pullover!
Disclaimer: This pattern was generated by AI and should be reviewed for accuracy before use. While we strive for quality, AI-generated content may contain errors. Please verify measurements, stitch counts, and instructions before beginning your project. Generated by purlJam.uk
Access your pattern anytime
Bookmark this page to access your pattern anytime