Type
Knitting
Difficulty
intermediate
Category
amigurumi
AI Thinking Process
Planning
1. **Design Strategy**: A cheerful knitted clown toy with a round head, oval body, simple limbs, and a pointed hat. Worked in stockinette in the round on DPNs, with contrast colours for costume stripes, embroidered face, and a pom-pom nose for character.
2. **Construction Plan**: Five separate pieces (head, body, 2 arms, 2 legs, hat) worked bottom-up/top-down in the round, stuffed and seamed; pom-poms added for nose and hat tip.
3. **Quality Assurance**:
- Tight tension essential — use 3.5mm needles with worsted to prevent stuffing show-through.
- Symmetrical limb placement; mark with pins before sewing.
- Stripe colour changes can leave loose floats — carry yarn neatly up the side.
4. **Final Calculations**: Tension 22 sts × 30 rows = 10cm in st st on 3.5mm. Head: cast 8, inc to 32 sts (~14cm circ, ~6cm diameter). Body: cast 8, inc to 28 sts. Arms/legs: 12 sts. Hat: cast 32, decrease to point. Finished toy ~22cm tall.
Verification
1. **Completeness**: Includes materials, tension, abbreviations, all pieces, assembly, finishing. ✓
2. **Consistency**: 32 sts ÷ 22 sts/10cm = ~14.5cm circumference head; matches intended 6cm diameter sphere. Body 28 sts = ~12.7cm circ. ✓
3. **Constraints**: UK terminology, metric first, worsted weight, intermediate level, toy clown. ✓
4. **Safety**: Increase/decrease rounds verified; stitch counts balance (8→16→24→32 via kfb pattern). Decreases mirror increases. ✓
Pattern
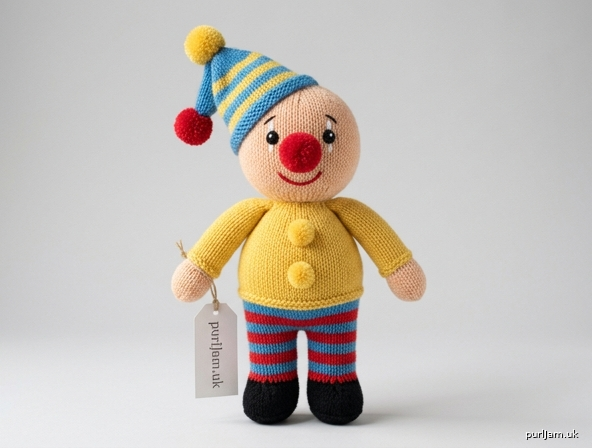
# Bobbins the Clown
### A Knitted Amigurumi Toy

**Designer's note:** Bobbins is a cheerful little circus clown with stripy trousers, a pointy hat and a bright pom-pom nose. Worked in pieces in the round, then stuffed and seamed. A lovely intermediate project to practise colourwork stripes, small-circumference knitting and shaping in the round.

---

## Finished Size
Approximately **22 cm (8¾ in) tall** from feet to hat tip, when stuffed.

## Materials

- **Yarn:** Worsted weight (Aran) 100% acrylic or wool blend, approx. 50 g per colour:
  - **MC (skin):** peachy beige – 20 g
  - **CC1 (trousers/hat main):** bright blue – 25 g
  - **CC2 (jumper/hat stripe):** sunshine yellow – 20 g
  - **CC3 (stripes/accents):** poppy red – 15 g
  - Small amounts of **black** and **white** for face embroidery
- **Needles:** Set of 3.5 mm (US 4) double-pointed needles (DPNs), or 80 cm circular for Magic Loop
- **Notions:**
  - Tapestry needle
  - Stitch marker
  - Polyester fibrefill stuffing (approx. 40–50 g total)
  - Small piece of cardboard for pom-poms (or a 3 cm pom-pom maker)
  - Pins for assembly
  - Optional: 6 mm safety eyes (×2) — for ages 3+ only; otherwise embroider

## Tension (Gauge)
**22 sts × 30 rounds = 10 cm (4 in)** in stocking stitch in the round, on 3.5 mm needles, worked tightly.

> ⚠️ *Use needles 1–2 sizes smaller than the yarn band recommends. A dense fabric is essential so the stuffing does not show through.*

## Abbreviations (UK)
- **k** – knit
- **p** – purl
- **st(s)** – stitch(es)
- **st st** – stocking stitch (knit every round)
- **kfb** – knit into front and back of stitch (1 st increased)
- **k2tog** – knit 2 sts together (1 st decreased)
- **ssk** – slip, slip, knit those 2 sts together (1 st decreased)
- **rnd(s)** – round(s)
- **MC / CC** – main colour / contrast colour
- **rem** – remaining

---

## Construction Overview
Six pieces are knitted separately: **head, body, 2 arms, 2 legs, hat**. Each is worked in the round from a small cast-on, stuffed firmly, then seamed. Face is embroidered (or safety eyes inserted) before the head is closed. Pom-poms are added for nose and hat tip.

---

## HEAD
*(Worked bottom-up in MC. Begin with a small cast-on, increase to widest point, decrease to close.)*

With MC, cast on **8 sts**, distribute over 3 DPNs (3-3-2) or arrange for Magic Loop. Join to work in the round, placing marker at beginning of round. Take care not to twist.

**Rnd 1:** *kfb; rep from * to end. **(16 sts)**
**Rnd 2:** knit
**Rnd 3:** *k1, kfb; rep from * to end. **(24 sts)**
**Rnd 4:** knit
**Rnd 5:** *k2, kfb; rep from * to end. **(32 sts)**

*Check: 8 → 16 → 24 → 32 sts. ✓*

**Rnds 6–17:** knit (12 rnds straight).

**Insert safety eyes** between rnds 12 and 13, approximately 6 sts apart (or mark positions to embroider later).

**Begin decreases:**
**Rnd 18:** *k2, k2tog; rep from * to end. **(24 sts)**
**Rnd 19:** knit
**Rnd 20:** *k1, k2tog; rep from * to end. **(16 sts)**

Stuff head firmly.

**Rnd 21:** *k2tog; rep from * to end. **(8 sts)**

Break yarn leaving a 20 cm tail. Thread through remaining 8 sts, pull tight, and fasten off on the inside.

---

## BODY
*(Worked bottom-up. Stripes in CC1 and CC3 for trousers, then CC2 for jumper.)*

With **CC1**, cast on **8 sts**. Join in the round.

**Rnd 1:** *kfb; rep from * to end. **(16 sts)**
**Rnd 2:** knit
**Rnd 3:** *k1, kfb; rep from * to end. **(24 sts)**
**Rnd 4:** knit
**Rnd 5:** *k3, kfb; rep from * to end. **(30 sts)** — *adjusted for wider belly*

Wait — recount: 24 sts ÷ (3+1 pattern) = 6 increases → **30 sts**. ✓

**Rnds 6–7:** knit in CC1.
**Rnds 8–9:** knit in CC3.
**Rnds 10–11:** knit in CC1.
**Rnds 12–13:** knit in CC3.
**Rnd 14:** knit in CC1.

*Trousers complete (~ 4.5 cm). Change to CC2 for jumper.*

**Rnds 15–22:** knit in CC2 (8 rnds, ~ 2.5 cm).

**Begin shoulder decreases:**
**Rnd 23:** *k3, k2tog; rep from * to end. **(24 sts)**
**Rnd 24:** knit
**Rnd 25:** *k2, k2tog; rep from * to end. **(18 sts)**

Stuff body firmly, shaping a rounded tummy.

**Rnd 26:** *k1, k2tog; rep from * to end. **(12 sts)**

Break yarn leaving a 30 cm tail for attaching head. Thread through remaining 12 sts, pull to gather slightly (do not close fully — head will sit on top).

---

## ARMS (make 2)
*(Worked top-down from shoulder to hand. Jumper in CC2, hands in MC.)*

With **CC2**, cast on **10 sts**. Join in the round.

**Rnds 1–14:** knit (14 rnds, ~ 4.5 cm).

Change to **MC**.

**Rnd 15:** *k3, kfb; rep from * to last 2 sts, k2. **(12 sts)**
**Rnds 16–19:** knit (hand, ~ 1.5 cm).
**Rnd 20:** *k2tog; rep from * to end. **(6 sts)**

Stuff lightly (arms should be soft, not stiff).

Break yarn, thread through remaining 6 sts, pull tight, fasten off.

---

## LEGS (make 2)
*(Worked top-down from hip to foot. Trousers stripes in CC1/CC3, shoes in black or CC3.)*

With **CC1**, cast on **12 sts**. Join in the round.

**Rnds 1–2:** knit in CC1.
**Rnds 3–4:** knit in CC3.
**Rnds 5–6:** knit in CC1.
**Rnds 7–8:** knit in CC3.
**Rnds 9–10:** knit in CC1.
**Rnds 11–12:** knit in CC3.

*Trousers complete (~ 4 cm). Change to black (or CC3) for shoe.*

**Rnd 13:** knit
**Rnd 14:** *kfb, k5; rep from * to end. **(14 sts)** — *forms foot*
**Rnds 15–17:** knit (3 rnds, foot length).

**Toe shaping:**
**Rnd 18:** *k2tog, k5; rep from * to end. **(12 sts)**
**Rnd 19:** *k2tog; rep from * to end. **(6 sts)**

Stuff leg and foot firmly.

Break yarn, thread through remaining 6 sts, pull tight, fasten off.

---

## HAT
*(Worked bottom-up in CC1 with a CC2 stripe, decreasing to a point.)*

With **CC1**, cast on **32 sts**. Join in the round.

**Rnds 1–2:** knit in CC1.
**Rnd 3:** knit in CC2.
**Rnd 4:** knit in CC1.
**Rnd 5:** *k6, k2tog; rep from * to end. **(28 sts)**
**Rnd 6:** knit
**Rnd 7:** *k5, k2tog; rep from * to end. **(24 sts)**
**Rnd 8:** knit in CC2.
**Rnd 9:** *k4, k2tog; rep from * to end (in CC1). **(20 sts)**
**Rnd 10:** knit
**Rnd 11:** *k3, k2tog; rep from * to end. **(16 sts)**
**Rnd 12:** knit
**Rnd 13:** *k2, k2tog; rep from * to end. **(12 sts)**
**Rnd 14:** *k1, k2tog; rep from * to end. **(8 sts)**
**Rnd 15:** *k2tog; rep from * to end. **(4 sts)**

*Check decreases: 32 → 28 → 24 → 20 → 16 → 12 → 8 → 4. ✓*

Break yarn, thread through remaining 4 sts, pull tight, fasten off. Do **not** stuff the hat — it should sit flat on the head.

---

## POM-POMS
Make:
- **1 small pom-pom** (approx. 2 cm) in CC3 for the **nose**
- **1 medium pom-pom** (approx. 3 cm) in CC2 for the **hat tip**
- Optional: 2 small pom-poms in CC2 for the front of the jumper as "buttons"

---

## ASSEMBLY

Work in this order — mattress stitch throughout, using matching yarn.

1. **Attach head to body:** Position head on top of body, centred over the gathered neck opening. Sew around the join with the long tail from the body, working through both layers. Add a little extra stuffing through the join before closing if needed.

2. **Attach legs:** Pin both legs to the underside of the body, side by side, with the feet pointing forward. Ensure they are **symmetrically placed**. Sew securely with CC1.

3. **Attach arms:** Pin arms to the sides of the body, just below the colour change between trousers and jumper (shoulder line). Check symmetry by measuring distance from the top of the head to each arm. Sew securely with CC2.

4. **Attach hat:** Place hat on head at a jaunty angle. Pin in place and sew around the base with CC1.

5. **Pom-poms:**
   - Sew the red pom-pom to the centre of the face for the **nose**.
   - Sew the yellow pom-pom to the **tip of the hat**.
   - Optional: sew "buttons" down the front of the jumper.

6. **Embroider face** (if not using safety eyes):
   - **Eyes:** Two French knots or small satin-stitch ovals in black, ~ 1.5 cm apart, level with the middle of the head.
   - **Whites of eyes:** Optional single white straight stitch highlight in each eye.
   - **Mouth:** A curved smile in red or black, just below the nose, about 2 cm wide.
   - **Cheeks:** Optional pink blush stitches either side of the mouth.

7. **Weave in all ends** securely on the **inside** of each piece before final closing, or hide them within the stuffed body.

---

## Finishing Notes
- Give Bobbins a gentle squeeze and reshape — the head should sit upright, limbs should hang naturally.
- For a **child under 3**, do **not** use safety eyes or small pom-poms; embroider all features instead and stitch pom-poms on with very secure knots.
- Spot clean only.

Enjoy your cheerful little clown! 🎪
Disclaimer: This pattern was generated by AI and should be reviewed for accuracy before use. While we strive for quality, AI-generated content may contain errors. Please verify measurements, stitch counts, and instructions before beginning your project. Generated by purlJam.uk
Access your pattern anytime
Bookmark this page to access your pattern anytime