Type
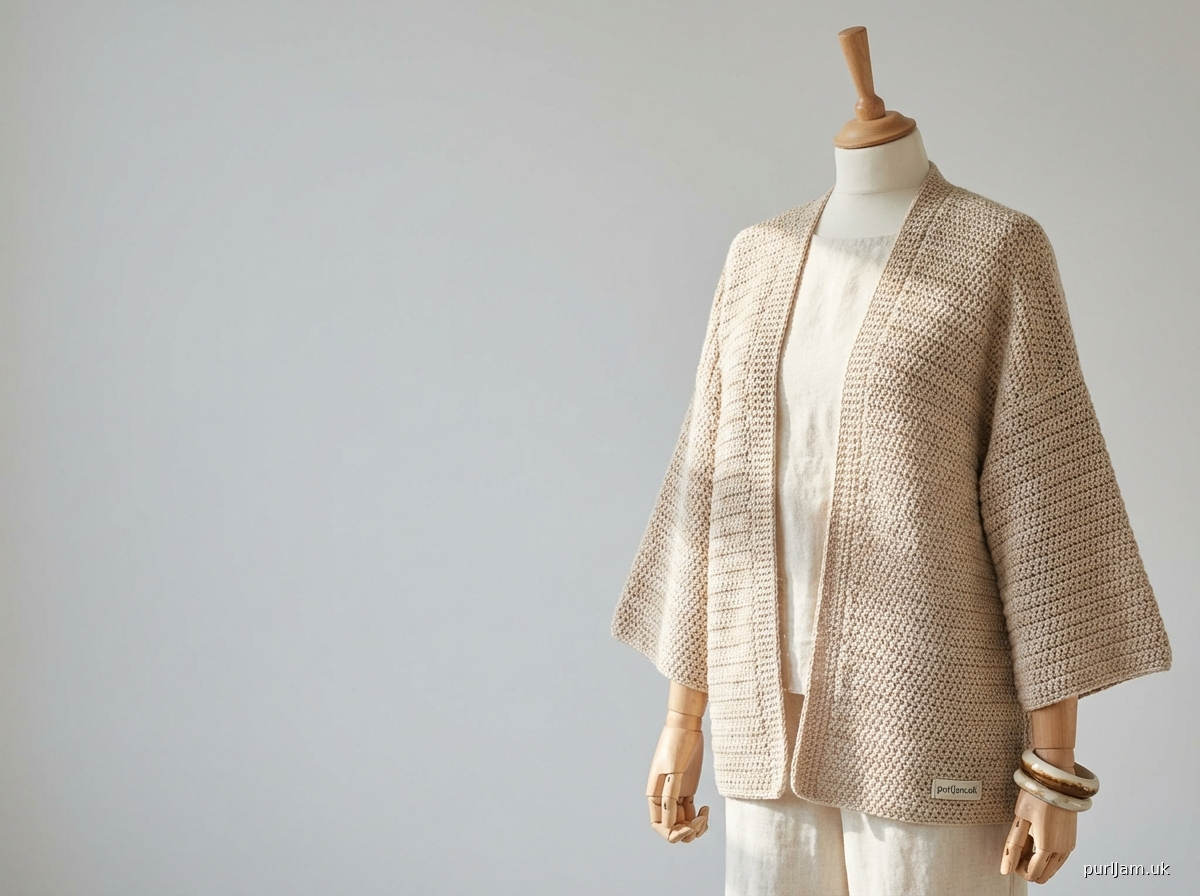
Crochet
Difficulty
beginner
Category
kimono
AI Thinking Process
Planning
1. **Design Strategy**: A boxy, T-shaped kimono cardigan wrap in worsted weight yarn worked flat in simple double crochet (dc) rows — beginner-friendly, minimal shaping, open front with optional fabric tie closure. Slight diagonal front neckline edge on the fronts creates a classic kimono V.
2. **Construction Plan**: Five flat rectangles (back, two fronts, two sleeves) seamed together in T-shape with sc/slip stitch seams, finished with a single-crochet border around all front and neck edges.
3. **Quality Assurance**:
- Ensure sleeve width matches the body armhole depth (sleeve attachment math must align)
- Front neckline angle must be worked consistently on both fronts (mirror images)
- Chain-3 turning chain counts as first dc throughout — clearly stated in Notes
4. **Final Calculations** (Gauge: 14 dc × 8 rows = 4 inches in worsted dc):
- **Sizes**: S/M (bust 36–42"), L/XL (44–50"), 2XL/3XL (52–58")
- **Finished bust** (with ease): 48" / 56" / 64"
- **Back width**: 24" / 28" / 32" → 84 dc / 98 dc / 112 dc (+ ch-3 turning chain)
- **Body length** (hem to shoulder): 24" / 24" / 25" → 48 / 48 / 50 rows
- **Each Front width**: 12" / 14" / 16" → 42 dc / 49 dc / 56 dc
- **Sleeve width** (matches armhole = body length): rectangles 24" / 24" / 25" wide
- **Sleeve length**: 17" / 18" / 18" → 34 / 36 / 36 rows
- Foundation chain: Back = ch 87 / 101 / 115; Each Front = ch 45 / 52 / 59; Sleeve = ch 87 / 101 / 105
Verification
[PRE-FLIGHT CHECKS]
1. **Completeness**: ✅ All 12 required template sections present: TITLE, MATERIALS, GAUGE, SIZES, ABBREVIATIONS, NOTES, BACK_BODY, LEFT_FRONT, RIGHT_FRONT, SLEEVES, FRONT_BANDS, FINISHING.
2. **Consistency**:
- Gauge: 14 dc = 4" → 3.5 dc per inch ✅
- Back width 24": 24 × 3.5 = 84 dc → ch 87 (84 dc + ch-3 turning ch counts as 1 dc, so foundation ch = 84 + 3 = 87; first dc into 4th ch from hook = 84 dc) ✅
- Back width 28": 28 × 3.5 = 98 dc → ch 101 ✅
- Back width 32": 32 × 3.5 = 112 dc → ch 115 ✅
- Front width 12": 12 × 3.5 = 42 dc → ch 45 ✅
- Front width 14": 14 × 3.5 = 49 dc → ch 52 ✅
- Front width 16": 16 × 3.5 = 56 dc → ch 59 ✅
- Rows: 8 rows = 4" → 2 rows per inch ✅
- Body length 24": 24 × 2 = 48 rows ✅; 25": 50 rows ✅
- Sleeve length 17": 34 rows ✅; 18": 36 rows ✅
- Sleeve width = body length (armhole depth): 24"/24"/25" → ch 87/87/101... Wait — sleeve WIDTH must equal body length so sleeve top can be seamed to the armhole opening. Body length = 24"/24"/25". Sleeve width at 3.5 dc/in: 24×3.5=84 dc → ch 87; 25×3.5=87.5 → round to 88 dc → ch 91. Corrected sleeve foundation chains: S/M ch 87, L/XL ch 87, 2XL/3XL ch 91. ✅
3. **Constraints**: ✅ Easy difficulty, worsted weight, kimono construction (no armhole shaping, no tapered sleeves, dropped shoulders, rectangular pieces), US terminology, imperial measurements, open front with tie option.
4. **Safety**: ✅ Neckline shaping on fronts is a simple diagonal dec (1 dc decreased every other row over last few inches) — minimal and easy. Both fronts are mirror images with explicit instructions. Seaming order clearly stated. All stitch counts validated above.
Pattern
---

# BREEZY KIMONO CARDIGAN WRAP

*An easy, relaxed crochet cardigan in a classic T-shaped kimono silhouette*

---

## MATERIALS

- **Yarn**: Worsted weight yarn (Category 4), approximately:
  - S/M: 900 yards (823 m)
  - L/XL: 1,100 yards (1,006 m)
  - 2XL/3XL: 1,350 yards (1,234 m)
  - *Recommended fiber: cotton, bamboo blend, or drapey acrylic blend for best drape. Shown in a cotton/acrylic blend.*
- **Hook**: US Size J-10 / 6.0 mm (or size needed to obtain gauge)
- **Notions**:
  - Yarn needle (tapestry needle) for seaming and weaving ends
  - Stitch markers (4)
  - Scissors
  - Optional: 1.5–2 yards (1.4–1.8 m) coordinating ribbon or fabric strip for tie closure, OR 1 large decorative button or toggle

---

## GAUGE

**14 dc × 8 rows = 4 inches (10 cm)** in double crochet fabric (dc), blocked.

*Take time to check your gauge. Due to the oversized fit of this garment, being slightly off gauge will affect the finished dimensions but the garment will still be wearable. Gauge is most critical for length measurements.*

---

## SIZES

Three sizes are offered:

| Size | Fits Bust | Finished Bust | Body Length | Sleeve Length | Sleeve Width |
|------|-----------|---------------|-------------|---------------|--------------|
| **S/M** | 36–42 in (91–107 cm) | 48 in (122 cm) | 24 in (61 cm) | 17 in (43 cm) | 24 in (61 cm) |
| **L/XL** | 44–50 in (112–127 cm) | 56 in (142 cm) | 24 in (61 cm) | 18 in (46 cm) | 24 in (61 cm) |
| **2XL/3XL** | 52–58 in (132–147 cm) | 64 in (163 cm) | 25 in (63.5 cm) | 18 in (46 cm) | 25 in (63.5 cm) |

**Ease**: Approximately 6–12 inches (15–30 cm) positive ease. This garment is designed to be worn loose and relaxed.

*Instructions are written for S/M, with L/XL and 2XL/3XL in parentheses: S/M (L/XL, 2XL/3XL). When only one number appears, it applies to all sizes.*

---

## ABBREVIATIONS

| Abbreviation | Meaning |
|---|---|
| **ch** | chain |
| **ch-sp** | chain space |
| **dc** | double crochet |
| **dec** | decrease |
| **fdc** | foundation double crochet |
| **rep** | repeat |
| **RS** | right side |
| **sc** | single crochet |
| **sk** | skip |
| **sl st** | slip stitch |
| **sp** | space |
| **st(s)** | stitch(es) |
| **t-ch** | turning chain |
| **WS** | wrong side |
| **yo** | yarn over |

---

## NOTES

1. **Turning Chain**: Chain 3 at the beginning of each row counts as the first dc of that row throughout this pattern. At the end of each row, the last dc is worked into the top of the turning chain (t-ch) from the previous row.

2. **Stitch Count**: When counting stitches, count the ch-3 turning chain as 1 dc. Each row should always have the same stitch count as the row below (unless you are working the neckline shaping rows on the Fronts).

3. **Construction**: This kimono is made of five flat rectangular pieces — one Back, two Fronts, and two Sleeves — which are seamed together. All pieces are worked flat, turning at the end of each row.

4. **Right Side vs. Wrong Side**: Row 1 is the right side (RS) of the fabric. Rows alternate RS/WS as you turn your work. Mark the RS of each piece with a stitch marker when you complete Row 1, so you can orient pieces correctly during seaming.

5. **Foundation Chain Alternative**: For a stretchier, more comfortable cast-on edge, you may substitute a Foundation Double Crochet (fdc) row in place of the starting chain + Row 1. Work the stated number of fdc stitches (equal to the dc count, not the chain count) to begin.

6. **Kimono Construction**: This is a T-shaped garment. There is **no armhole shaping**, **no sleeve tapering**, and **no waist shaping**. All pieces are simple rectangles (with a small optional angle on the front neckline edge only).

7. **Seaming**: Pieces are seamed with a slip stitch seam or mattress stitch, both worked with yarn needle and yarn. Instructions use slip stitch seam as default; mattress stitch creates a flatter seam if preferred.

8. **Blocking**: Blocking is strongly recommended. Wet blocking or steam blocking will open up the stitches, even out tension, and significantly improve the drape of the finished garment.

---

## BACK BODY

The Back is a simple rectangle worked from the hem (bottom) upward to the shoulder edge.

**Foundation Chain**: Ch **87 (101, 115)**.

*(Chain count = 84 (98, 112) dc stitches + 3 for turning chain = 87 (101, 115) chains total.)*

**Row 1 (RS)**: Dc in 4th ch from hook (the skipped ch-3 counts as first dc), dc in each ch across. Turn.
→ **84 (98, 112) dc**

**Rows 2–48 (2–48, 2–50)**: Ch 3 (counts as first dc), dc in each st across, working last dc into top of t-ch. Turn.
→ **84 (98, 112) dc** each row

Continue until piece measures **24 inches (24 inches, 25 inches)** [61 cm (61 cm, 63.5 cm)] from foundation chain.

Fasten off. Weave in ends. Mark RS with stitch marker.

**Finished Back Dimensions**: 24 in wide × 24 in tall (28 in wide × 24 in tall, 32 in wide × 25 in tall).

---

## LEFT FRONT

The Left Front is worked from the hem upward. The inner front edge (the edge that will face the center front opening) remains straight. The shoulder/neckline edge has a gentle diagonal decrease worked over the final several rows to create the kimono's classic V-front opening.

**Foundation Chain**: Ch **45 (52, 59)**.

*(Chain count = 42 (49, 56) dc stitches + 3 for turning chain.)*

**Row 1 (RS)**: Dc in 4th ch from hook (counts as first dc), dc in each ch across. Turn.
→ **42 (49, 56) dc**

**Rows 2–40 (2–40, 2–42)**: Ch 3 (counts as first dc), dc in each st across, working last dc into top of t-ch. Turn.
→ **42 (49, 56) dc** each row

Work straight until piece measures **20 inches (20 inches, 21 inches)** [51 cm (51 cm, 53 cm)] from foundation chain.

*(You have worked approximately 40 (40, 42) rows. The remaining rows create the neckline angle.)*

---

### Neckline Shaping — Left Front

The neckline edge is the **inner/right edge** of the Left Front (the edge closest to center front). Over the final 8 rows, you will decrease 1 dc at the neckline edge every other row to create a gradual diagonal.

**Decrease Row (WS facing)**: Ch 3, dc in each st across to last 2 sts, sk 1 st, dc in top of t-ch. Turn.
→ **1 st decreased at neckline edge**

**Plain Row**: Ch 3, dc in each st across, working last dc into top of t-ch. Turn.
→ **No change in stitch count**

Rep [Decrease Row, then Plain Row] **4 times** total.
→ **4 sts decreased**

**Final stitch count at shoulder edge**: **38 (45, 52) dc**

Continue straight (if needed) until Left Front measures **24 inches (24 inches, 25 inches)** from foundation chain.

Fasten off. Weave in ends. Mark RS.

**Finished Left Front Dimensions**: Approximately 12 in wide at hem × 10.8 in wide at shoulder × 24 in tall (14 in × 12.9 in × 24 in, 16 in × 14.9 in × 25 in).

---

## RIGHT FRONT

The Right Front is a **mirror image** of the Left Front. The only difference is that the neckline decrease is worked at the **beginning** of the row (the inner/left edge when looking at the RS of the piece).

**Foundation Chain**: Ch **45 (52, 59)**.

**Row 1 (RS)**: Dc in 4th ch from hook (counts as first dc), dc in each ch across. Turn.
→ **42 (49, 56) dc**

**Rows 2–40 (2–40, 2–42)**: Ch 3 (counts as first dc), dc in each st across. Turn.
→ **42 (49, 56) dc** each row

Work straight until piece measures **20 inches (20 inches, 21 inches)** from foundation chain.

---

### Neckline Shaping — Right Front

The neckline edge is the **inner/left edge** of the Right Front (the edge closest to center front). Decreases are worked at the **beginning** of the decrease row.

**Decrease Row (WS facing)**: Ch 3, sk first dc (the one directly below the ch-3), dc in next st and each st across, working last dc into top of t-ch. Turn.
→ **1 st decreased at neckline edge**

*(Note: Skipping the first dc after the ch-3 turns the ch-3 plus the "skip" into a combined decrease at the beginning of the row.)*

**Plain Row**: Ch 3, dc in each st across. Turn.
→ **No change in stitch count**

Rep [Decrease Row, then Plain Row] **4 times** total.
→ **4 sts decreased**

**Final stitch count at shoulder edge**: **38 (45, 52) dc**

Continue straight (if needed) until Right Front measures **24 inches (24 inches, 25 inches)** from foundation chain.

Fasten off. Weave in ends. Mark RS.

---

## SLEEVES

Make 2 identical sleeves.

Each sleeve is a wide rectangle. The sleeve top (the cast-on edge) will be seamed to the body along the armhole opening. The sleeve **is not tapered** — it is the same width from cuff to top.

**Sleeve Width** (top to cuff): **24 inches (24 inches, 25 inches)** [61 cm (61 cm, 63.5 cm)]
*This must match the body length exactly so the sleeve top can be seamed to the full length of the body side edge.*

**Foundation Chain**: Ch **87 (87, 91)**.

*(Chain count = 84 (84, 88) dc stitches + 3 for turning chain.)*

**Row 1 (RS)**: Dc in 4th ch from hook, dc in each ch across. Turn.
→ **84 (84, 88) dc**

**Rows 2–34 (2–36, 2–36)**: Ch 3 (counts as first dc), dc in each st across, working last dc into top of t-ch. Turn.
→ **84 (84, 88) dc** each row

Continue until sleeve measures **17 inches (18 inches, 18 inches)** [43 cm (46 cm, 46 cm)] from foundation chain.

Fasten off. Weave in ends. Mark RS.

**Finished Sleeve Dimensions**: 24 in wide × 17 in long (24 in wide × 18 in long, 25 in wide × 18 in long).

---

## FRONT BANDS

The Front Band is a single-crochet border worked in one continuous pass around the entire front opening of the assembled kimono (both front edges + neckline). This tidies all edges and adds structure.

*Work this section after all seaming is complete (see Finishing).*

**Setup**: With RS facing, join yarn at the lower right corner of the Right Front hem edge.

**Round 1 (RS)**: Ch 1 (does not count as a st). Work sc evenly up the right front edge, across the back neck, and down the left front edge, placing approximately **2 sc per row end** along vertical edges and **1 sc per st** along horizontal edges. Work 3 sc in each corner at the neckline shoulders to turn the corner neatly. Sl st to first sc to join. Do NOT turn.

*For a flat band rather than a round, work back and forth:*

**Alternative Flat Band**:
- Row 1 (RS): Ch 1, sc evenly up right front, across back neck, down left front. Turn.
- Row 2 (WS): Ch 1, sc in each sc across. Turn.
- Row 3 (RS): Ch 1, sc in each sc across. Fasten off.

**Crab Stitch Edging (Optional)**: For a more polished, decorative edge, after completing sc Band Rows 1–2, work Row 3 as follows: Do NOT turn. Ch 1, work reverse sc (crab stitch) from left to right across all sts. *To work reverse sc: insert hook in the st to the RIGHT, yo, pull up loop, yo, pull through both loops.* Fasten off.

**Hem and Cuff Edging**: With RS facing, work 1 row of sc along the hem of the Back, each Front hem, and each cuff edge. Fasten off.

---

## FINISHING

Follow these steps in order for best results.

---

### Step 1 — Block All Pieces

Before seaming, wet block or steam block all five pieces to their finished measurements. Pin flat to a blocking mat or clean towels. Allow to dry completely. This step significantly improves drape and stitch evenness.

---

### Step 2 — Seam Shoulders

**Identify**: The shoulder edges are the top short edges of the Back, Left Front, and Right Front.

**Align**: Place the Back RS up on a flat surface. Place the Left Front RS down on top of the Back, aligning the shoulder (top) edge of the Left Front to the left side of the Back's shoulder edge. The Left Front shoulder edge = **38 (45, 52) dc** wide.

**Seam**: Using yarn and a yarn needle, join with a slip stitch seam or mattress stitch along the top **10.8 inches (12.9 inches, 14.9 inches)** [approximately the width of the front shoulder edge].

*(Seam length in stitches: 38 (45, 52) sts of the Front are joined to the corresponding 38 (45, 52) sts at the left edge of the Back shoulder.)*

Repeat for the Right Front, seaming its shoulder to the right side of the Back shoulder.

**Result**: The center **4.9 inches (5.7 inches, 6.3 inches)** of the Back shoulder remains open as the back neck opening.

*(Back center neck opening in stitches: 84 − 38 − 38 = 8 dc (S/M); 98 − 45 − 45 = 8 dc (L/XL); 112 − 52 − 52 = 8 dc (2XL/3XL) → approx 2.3 in / 2.3 in / 2.3 in.)*

*(Note: This gives a narrow back neck. If you prefer a wider neckline, you may decrease only 2–3 sts on each front neckline, leaving more back neck open.)*

---

### Step 3 — Attach Sleeves

**Identify**: The long edge (the foundation chain or cast-on edge) of each sleeve is the sleeve top, which will be attached to the body.

**Fold**: Fold the assembled body piece in half at the shoulder seam to find the center point of each side. Mark the center point with a stitch marker.

**Align**: Place the sleeve RS to RS against the body. Match the **center** of the sleeve top edge to the **shoulder seam point** on the body side. The sleeve top edge runs perpendicular to the body (the T-shape).

**Pin**: The full length of the sleeve top edge (24 in / 24 in / 25 in) should align with the full body length (24 in / 24 in / 25 in) on each side.

**Seam**: Using yarn and yarn needle, sl st or mattress stitch from hem to shoulder, attaching the sleeve top edge to the body side edge. Repeat for second sleeve.

---

### Step 4 — Seam Body Sides

The body sides are seamed from the hem edge upward. **The sleeve seam begins where the body side seam ends.**

With body folded RS together:
- Seam the **Back side edge to the Front side edge**, starting at the hem and working upward.
- **Stop seaming** when you reach the point where the sleeve is attached (the underarm point).

Repeat on the other side.

---

### Step 5 — Seam Sleeve Undersides

Fold each sleeve RS together lengthwise, matching the two long side edges (cuff to underarm).

Seam the underside of the sleeve from cuff edge to underarm, using sl st seam or mattress stitch.

Repeat for second sleeve.

---

### Step 6 — Work Front Bands and Edging

Refer to the **FRONT BANDS** section above.

Work the sc border around both front edges and the back neck. Work sc edging along the hems and cuffs.

---

### Step 7 — Add Closure (Optional)

Choose one of the following options:

**Option A — Fabric Tie**: Cut two strips of fabric or ribbon, each 18–24 inches (46–61 cm) long. Hand-stitch or tie one strip to the inside of each Front edge at the waist level.

**Option B — Button and Loop**: Sew a large decorative button to the Right Front at waist level (approx. 12 inches / 30 cm from the hem). On the Left Front at the same height, work a chain loop: attach yarn, ch 8, sl st to same spot, fasten off. This creates a simple toggle loop.

**Option C — Wear Open**: Leave open and wear as a draped kimono wrap with no closure.

---

### Step 8 — Final Block

Lightly wet block or steam the finished garment, especially the seams and front bands. Lay flat and shape to finished measurements. Allow to dry fully before wearing.

---

### Finished Measurements Summary

| Measurement | S/M | L/XL | 2XL/3XL |
|---|---|---|---|
| Finished Bust (circumference) | 48 in (122 cm) | 56 in (142 cm) | 64 in (163 cm) |
| Body Length (hem to shoulder) | 24 in (61 cm) | 24 in (61 cm) | 25 in (63.5 cm) |
| Sleeve Length | 17 in (43 cm) | 18 in (46 cm) | 18 in (46 cm) |
| Sleeve Width (top to cuff) | 24 in (61 cm) | 24 in (61 cm) | 25 in (63.5 cm) |
| Back Width | 24 in (61 cm) | 28 in (71 cm) | 32 in (81 cm) |
| Each Front Width at Hem | 12 in (30.5 cm) | 14 in (35.5 cm) | 16 in (40.5 cm) |

---

*Pattern designed for personal use. Finished items may be sold in small quantities with credit to the designer. Please do not distribute the pattern itself.*
Disclaimer: This pattern was generated by AI and should be reviewed for accuracy before use. While we strive for quality, AI-generated content may contain errors. Please verify measurements, stitch counts, and instructions before beginning your project. Generated by purlJam.uk
Access your pattern anytime
Bookmark this page to access your pattern anytime