Type
Knitting
Difficulty
intermediate
Category
hat
AI Thinking Process
Planning
Verification
Pattern
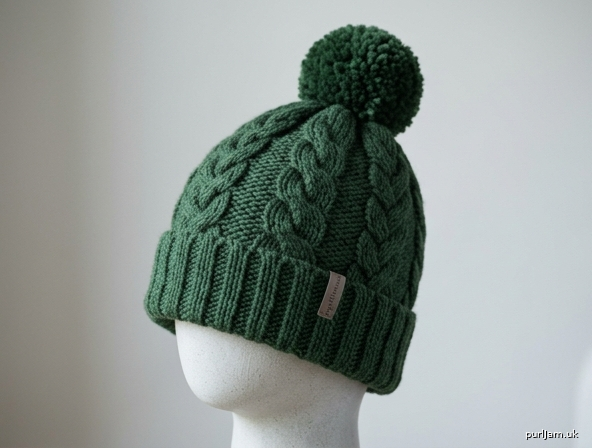
Brimmed Cabled Hat with Pompom
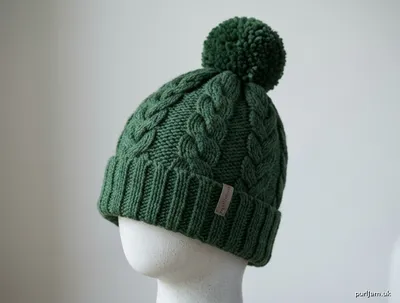
A snug adult beanie in bulky wool with a wide folded brim, six chunky cable panels, and a pompom. The brim is worked long in 2×2 rib and folded up for a double-thick cuff. Six 6-stitch cables travel up the hat on a reverse-stockinette ground; the same cables run into the crown so the pattern doesn’t stop short. Written instructions and a chart are both included.
Skill level: Beginner (first cables). If you can knit and purl in the round, you can make this hat.
Sizes
Adult (one size).
Hat is stretchy. For a snugger fit, work the body on US 10 / 6 mm; for a roomier fit, work the body on US 11 / 8 mm.
Finished measurements
- Circumference: 20½" (52 cm) unstretched
- To fit head: 21–23" (53.5–58.5 cm)
- Height with brim folded, excluding pompom: 9" (23 cm)
- Height unfolded, excluding pompom: 11½" (29 cm)
- Pompom: about 3½" (9 cm) across
(72 sts ÷ 14 sts × 4" = 20.57" ≈ 20½" ✓)
Yarn
Bulky weight (CYC 5), 100% wool (or wool-rich blend)
180 yd / 165 m total:
- Hat: 140 yd / 128 m
- Pompom: 40 yd / 37 m
Typical requirement: 2 skeins of a 100 g bulky wool (about 106–137 yd / 97–125 m per skein). One skein is usually enough for the hat alone; the second covers the pompom and a comfortable margin.
Suggested yarns: Cascade 128 Superwash, Berroco Vintage Chunky, Lion Brand Wool-Ease Chunky, or any bulky wool that meets gauge.
Needles
- Brim: US 9 / 5.5 mm, 16" (40 cm) circular
- Body and crown: US 10.5 / 6.5 mm, 16" (40 cm) circular
- Crown: US 10.5 / 6.5 mm double-pointed needles (DPNs), or a long circular for magic loop
Adjust needle size to obtain gauge.
Notions
- Cable needle
- 7 stitch markers (1 distinct for beginning of round, 6 for panels)
- Tapestry needle
- Pompom maker, 3½" (9 cm), or two cardboard circles
- Scissors
- Optional: leftover contrasting bulky yarn for wrapping the pompom
Gauge
14 stitches and 18 rounds = 4" (10 cm) in Cable Pattern on US 10.5 / 6.5 mm, blocked lightly.
Work a circular swatch (or a flat swatch: RS *k6, p6; rep from *, WS *k6, p6; rep from *, cabling on Row 8). Measure over one full 12-st panel plus part of the next.
Gauge matters for fit. If you have more than 14 sts in 4", go up a needle size; if fewer, go down.
Abbreviations (US)
| Abbrev. | Meaning |
|---|---|
| BOR | beginning of round |
| C6F | cable 6 front (see Special Stitches) |
| cn | cable needle |
| CO | cast on |
| k | knit |
| k2tog | knit 2 together (1 st decreased) |
| p | purl |
| p2tog | purl 2 together (1 st decreased) |
| pm | place marker |
| rep | repeat |
| rnd(s) | round(s) |
| RS | right side |
| sm | slip marker |
| ssk | slip, slip, knit (1 st decreased; left-leaning) |
| st(s) | stitch(es) |
| WS | wrong side |
Special stitches
C6F (cable 6 front) Slip 3 stitches purlwise to the cable needle and hold in front of the work. Knit the next 3 stitches. Knit the 3 stitches from the cable needle.
Beginner tips:
- Keep the cable needle in the center of the work, not dangling off the side.
- Knit the three live stitches first (those still on the left needle), then the three from the cn.
- The six stitches will look crossed with the left three riding on top. That is correct.
- If a stitch starts to slip, put it back on the left needle before it drops a row.
- You only cable once every 8 rounds — most of the hat is plain knit and purl.
ssk Slip 1 knitwise, slip 1 knitwise, insert left needle into the fronts of both slipped stitches from left to right, knit them together.
Pattern notes
- Worked in the round from the brim up. Do not turn.
- Join for working in the round, taking care not to twist the cast-on.
- The 12-stitch Cable Pattern is worked 6 times per round (6 cable panels alternating with reverse stockinette).
- Place a marker between panels. Slip markers every round.
- When the stitch count no longer fits comfortably on the 16" circular, switch to DPNs or magic loop. This usually happens during the crown, around 48 sts.
- Charts are worked in the round: read every chart round from right to left.
- The brim is designed to be folded up. It is twice as long as the finished cuff so the fold is double-thick and stands like a brim.
- Light blocking only — do not press the cables flat.
Hat
Brim
With smaller needle (US 9 / 5.5 mm) and long-tail cast-on, CO 72 sts. Leave a 40" (100 cm) tail.
Place BOR marker and join in the round, being careful not to twist.
Rib rnd: *K2, p2; rep from * to end. (72 ÷ 4 = 18 repeats ✓)
Repeat Rib rnd until brim measures 5" (12.5 cm) from the cast-on edge — about 26–28 rounds.
The fabric will look like a long ribbed tube. This is the fold-up brim.
Body
Change to larger needle (US 10.5 / 6.5 mm).
Setup rnd: *K6, p6, pm; rep from * 5 more times, using the BOR marker as the last marker.
(6 panels × 12 sts = 72 sts ✓)
You now have 6 cable panels (the k6 groups) alternating with 6 reverse-stockinette gutters (the p6 groups).
Work the Cable Pattern (written or chart) until the hat measures 9½" (24 cm) from the cast-on edge, ending with Rnd 7 of the pattern (a non-cable round). You will have worked about two and a half 8-round repeats after the brim.
Cable Pattern (12-st repeat; 6 times per round)
Rnds 1–7: *K6, p6; rep from * to end. (72 sts)
Rnd 8: *C6F, p6; rep from * to end. (72 sts; 6 cables ✓)
Repeat Rnds 1–8 for pattern.
Crown
Keep the 6 panel markers in place. Switch to DPNs or magic loop when the circle gets tight.
Cables continue through the first part of the crown. Purl gutters are decreased first; then the 6-st cables themselves are reduced.
Rnd 1 (cable + decrease): *C6F, p2tog, p2, p2tog; rep from * to end.
(12 sts − 2 = 10 sts per panel; 10 × 6 = 60 sts ✓)
Rnd 2: *K6, p4; rep from * to end. (60 sts)
Rnd 3: *K6, p2tog, p2tog; rep from * to end.
(10 sts − 2 = 8 sts per panel; 8 × 6 = 48 sts ✓)
Rnd 4: *K6, p2; rep from * to end. (48 sts)
Rnd 5 (cable): *C6F, p2; rep from * to end. (48 sts; cables still 6 sts wide ✓)
Rnd 6: *K6, p2tog; rep from * to end.
(8 sts − 1 = 7 sts per panel; 7 × 6 = 42 sts ✓)
Rnd 7: *K2tog, k2, ssk, p1; rep from * to end.
(7 sts − 2 = 5 sts per panel; 5 × 6 = 30 sts ✓)
(Each 6-st cable is now a 4-st knit panel.)
Rnd 8: *K4, p1; rep from * to end. (30 sts)
Rnd 9: *K2tog, ssk, p1; rep from * to end.
(5 sts − 2 = 3 sts per panel; 3 × 6 = 18 sts ✓)
Rnd 10: *K2tog, p1; rep from * to end.
(3 sts − 1 = 2 sts per panel; 2 × 6 = 12 sts ✓)
Rnd 11: *K2tog; rep from * to end.
(12 ÷ 2 = 6 sts ✓)
Cut yarn, leaving a 10" (25 cm) tail. Thread tail onto a tapestry needle, draw through the remaining 6 sts, pull snug, and fasten off on the WS. Weave in this tail securely — it holds the crown shut.
Finishing
Weave in the cast-on tail and any other ends on the WS.
Fold the brim. Turn the ribbed brim up so the cast-on edge sits on the inside, just below the first cable round. The fold is 2½" (6.5 cm) deep and double-thick. The folded cuff is the brim.
Optional (recommended so the brim stays put): with matching yarn and a tapestry needle, loosely tack the cast-on edge to the WS at 4 points around the hat, catching the back bump of a purl stitch so nothing shows on the RS. Do not sew it down tightly or the brim will not stretch.
Block lightly. Mist the hat or steam it from a distance. Shape the cables with your fingers. Do not pin the cables flat and do not press with an iron. Let dry fully before attaching the pompom.
Pompom
Make one pompom about 3½" (9 cm) across.
With a pompom maker: Follow the maker’s wrapping instructions, using the remaining bulky wool. Wrap generously — a dense pompom looks better on a chunky hat. Tie the center as tightly as you can with a 12" (30 cm) length of the same yarn (or a strong cotton waste yarn). Trim to a smooth sphere.
With cardboard: Cut two rings of cardboard, each about 3½" (9 cm) across with a 1¼" (3 cm) hole in the center. Hold them together and wrap yarn through the hole and around the rings until the hole is nearly full. Slide scissors between the rings and cut all wraps at the outer edge. Pass a 12" (30 cm) tie yarn between the rings, cinch as hard as possible, and knot several times. Remove cardboard and trim.
Attach: Using the two long tie tails, sew the pompom to the crown. Take several stitches through the gathered crown stitches and through the pompom’s tied center. Knot firmly on the WS and weave in. Tug the pompom — it should not twist or lift off. A bulky wool pompom is heavy; extra stitches here are worth it.
Cable Chart
Worked in the round. Read every round from right to left. Repeat the 12-st panel 6 times per round.
        12 11 10  9  8  7  6  5  4  3  2  1
Rnd 8    –  –  –  –  –  –  \____C6F____/
Rnd 7    –  –  –  –  –  –  k  k  k  k  k  k
Rnd 6    –  –  –  –  –  –  k  k  k  k  k  k
Rnd 5    –  –  –  –  –  –  k  k  k  k  k  k
Rnd 4    –  –  –  –  –  –  k  k  k  k  k  k
Rnd 3    –  –  –  –  –  –  k  k  k  k  k  k
Rnd 2    –  –  –  –  –  –  k  k  k  k  k  k
Rnd 1    –  –  –  –  –  –  k  k  k  k  k  k
Key
| Symbol | Stitch |
|---|---|
| k | knit |
| – | purl (reverse stockinette) |
| C6F | slip 3 to cn, hold front; k3; k3 from cn |
After Rnd 8, return to Rnd 1.
Schematic (worn, brim folded)
              pompom
                *
               / \
              /   \     crown ~2" (5 cm)
             |     |
             |  C  |    cabled body
             |  C  |    ~4½" (11.5 cm) visible
             |  C  |
          ___|     |___
         /   brim     \  folded brim 2½" (6.5 cm)
         \_____________/  double-thick 2x2 rib

         <--- 20½" (52 cm) unstretched --->
              fits 21–23" (53.5–58.5 cm)
Six cable panels (C) sit equally around the hat with reverse stockinette between them.
Stitch-count tracker
| Section | Stitches | Check |
|---|---|---|
| Cast-on / brim | 72 | 72 ÷ 4 (rib) = 18 ✓ |
| Body (6 × 12-st panels) | 72 | 6 × 12 = 72 ✓ |
| Crown Rnd 1 | 60 | 6 × 10 = 60 ✓ |
| Crown Rnd 3 | 48 | 6 × 8 = 48 ✓ |
| Crown Rnd 6 | 42 | 6 × 7 = 42 ✓ |
| Crown Rnd 7 | 30 | 6 × 5 = 30 ✓ |
| Crown Rnd 9 | 18 | 6 × 3 = 18 ✓ |
| Crown Rnd 10 | 12 | 6 × 2 = 12 ✓ |
| Crown Rnd 11 | 6 | 12 ÷ 2 = 6 ✓ |
Quick-reference: what you are making
- CO 72. Rib 5" on smaller needles. Fold later for the brim.
- Larger needles. Six panels of
k6, p6, cable every 8th round (C6F, p6). - At 9½" from CO, decrease the purl gutters, then the cables, down to 6 sts.
- Close crown, fold brim up, add pompom.
Disclaimer: This pattern was generated by AI and should be reviewed for accuracy before use. While we strive for quality, AI-generated content may contain errors. Please verify measurements, stitch counts, charts, and instructions before beginning your project. Generated by purlJam.uk
Love this pattern?
Save this pattern to your free PurlJam libraryAccess your pattern anytime
Bookmark this page to access your pattern anytime