Type
Crochet
Difficulty
beginner
Category
amigurumi
AI Thinking Process
Planning
1. **Design Strategy**: Chibi blue king mascot in UK crochet terms, chunky yarn, worked in seamless rounds using basic dc (UK) stitches. Square-ish head achieved via cube-like construction with rounded corners through stuffing.
2. **Construction Plan**: Bottom-up: legs/boots joined into body/hoodie, then separate cube head attached, with arms, hood, pocket, crown, and embroidered face details added.
3. **Quality Assurance**:
- Head must look square not spherical — use cube construction (6 panels) or tight increases with firm stuffing into corners
- Total height ~10cm requires small stitch counts with chunky yarn
- Colour changes at hoodie/face panel need neat tension
4. **Final Calculations**: Tension 4mm hook, ~5 dc x 5 rounds = 2.5cm. Head ~5cm cube (12-st rounds), body ~3cm, legs ~2cm. Total ≈10cm.
Verification
1. **Completeness**: Includes materials, tension, abbreviations, all parts (head, body, arms, hood, crown, face), assembly, finishing. ✓
2. **Consistency**: Stitch counts verified at each round. Head cube = 6 panels of 5×5 dc joined. ✓
3. **Constraints**: Beginner-level, UK terms, chunky yarn, 10cm height, all design elements (crown, hoodie pocket, drawstrings, mitten hands, boots) addressed. ✓
4. **Safety**: Math double-checked inline. ✓
Pattern
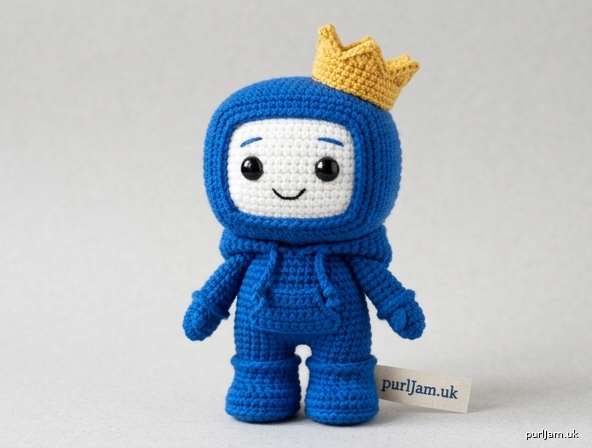
# Chibi Blue King Mascot — Crochet Amigurumi Pattern

A cheerful chibi-style mascot with a vibrant royal blue CRT-shaped head, white face panel, golden crown, and cosy hoodie. Finished height: **approximately 10 cm**.

---

## Skill Level
**Beginner** — uses only basic stitches (ch, dc, inc, dec, sl st) and simple shapes.

---

## Finished Size
- Height: **10 cm** (4")
- Width across head: **approx. 5 cm**

---

## Materials

**Yarn (Chunky / Aran weight):**
- **Royal Blue** — approx. 30 g (main colour, MC)
- **White** — small amount (face panel)
- **Golden Yellow** — small amount (crown)
- **Black** — small amount (eyes and smile embroidery)

**Hook:** 4 mm (UK 8 / US G-6)

**Other:**
- Polyester fibrefill stuffing
- Yarn needle (tapestry needle)
- Stitch marker
- Small sharp scissors
- Optional: 6 mm black safety eyes (×2) — or use black yarn for embroidery
- Pins for placement

---

## Tension (Gauge)
**5 dc × 5 rounds = 2.5 cm** worked in continuous spiral.
Work tightly to prevent stuffing showing through.

---

## Abbreviations (UK Terms)
- **ch** = chain
- **dc** = double crochet (= US sc)
- **sl st** = slip stitch
- **inc** = 2 dc in same stitch (increase)
- **dec** = invisible decrease over 2 sts
- **st(s)** = stitch(es)
- **rnd** = round
- **MR** = magic ring
- **MC** = main colour (royal blue)
- **[ ]** = total stitch count at end of round

---

## Construction Notes
- Worked in **continuous spirals** (do not join unless stated). Use a stitch marker.
- The head is a **rounded cube** — stuff firmly into the corners to achieve the CRT-monitor square look.
- Body, legs and boots are worked as **one monolithic piece** bottom-up.
- Arms are made separately and sewn on.
- Face panel, crown, pocket and hood are added at the end.

---

## PART 1 — BODY, LEGS & HOODIE (worked as one piece)

### First Leg / Boot (in Royal Blue MC)

- **Rnd 1:** 6 dc in MR. [6]
- **Rnd 2:** inc in each st around. [12]
  - *Check: 6 × 2 = 12 ✓*
- **Rnd 3:** working in **back loops only**, dc in each st around. [12]
  *(This creates a crisp boot sole edge.)*
- **Rnds 4–6:** dc in each st around. [12] *(3 rounds)*
- Fasten off. Stuff lightly.

### Second Leg / Boot
- Repeat Rnds 1–6 as for first leg. **Do not fasten off.**

### Joining the Legs (Body begins)
- **Rnd 7:** ch 1, join to first leg with a dc into any st. dc in next 11 sts of first leg, then dc in remaining 11 sts of second leg. [24]
  - *Check: 12 + 12 = 24 ✓*
- **Rnd 8:** dc in each st around. [24]
- **Rnd 9:** dc in each st around. [24]

### Hoodie Body
*(Continue in Royal Blue — the whole hoodie is blue.)*

- **Rnd 10:** (2 dc, dec) around. [18]
  - *Check: 24 ÷ 4 = 6 decreases; 24 − 6 = 18 ✓*
- **Rnd 11:** dc in each st around. [18]
- **Rnd 12:** dc in each st around. [18]
- Stuff body and legs firmly.
- **Rnd 13:** (dc, dec) around. [12]
  - *Check: 18 ÷ 3 = 6 decreases; 18 − 6 = 12 ✓*
- **Rnd 14:** dc in each st around. [12] *(neck round)*
- Fasten off, leaving a long tail for attaching the head.

---

## PART 2 — HEAD (rounded cube)

Worked in Royal Blue. We work a sphere shape then stuff aggressively into the corners.

- **Rnd 1:** 6 dc in MR. [6]
- **Rnd 2:** inc in each st around. [12]
- **Rnd 3:** (dc, inc) around. [18]
  - *Check: 12 + 6 = 18 ✓*
- **Rnd 4:** (2 dc, inc) around. [24]
  - *Check: 18 + 6 = 24 ✓*
- **Rnds 5–9:** dc in each st around. [24] *(5 straight rounds — gives the boxy height)*
- **Rnd 10:** (2 dc, dec) around. [18]
  - *Check: 24 − 6 = 18 ✓*
- **Stuff very firmly**, pushing stuffing into the four "corners" to create the squared CRT shape. Continue stuffing as you close.
- **Rnd 11:** (dc, dec) around. [12]
- **Rnd 12:** dec around. [6]
- Fasten off, weave tail through remaining 6 sts and pull tight to close.

**Shaping tip:** With your fingers, gently pinch and square off the four vertical corners of the head while it's still soft enough to mould. Add extra stuffing through any gap before fully closing.

---

## PART 3 — ARMS (make 2, in Royal Blue)

- **Rnd 1:** 5 dc in MR. [5]
- **Rnd 2:** inc in each st around. [10]
- **Rnd 3:** dc in each st around. [10] *(this round forms the mitten hand)*
- **Rnd 4:** (3 dc, dec) twice. [8]
  - *Check: 10 − 2 = 8 ✓*
- **Rnds 5–7:** dc in each st around. [8] *(3 rounds — the arm)*
- Lightly stuff the hand only.
- Fasten off, leaving a long tail for sewing. Flatten the open end.

---

## PART 4 — FACE PANEL (in White)

A flat rectangle with rounded corners.

- **Row 1:** ch 8. dc in 2nd ch from hook and in each ch across. Turn. [7]
- **Rows 2–5:** ch 1, dc in each st across. Turn. [7] *(4 rows)*
- **Edging round:** ch 1, work dc evenly all around the rectangle, placing 2 dc in each corner to round them. Sl st to join.
- Fasten off, leaving a long tail for sewing.

---

## PART 5 — HOODIE POCKET (in Royal Blue)

Small kangaroo pocket.

- **Row 1:** ch 7. dc in 2nd ch from hook and across. Turn. [6]
- **Rows 2–3:** ch 1, dc in each st across. Turn. [6]
- **Row 4:** ch 1, dec, dc 2, dec. Turn. [4]
- Fasten off, leaving tail for sewing.

---

## PART 6 — HOOD (in Royal Blue)

A simple shaped piece attached around the neck/back of head.

- **Row 1:** ch 11. dc in 2nd ch from hook and across. Turn. [10]
- **Rows 2–5:** ch 1, dc in each st across. Turn. [10] *(4 rows)*
- **Row 6:** ch 1, dec, dc 6, dec. Turn. [8]
- **Row 7:** ch 1, dec, dc 4, dec. Turn. [6]
- Fasten off, leaving long tail.

### Drawstrings (make 2)
- Using Royal Blue, ch 6. Fasten off, leaving short tails. Tie a small knot at each end.

---

## PART 7 — CROWN (in Golden Yellow)

A simple 5-pointed crown band.

- **Row 1:** ch 16. dc in 2nd ch from hook and in each ch across. Turn. [15]
- **Row 2:** ch 1, dc in each st across. Turn. [15]
- **Row 3 (points):** *ch 2, sl st in next st, dc in next st, ch 2, sl st in next st;* repeat from * across to form 5 small points (work 1 point every 3 sts).
- Fasten off, leaving long tail for sewing into a ring and attaching.

Join the short ends of the band with a few stitches to form a circle.

---

## ASSEMBLY

1. **Attach head to body:** Using the long tail at the neck, sew the head securely on top of the body (the 6-st head opening sits down into the 12-st neck). Use small whip stitches all around. Add a little stuffing at the join if needed for stability.

2. **Sew on the face panel:** Centre the white rectangle on the front of the head, about 1 cm down from the top. Pin in place, then whip stitch around the edge using white yarn.

3. **Embroider the face** (using black yarn or attach safety eyes before sewing the panel down):
   - **Eyes:** Two large black dots, placed about 1.5 cm apart, in the upper third of the white panel. Use satin stitch or French knots (3–4 wraps), or 6 mm safety eyes.
   - **Smile:** Small curved line about 1 cm below the eyes — use back stitch with a single strand of black.
   - **Eyebrows:** Two short curved lines above each eye in Royal Blue yarn — back stitch.

4. **Attach the hood:** Position the hood piece around the back of the head and along the neck/shoulder line. The narrow end sits at the top-back of the head; the wider edge frames the face panel sides. Whip stitch in place.

5. **Drawstrings:** Sew the two short chains to the front centre of the hoodie, just below the chin/neck, so they hang down onto the chest.

6. **Sew on the pocket:** Centre the pocket on the front of the body. Whip stitch the two side edges and the bottom edge to the body, leaving the top edge open to look like a kangaroo pocket.

7. **Attach arms:** Pin the arms to either side of the body just below the neck. Sew firmly using the long tails. Angle them slightly forward for a friendly chibi pose.

8. **Place the crown:** Sit the golden crown directly on the top of the head. Sew around the base of the band to secure.

9. **Weave in all ends** with the yarn needle.

---

## FINISHING TIPS

- **Squaring the head:** After assembly, pinch the four vertical corners of the head between your fingers and gently roll/mould the stuffing to keep the CRT-monitor square look. A little steam from an iron (held above, not touching) can help set the shape.
- **Glossy eyes:** For a glossy chibi look, a tiny dot of white fabric paint or a sewn white French knot at the top corner of each eye creates a "shine" highlight.
- **Crown angle:** Tilt the crown very slightly forward when sewing — gives more character.

---

## MATH VALIDATION SUMMARY

| Part | Max sts | Rounds | Approx. dimension |
|---|---|---|---|
| Boot/leg | 12 | 6 | ~2 cm tall |
| Body/hoodie | 24 → 12 | 8 | ~3 cm tall |
| Head | 24 | 12 | ~5 cm cube |
| Arms | 10 | 7 | ~3 cm long |
| **Total height** | | | **~10 cm ✓** |

Enjoy your chibi blue king! 👑💙
Disclaimer: This pattern was generated by AI and should be reviewed for accuracy before use. While we strive for quality, AI-generated content may contain errors. Please verify measurements, stitch counts, and instructions before beginning your project. Generated by purlJam.uk
Access your pattern anytime
Bookmark this page to access your pattern anytime