Type
Crochet
Difficulty
beginner
Category
blanket
AI Thinking Process
Planning
Verification
Pattern
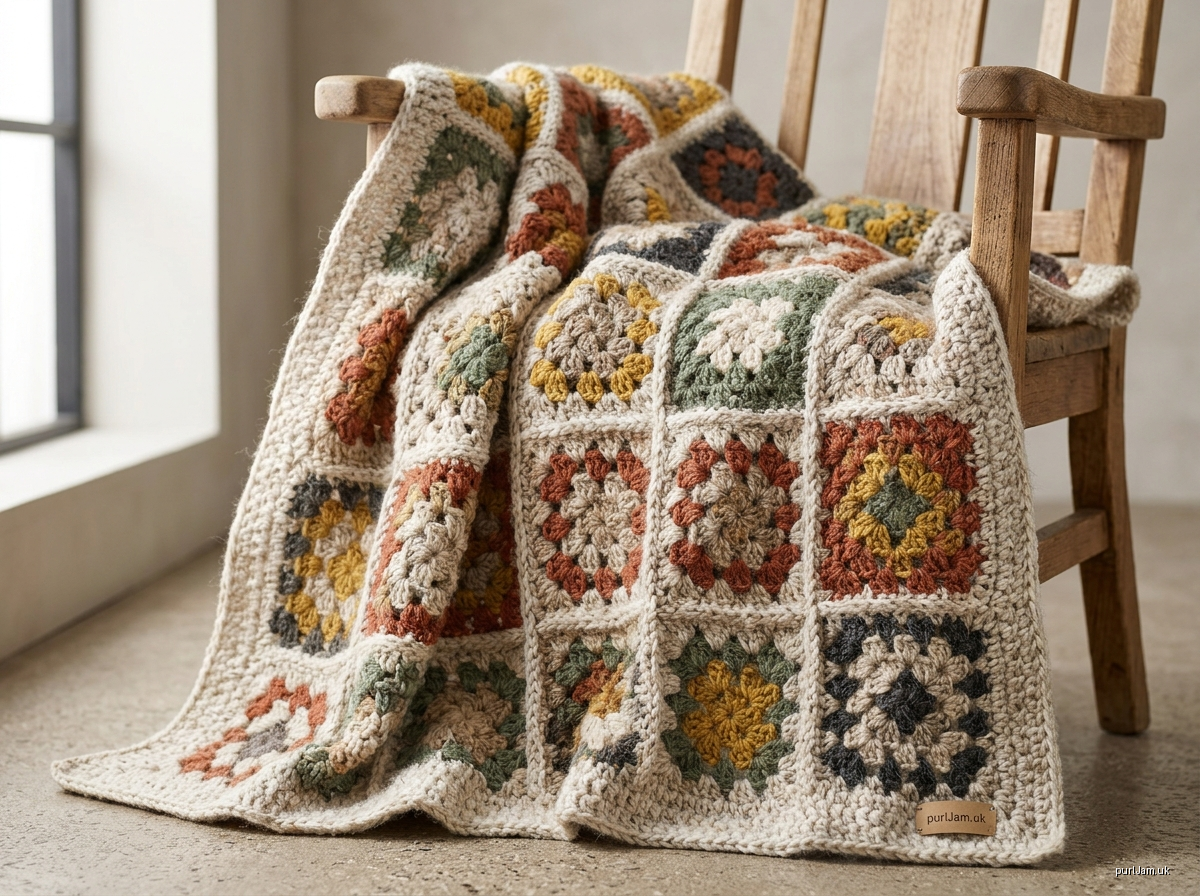
Chunky Cosy Granny Square Blanket
Skill level: Beginner | Terminology: UK crochet terms
Finished Size
Approximately 105 × 125 cm (41 × 49 in) including the border.
- Each square: 20 cm (8 in).
- 30 squares, arranged 5 across × 6 down.
Materials
- Yarn: Bulky/chunky weight yarn, approximately 2,000 m (2,190 yd) in total.
- Example: 20 × 100 g balls, roughly 100 m per ball.
- Each square uses about 55 m.
- Joining and the border use about 350 m.
- Hook: 7 mm (US K/10.5–L/11).
- Notions: Large-eye tapestry needle, scissors, stitch marker (optional).
Tension (Gauge)
Rounds 1–3 of the square measure 10 cm (4 in) square using a 7 mm hook.
- If your square is larger, change to a smaller hook.
- If it is smaller, change to a larger hook.
Abbreviations (UK)
- ch = chain
- ss = slip stitch
- dc = double crochet (US single crochet)
- tr = treble crochet (US double crochet)
- sp = space
- cluster = 3 tr worked into the same space
- RS = right side
Notes
- The beginning ch 3 counts as the first tr of a cluster.
- The squares are worked in the round with the RS facing; do not turn.
- Corner spaces are ch 2. The spaces between clusters along the sides are ch 1.
- Optional colour change: To make multicoloured squares, fasten off at the end of any round. Join the new colour with a ss in any corner ch-2 sp, ch 3, and continue from that point.
Granny Square (make 30)
Ch 4, ss into the first ch to form a ring.
Round 1:
- Ch 3 (counts as 1 tr), 2 tr into the ring, ch 2.
- *3 tr into the ring, ch 2; repeat from * twice more.
- Ss to the top of the beginning ch 3.
- (4 clusters = 12 tr; 4 ch-2 corners ✓)
Round 2:
- Ss into the next 2 tr and into the corner ch-2 sp.
- Ch 3, (2 tr, ch 2, 3 tr) in the same sp, ch 1.
- *(3 tr, ch 2, 3 tr) in the next ch-2 sp, ch 1; repeat from * twice more.
- Ss to the top of the beginning ch 3.
- (8 clusters = 24 tr; 2 per side ✓)
Round 3:
- Ss into the next 2 tr and into the corner sp.
- Ch 3, (2 tr, ch 2, 3 tr) in the same sp, ch 1.
- *3 tr in the next ch-1 sp, ch 1, (3 tr, ch 2, 3 tr) in the corner sp, ch 1; repeat from * twice more.
- 3 tr in the last ch-1 sp, ch 1.
- Ss to the top of the beginning ch 3.
- (12 clusters = 36 tr; 3 per side ✓)
Rounds 4–6:
- Ss into the next 2 tr and into the corner sp.
- Ch 3, (2 tr, ch 2, 3 tr) in the same sp, ch 1.
- *(3 tr, ch 1) in each ch-1 sp along the side, then (3 tr, ch 2, 3 tr, ch 1) in the corner sp; repeat from * twice more.
- (3 tr, ch 1) in each remaining ch-1 sp.
- Ss to the top of the beginning ch 3.
- Each round adds 1 cluster per side:
- Round 4: 16 clusters = 48 tr (4 per side ✓)
- Round 5: 20 clusters = 60 tr (5 per side ✓)
- Round 6: 24 clusters = 72 tr (6 per side ✓; 18 tr per side ✓)
Fasten off, leaving a 50 cm tail on 15 of the squares to use for joining. Weave in all other ends. The square should measure 20 cm.
Joining (Whip Stitch)
- Lay out the squares in 5 columns × 6 rows, all with the RS facing up.
- Place two squares with their RS facing up, side by side.
- Using the tapestry needle and yarn, whip stitch through the back loops only of the matching stitches along the edge.
- Start in the corner ch.
- Work 1 stitch in each of the 18 tr and in each ch.
- End in the opposite corner ch.
- Join the squares into 6 strips of 5 squares each.
- Join the strips together lengthwise, keeping the corners aligned.
- Weave in all ends securely.
Join check: 5 squares × 20 cm = 100 cm wide ✓; 6 squares × 20 cm = 120 cm long ✓
Border
Round 1:
- Join the yarn in any blanket corner ch-2 sp.
- Ch 1, 3 dc in the same sp.
- Along each edge, work 1 dc in each tr and ch-1 sp, and 1 dc in each square's corner sp at the seams.
- Aim for 20 dc per square edge:
- Short edges: 5 × 20 = 100 dc.
- Long edges: 6 × 20 = 120 dc.
- Work 3 dc in each blanket corner.
- Ss to the first dc.
- (Total: 2 × 100 + 2 × 120 + 12 corner dc = 452 dc ✓)
Round 2:
- Ch 3 (counts as tr).
- Work 1 tr in each dc, with 3 tr in the centre dc of each corner.
- Ss to the top of the beginning ch 3.
- (452 + 8 = 460 tr ✓)
Fasten off.
Finishing
- Weave in all remaining ends.
- Gently steam block, holding the iron above the fabric. Do not press acrylic yarns.
- Finished size: about 105 × 125 cm ✓
Enjoy your cosy blanket!
Disclaimer: This pattern was generated by AI and should be reviewed for accuracy before use. While we strive for quality, AI-generated content may contain errors. Please verify measurements, stitch counts, charts, and instructions before beginning your project. Generated by purlJam.uk
Love this pattern?
Save this pattern to your free PurlJam libraryAccess your pattern anytime
Bookmark this page to access your pattern anytime