Type
Crochet
Difficulty
intermediate
Category
custom
AI Thinking Process
Planning
Verification
Pattern
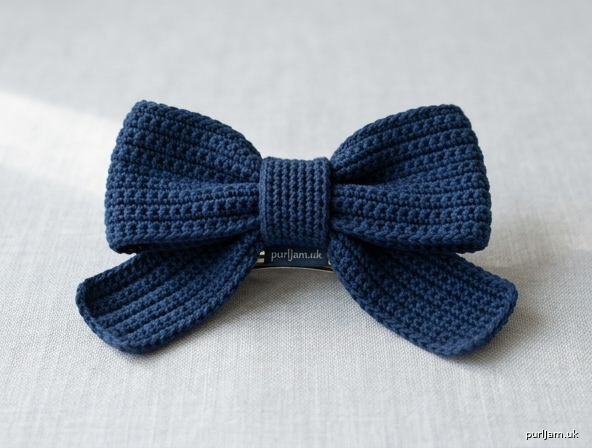
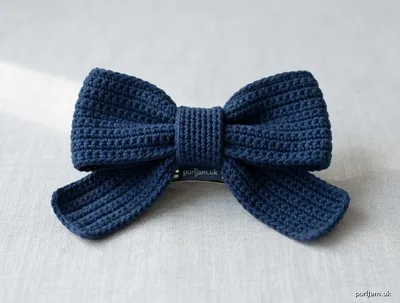
Classic Crochet Hairbow
A firm, beginner-friendly stacked hairbow in single crochet. The bow is three flat rectangles — a main bow, optional tails, and a center wrap — cinched in the middle and mounted on a clip, barrette, or hair elastic. No increases, no decreases, and no in-the-round work. One skein of worsted yarn will make many bows.
Skill level: Beginner
Time: About 30–60 minutes
Materials
Yarn: Worsted weight (category 4), acrylic or cotton. Cotton holds a crisper shape; acrylic is softer.
Yardage: 30 (40, 50) yd / 27 (37, 46) m, including optional tails. A leftover ball is plenty.
Hook: US G-6 / 4.0 mm (or the hook that gives a firm, not drapey, fabric). If your swatch looks loose or holey, go down one hook size.
Notions:
- Tapestry needle
- Scissors
- Alligator clip or French barrette, 1½–2¼" (4–6 cm), or a hair elastic / nylon baby headband
- Optional: hot glue gun, small felt circle to cover the clip, decorative button
Color ideas: One solid color is classic. Use a contrast color for the center wrap, or make the tails in a second color.
Gauge
16 sc and 18 rows = 4" × 4" (10 × 10 cm) in single crochet with US G-6 / 4.0 mm, worked in both loops.
Gauge is not critical for fit, but it does change the finished size. A dense fabric is better than a floppy one. Check: 4 sc should measure 1" (2.5 cm).
Sizes
Instructions are written for Small (Medium, Large). Medium is the classic school-and-everyday size.
Finished bow (after cinching, approx.):
| Size | Width | Height (without tails) |
|---|---|---|
| Small | 4" (10 cm) | 2" (5 cm) |
| Medium | 5½" (14 cm) | 2½" (6.5 cm) |
| Large | 7" (18 cm) | 3" (7.5 cm) |
Tails add about ½" (1.5 cm) of extra span on each side and a little extra height.
Abbreviations (US)
- ch — chain
- sc — single crochet
- st(s) — stitch(es)
- sl st — slip stitch
- RS — right side
- WS — wrong side
- FO — fasten off
Pattern Notes
- US crochet terminology throughout. Turning chain is ch 1 and does not count as a stitch. Skip it at the end of the next row; work the first sc into the first sc of the previous row.
- Work in both loops of every stitch.
- Every row is worked even. The stitch count at the end of a row is the same as the row before. Count at the end of Row 1 and again every few rows until the count feels automatic.
- Do not join or turn the work into a tube — these are flat rectangles.
- Leave a long tail (18–24" / 45–60 cm) when you fasten off the Bow Body; you will use it to cinch the bow.
- Weave in all other ends before assembly so they do not bulk up the center.
- Numbers are given as Small (Medium, Large). If only one number appears, it applies to all sizes.
Pattern
Bow Body
The main loops of the bow.
Ch 17 (23, 29).
Row 1 (RS): Sc in 2nd ch from hook and in each ch across, turn.
16 (22, 28) sc (17 − 1 = 16, 23 − 1 = 22, 29 − 1 = 28 ✓).
Rows 2–9 (11, 14): Ch 1 (does not count as a st), sc in each st across, turn.
16 (22, 28) sc each row ✓.
Work 9 (11, 14) rows total (Row 1 + 8 (10, 13) even rows ✓).
FO, leaving an 18–24" (45–60 cm) tail for cinching. Weave in the starting tail only.
Check: Piece should measure about 4 × 2" (5½ × 2½", 7 × 3") / 10 × 5 cm (14 × 6.5 cm, 18 × 7.5 cm) unstretched.
Tails (optional)
Skip this piece for a simple two-loop bow.
Ch 21 (29, 37).
Row 1 (RS): Sc in 2nd ch from hook and in each ch across, turn.
20 (28, 36) sc (21 − 1 = 20, 29 − 1 = 28, 37 − 1 = 36 ✓).
Rows 2–6 (7, 9): Ch 1, sc in each st across, turn.
20 (28, 36) sc each row ✓.
Work 6 (7, 9) rows total ✓.
FO and weave in both ends.
Check: Piece should measure about 5 × 1¼" (7 × 1½", 9 × 2") / 12.5 × 3 cm (18 × 4 cm, 23 × 5 cm).
Center Wrap
The band that hides the cinch.
Ch 5 (6, 7).
Row 1 (RS): Sc in 2nd ch from hook and in each ch across, turn.
4 (5, 6) sc (5 − 1 = 4, 6 − 1 = 5, 7 − 1 = 6 ✓).
Rows 2–12 (14, 16): Ch 1, sc in each st across, turn.
4 (5, 6) sc each row ✓.
Work 12 (14, 16) rows total ✓.
FO, leaving a 12" (30 cm) tail for sewing. Weave in the starting tail.
Check: Piece should measure about 1 × 2¾" (1¼ × 3", 1½ × 3½") / 2.5 × 7 cm (3 × 7.5 cm, 4 × 9 cm). Length is meant to overlap at the back after wrapping; if your cinch is very bulky, add 2 extra rows.
Finishing
1. Stack
Lay the Tails (if using) horizontally, RS facing you. Center the Bow Body on top of the tails, also RS up, so the long edges of both pieces run the same direction. The bow should sit in the middle of the tails, with a little tail showing on the left and right.
2. Cinch
Pinch the stack tightly at the horizontal center so the fabric gathers into bow loops. Using the long tail from the Bow Body, wrap tightly around the pinched center 8–12 times. Tie a firm square knot at the back. Do not cut this yarn yet if you plan to sew the clip on with it; otherwise weave it in.
Tip: The tighter the cinch, the more defined the loops. A loose cinch looks like a gathered rectangle rather than a bow.
3. Wrap the center
Place the Center Wrap over the front of the cinch, covering the wrapped yarn. Bring both short ends to the back, overlapping them about ¼–½" (0.5–1.5 cm). With the sewing tail, stitch the overlap closed through all layers. Weave in the remaining end.
The wrap should be snug. If it is loose, overlap more or stitch it down through the cinch.
4. Attach hardware
Alligator clip or barrette: Sew the clip to the back of the center wrap with matching yarn, stitching through the holes or around the clip spine several times. For a cleaner back, glue a small felt circle over the stitching (optional). Hot glue may be used instead of sewing; hold until set.
Hair elastic: Sew the center wrap to the elastic at the back with a few firm stitches so the bow sits on the outside of the band.
Nylon baby headband: Sew or glue the bow to the band at the center wrap only. Do not use clips on infants.
5. Shape
Gently tug each loop and each tail so they are even. Steam-block very lightly if the rectangles curl (hold an iron above the work; do not press flat or you will crush the loops).
Variations
- No tails: Make only the Bow Body and Center Wrap.
- Two-tone: Bow Body in Color A, Tails and/or Center Wrap in Color B.
- Button center: Sew a small button to the front of the Center Wrap after assembly.
- Pigtail pair: Make two matching Medium or Small bows.
- Larger statement bow: Use the Large numbers, or add 4 extra chains to the Bow Body and 2 extra rows for more height.
Troubleshooting
| Problem | Fix |
|---|---|
| Bow looks skinny / no loops | Cinch tighter; make sure you pinched the width (the long side) at its midpoint. |
| Center wrap will not meet | Add 2–4 rows to the wrap, or cinch a little slimmer. |
| Edges ripple | You may be adding a stitch at the turning chain. Skip the ch-1; first sc goes in the first sc. |
| Fabric is floppy | Go down a hook size and remake. Worsted + G-6 / 4.0 mm should feel sturdy. |
| Sides uneven after cinching | Tug the loops individually until they match, then stitch the wrap down so they stay. |
Wear, gift, or clip onto a wrapped present. One 100 g skein of worsted will make a whole set.
Disclaimer: This pattern was generated by AI and should be reviewed for accuracy before use. While we strive for quality, AI-generated content may contain errors. Please verify measurements, stitch counts, charts, and instructions before beginning your project. Generated by purlJam.uk
Love this pattern?
Save this pattern to your free PurlJam libraryAccess your pattern anytime
Bookmark this page to access your pattern anytime