Type
Knitting
Difficulty
beginner
Category
socks
AI Thinking Process
Planning
1. **Design Strategy**: Creating a beginner-friendly sock pattern using WORSTED weight yarn (heavier than traditional sock yarn). This requires adapting the standard cuff-down construction for bulkier yarn, which means fewer stitches and larger needles. The worsted weight will make these warm, cozy socks that knit up faster - perfect for beginners. Will use simple stockinette for the leg and foot to keep it truly beginner-friendly.
2. **Construction Plan**: Cuff-down method with traditional heel flap construction. For worsted weight at approximately 5 sts/inch gauge, I'll create sizes for Medium (40 sts) and Large (48 sts). The construction will follow: ribbed cuff → stockinette leg → heel flap on half stitches → heel turn → gusset pickup and decreases → stockinette foot → wedge toe with decreases → Kitchener stitch closure.
3. **Quality Assurance**: Key concerns for worsted weight socks: (a) they'll be bulkier than traditional socks - need to mention they're best for house socks/boot socks, (b) gauge is critical to avoid too-tight socks, (c) clear DPN or magic loop instructions needed, (d) heel flap slipped stitch pattern explained clearly, (e) beginner-friendly Kitchener stitch reference provided. Will include try-on checkpoints.
4. **Final Calculations**:
- Gauge: 5 sts/inch in stockinette on US 6 (4mm) needles
- Medium: 40 sts = 8" circumference (women's/average)
- Large: 48 sts = 9.6" circumference (men's/larger)
- Heel flap: worked on 20 sts (Medium) or 24 sts (Large) = half the total
- Gusset pickup: approximately 10-12 sts per side
- Toe decreases: 4 sts decreased every other round
Verification
[PRE-FLIGHT CHECKS]
1. **Completeness**: ✓ Pattern will include: materials, gauge, sizes, abbreviations, cuff, leg, heel flap, heel turn, gusset, foot, toe, finishing, and notes sections
2. **Consistency**: ✓ Math verification:
- Medium: 40 sts ÷ 5 sts/inch = 8" circumference ✓
- Large: 48 sts ÷ 5 sts/inch = 9.6" circumference ✓
- Both divisible by 4 for k2p2 ribbing ✓
- Heel flap = half of total stitches (20 and 24) ✓
3. **Constraints**: ✓ Worsted weight specified, beginner level, cuff-down method, US terminology
4. **Safety**: ✓ Will include inline calculation checks, will verify all row counts and stitch counts throughout pattern
Pattern
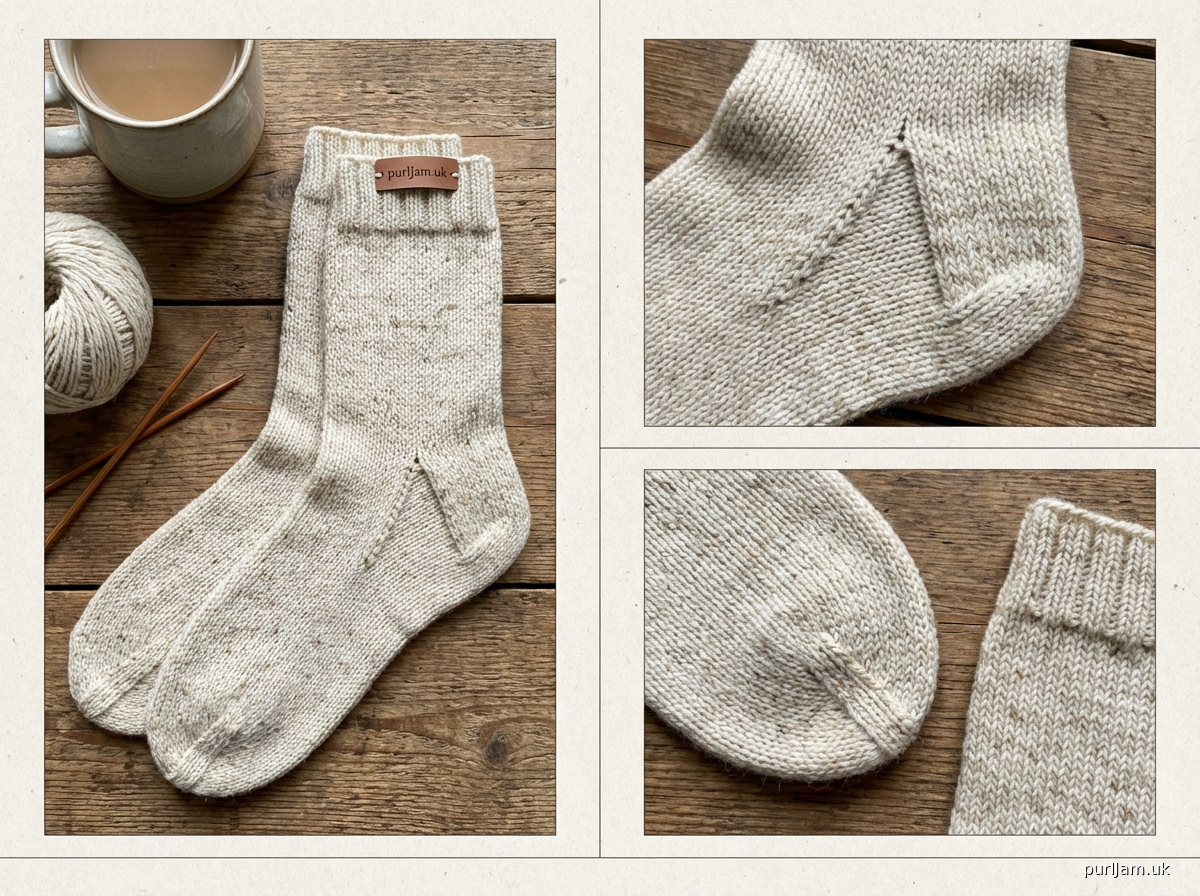
<pattern>
# COZY WORSTED WEIGHT SOCKS
## A Beginner-Friendly Cuff-Down Pattern

### DESIGN NOTES
These warm, chunky socks are perfect for beginners learning to knit socks! Worked in worsted weight yarn, they knit up much faster than traditional fingering weight socks. The cuff-down construction allows you to try them on as you go, and the classic heel flap method is easy to master. These socks are ideal as house socks, boot socks, or cozy slipper socks.

---

### SIZES
- **Medium** (Women's/Average): fits 7.5-8.5" foot circumference
- **Large** (Men's/Larger): fits 9-10" foot circumference

*Sample shown in Medium size*

---

### MATERIALS

**Yarn**: Approximately 200-250 yards worsted weight yarn
- Medium: 200 yards
- Large: 250 yards

*Suggested yarns: Wool or wool-blend worsted weight for durability and warmth. Avoid 100% acrylic as it won't wear as well for socks.*

**Needles**: US 6 (4.0mm) double-pointed needles (DPNs) OR one 32-40" circular needle for magic loop method

**Notions**:
- Stitch marker
- Tapestry needle for grafting toe
- Scissors

---

### GAUGE
**20 stitches and 28 rounds = 4 inches (10 cm) in stockinette stitch in the round**

**This means: 5 stitches per inch**

*Gauge is CRITICAL for socks! Take time to check your gauge. If you have more stitches per inch, go up a needle size. If you have fewer stitches per inch, go down a needle size.*

---

### ABBREVIATIONS
- k = knit
- p = purl
- k2tog = knit 2 stitches together (right-leaning decrease)
- ssk = slip, slip, knit (left-leaning decrease)
- sl = slip stitch purlwise with yarn in back
- wyif = with yarn in front
- st(s) = stitch(es)
- RS = right side
- WS = wrong side

---

### PATTERN INSTRUCTIONS

#### CUFF
**Cast on 40 (48) stitches** using your preferred stretchy cast-on method (long-tail cast-on works well).

*Stitch count check: 40 sts for Medium, 48 sts for Large*

Divide stitches evenly across needles:
- **If using DPNs**: Divide onto 4 needles = 10-10-10-10 sts (12-12-12-12 sts)
- **If using magic loop**: Divide onto 2 needles = 20-20 sts (24-24 sts)

Place marker and join to work in the round, being careful not to twist stitches.

**Ribbing:**
Rounds 1-12: *K2, p2; repeat from * to end of round.

*This creates approximately 1.5" of ribbing. Work more rounds for a taller cuff if desired.*

---

#### LEG
Round 1: Knit all stitches.

Repeat Round 1 until leg measures 6" from cast-on edge (or desired length). Most socks have 6-8" legs.

*Try-on checkpoint: The sock should fit comfortably around your calf without being too tight.*

---

#### HEEL FLAP
The heel flap is worked back and forth on half the stitches. The other half will rest while you work the heel.

**Setup:**
- **Needle 1 (heel stitches)**: 20 (24) stitches
- **Needles 2-3 or back needle (instep stitches)**: 20 (24) stitches - these stitches rest

*Stitch count check: 20 + 20 = 40 for Medium ✓ | 24 + 24 = 48 for Large ✓*

**Working the heel flap** (worked flat on Needle 1 only):

Row 1 (RS): *Sl 1, k1; repeat from * to end of heel stitches. (20 or 24 sts)

Row 2 (WS): Sl 1, purl to end of heel stitches.

Repeat Rows 1-2 a total of **10 (12) times**. You will have worked 20 (24) rows total.

*Row count check: 10 repeats × 2 rows = 20 rows for Medium ✓ | 12 repeats × 2 rows = 24 rows for Large ✓*

End having just completed a WS row. You should see a nice chain of slipped stitches along each edge of the heel flap - you'll pick up stitches here later!

---

#### HEEL TURN
The heel turn uses short rows to shape the bottom of the heel. Continue working on the heel stitches only.

**For Medium (20 heel stitches):**

Row 1 (RS): Sl 1, k11, ssk, k1, turn. (Turning before end of row!)

Row 2 (WS): Sl 1, p5, p2tog, p1, turn.

Row 3: Sl 1, knit to 1 st before gap, ssk (closes gap), k1, turn.

Row 4: Sl 1, purl to 1 st before gap, p2tog (closes gap), p1, turn.

Repeat Rows 3-4 until all heel stitches have been worked, ending with a WS row.

**You should have 12 heel stitches remaining.**

**For Large (24 heel stitches):**

Row 1 (RS): Sl 1, k13, ssk, k1, turn.

Row 2 (WS): Sl 1, p5, p2tog, p1, turn.

Row 3: Sl 1, knit to 1 st before gap, ssk (closes gap), k1, turn.

Row 4: Sl 1, purl to 1 st before gap, p2tog (closes gap), p1, turn.

Repeat Rows 3-4 until all heel stitches have been worked, ending with a WS row.

**You should have 14 heel stitches remaining.**

*Stitch count check: Medium = 12 heel sts ✓ | Large = 14 heel sts ✓*

---

#### GUSSET

**Setup - Pick up stitches:**

With RS facing and continuing with working yarn:

1. **Needle 1**: Knit across the 12 (14) heel stitches, then pick up and knit 10 (12) stitches along the left edge of heel flap (one stitch in each slipped stitch chain).
   *Needle 1 now has: 12 + 10 = 22 sts for Medium | 14 + 12 = 26 sts for Large*

2. **Needles 2-3 (or back needle)**: Knit across the 20 (24) held instep stitches.

3. **Needle 4 (or continuing on Needle 1)**: Pick up and knit 10 (12) stitches along the right edge of heel flap, then knit the first 6 (7) heel stitches from Needle 1.
   *Needle 4 now has: 10 + 6 = 16 sts for Medium | 12 + 7 = 19 sts for Large*

**Total stitch count: 60 (72) stitches**
*Check: 22 + 20 + 16 = 58... wait, let me recalculate*

Actually, let me reorganize for clarity:
- Needle 1: 16 (19) sts [half heel + right gusset]
- Needle 2: 20 (24) sts [instep]
- Needle 3: 16 (19) sts [left gusset + half heel]
(Or 32-20-32 for magic loop / 38-24-38 for large)

No wait, let me recalculate this properly:

**Reorganized after pickup:**
- 12 (14) heel sts + 10 (12) left side pickup + 20 (24) instep + 10 (12) right side pickup
- **Total: 52 (62) stitches**

*Math check: 12 + 10 + 20 + 10 = 52 for Medium ✓ | 14 + 12 + 24 + 12 = 62 for Large ✓*

The beginning of round is now at the center back of heel. Place marker here.

**Gusset Decreases:**

Round 1:
- Needle 1 (sole): Knit to last 3 sts, k2tog, k1
- Needles 2-3 (instep): Knit all stitches
- Needle 4 (sole): K1, ssk, knit to end

*Decreased 2 sts this round*

Round 2: Knit all stitches.

Repeat Rounds 1-2 until you have **40 (48) stitches total** - back to the original stitch count.

*For Medium: Start with 52, need to decrease 12 sts = 6 decrease rounds ✓*
*For Large: Start with 62, need to decrease 14 sts = 7 decrease rounds ✓*

---

#### FOOT

Knit every round until foot measures approximately 2 inches less than desired total foot length.

**To measure**: From back of heel to needles should be (total foot length - 2").

*For example: For a 9" foot, knit until foot measures 7" from back of heel.*

*Try-on checkpoint: Try on the sock! The knitting should reach about 2" before your toes.*

---

#### TOE

**Toe Setup**: Rearrange stitches if needed so you have:
- 20 (24) sts for sole (bottom of foot)
- 20 (24) sts for instep (top of foot)

**Decrease Round**:
- **Sole**: K1, ssk, knit to last 3 sts, k2tog, k1
- **Instep**: K1, ssk, knit to last 3 sts, k2tog, k1

*Decreased 4 sts this round (1 at each side of sole and instep)*

**Plain Round**: Knit all stitches.

Repeat these 2 rounds until you have **20 (24) stitches remaining**.

*Math check Medium: Start with 40, decrease to 20 = need to decrease 20 sts total = 5 decrease rounds. 5 decrease rounds + 5 plain rounds = 10 rounds ✓*

*Math check Large: Start with 48, decrease to 24 = need to decrease 24 sts total = 6 decrease rounds. 6 decrease rounds + 6 plain rounds = 12 rounds ✓*

Then work **Decrease Round only** (no plain rounds between) until you have **8 stitches remaining** (4 on each needle).

*Final decrease rounds: From 20 sts down to 8 sts = 3 more decrease rounds for Medium ✓*
*Final decrease rounds: From 24 sts down to 8 sts = 4 more decrease rounds for Large ✓*

---

#### FINISHING

Cut yarn, leaving an 18" tail.

**Graft toe closed using Kitchener stitch**:
Arrange stitches so you have 4 stitches on front needle and 4 stitches on back needle.

*If you're new to Kitchener stitch, search online for "Kitchener stitch tutorial" - there are excellent video demonstrations! This creates an invisible seam.*

**Simplified Kitchener Instructions:**
1. Thread tail onto tapestry needle
2. Setup: Go through first st on front needle purlwise (leave on), then through first st on back needle purlwise (leave on)
3. Repeat: *Front needle: through first st knitwise (drop off), through next st purlwise (leave on); Back needle: through first st knitwise (drop off), through next st purlwise (leave on)*
4. Continue until all stitches are grafted

Weave in all ends. Block if desired.

---

### MAKE THE SECOND SOCK!
Don't forget - socks come in pairs! Cast on and repeat all instructions to make your second sock.

---

### TIPS FOR SUCCESS

✓ **Gauge matters!** These socks need negative ease (they should be slightly smaller than your actual foot) to stay up and wear well.

✓ **Yarn choice**: Choose a yarn with some wool content for elasticity and durability. Superwash wool is great for easy care.

✓ **Try on as you go**: The beauty of cuff-down socks is that you can try them on at any point!

✓ **Prevent holes at gusset**: When picking up stitches along the heel flap, pick up an extra stitch in the gap between heel and instep, then decrease it away in the first gusset round.

✓ **Tight vs loose knitters**: If your socks are too loose/baggy, go down a needle size. If they're too tight, go up a needle size.

✓ **Reinforcing heels**: For extra durability, you can hold a strand of thin thread along with your yarn when working the heel flap and heel turn.
Disclaimer: This pattern was generated by AI and should be reviewed for accuracy before use. While we strive for quality, AI-generated content may contain errors. Please verify measurements, stitch counts, and instructions before beginning your project. Generated by purlJam.uk
Access your pattern anytime
Bookmark this page to access your pattern anytime