Type
Knitting
Difficulty
beginner
Category
mittens
AI Thinking Process
Planning
Verification
Pattern
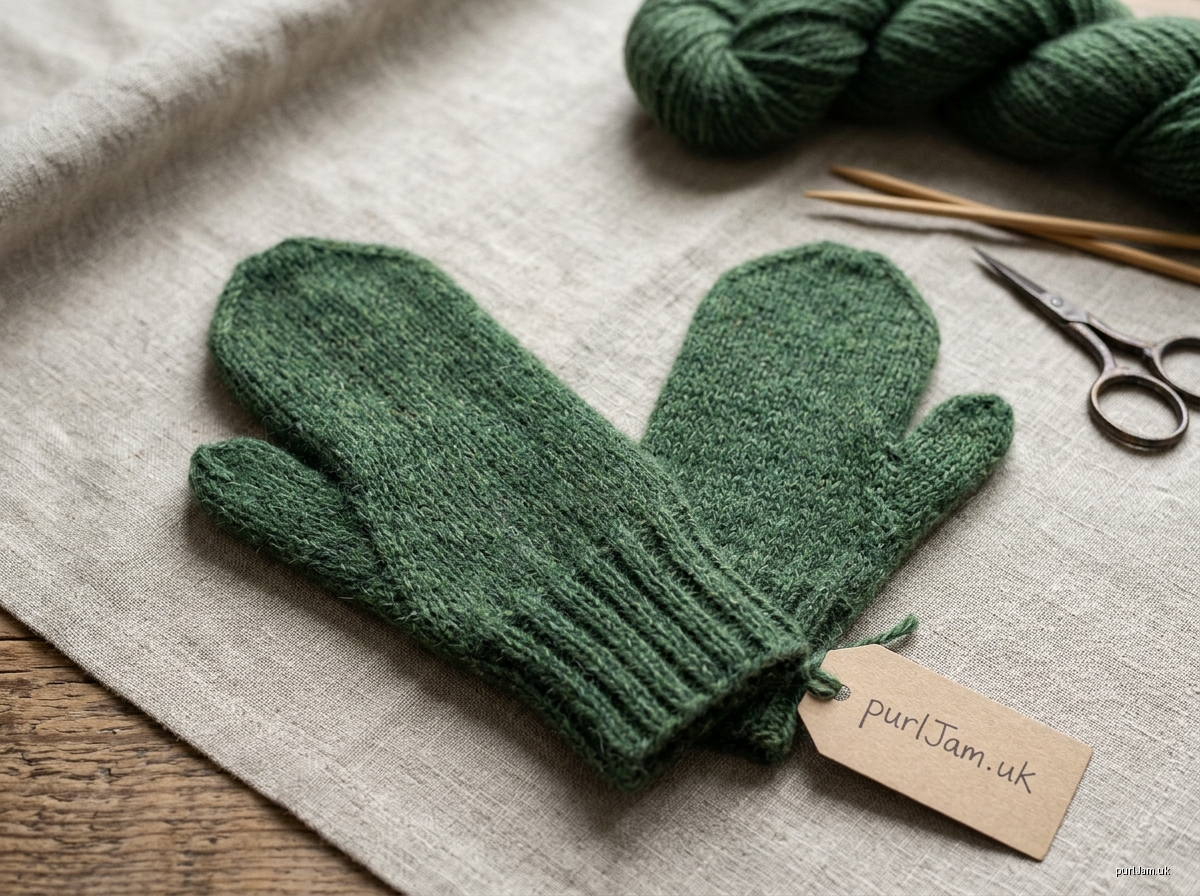
Easy Everyday Mittens
A cozy, classic mitten for beginners, worked in the round from the cuff up. It has a ribbed cuff, a shaped thumb gusset for a comfortable fit, and a neat rounded top.
Sizes
- Adult Small (Medium, Large)
- Fits hand circumference: 7 (8, 9) in [18 (20.5, 23) cm], measured around the knuckles
Finished hand circumference: 6.4 (7.2, 8) in [16 (18.5, 20.5) cm]. This gives a little negative ease, so the mitten fits snugly.
Finished length (cuff to tip): 9.5 (10.5, 11.5) in [24 (26.5, 29) cm]
Materials
- Yarn: Worsted weight, about 150 (180, 220) yds [137 (165, 201) m]. Wool or a wool blend is recommended.
- Needles:
- US 6 (4 mm) double-pointed needles (DPNs), or a 32 in circular needle for magic loop
- US 7 (4.5 mm) DPNs or a 32 in circular needle
- Notions:
- 3 stitch markers, one in a different color for the beginning of round (BOR)
- Scrap yarn for holding stitches
- Tapestry needle
Gauge
20 sts and 26 rnds = 4 in (10 cm) in stockinette stitch worked in the round on US 7 (4.5 mm) needles.
Check your gauge before you start. If you have more stitches per 4 in than this, try larger needles. If you have fewer, try smaller needles.
Abbreviations
- k: knit
- p: purl
- st(s): stitch(es)
- rnd(s): round(s)
- pm: place marker
- sm: slip marker
- BOR: beginning of round
- M1L: make 1 left. Insert the left needle from front to back under the strand between stitches, then knit it through the back loop (1 st increased).
- M1R: make 1 right. Insert the left needle from back to front under the strand between stitches, then knit it through the front loop (1 st increased).
- k2tog: knit 2 together (1 st decreased)
- ssk: slip, slip, knit. Slip 2 sts knitwise one at a time, then knit them together through the back loops (1 st decreased).
Instructions (make 2 alike)
Cuff
- With US 6 (4 mm) needles, cast on 32 (36, 40) sts using the long-tail cast on.
- Join to work in the round, taking care not to twist the stitches. Pm for BOR.
- Rib rnd: *K2, p2; repeat from * to end.
- Repeat the Rib rnd until the cuff measures 2.5 (3, 3) in [6.5 (7.5, 7.5) cm] from the cast-on edge.
(32 (36, 40) sts)
Hand to thumb gusset
- Change to US 7 (4.5 mm) needles.
- Knit 3 rnds.
(32 (36, 40) sts)
Thumb gusset
- Set-up rnd: K1, pm, M1R, k1, M1L, pm, k to end.
- 3 gusset sts are now between the markers.
- (34 (38, 42) sts)
- Rnds 1–2: K all sts, slipping markers.
- Increase rnd: K1, sm, M1R, k to marker, M1L, sm, k to end.
- This adds 2 sts.
- Repeat Rnds 1–2 and the Increase rnd 3 (3, 4) more times. That makes 4 (4, 5) Increase rnds in total.
- Gusset: 3 + 8 = 11 sts ✓ (S, M); 3 + 10 = 13 sts ✓ (L)
- (42 (46, 52) sts)
- Knit 2 rnds even.
Separate the thumb
- Next rnd: K1, remove marker.
- Slip the 11 (11, 13) gusset sts onto scrap yarn and remove the second marker.
- Using the backward-loop method, cast on 1 st over the gap.
- Knit to the end of the round.
- 42 − 11 + 1 = 32 ✓ (S); 46 − 11 + 1 = 36 ✓ (M); 52 − 13 + 1 = 40 ✓ (L)
- (32 (36, 40) sts)
Hand
- Knit every rnd until the hand measures 5.5 (6, 7) in [14 (15, 18) cm] from the end of the cuff ribbing.
- Check this against your hand: the mitten should reach the tip of your little finger.
(32 (36, 40) sts)
Top shaping
- Set-up rnd: K16 (18, 20), pm, k to end. The BOR and this marker mark the two sides of the mitten.
- Decrease rnd: *K1, ssk, k to 3 sts before marker, k2tog, k1, sm; repeat from * once more.
- This removes 4 sts.
- Even rnd: Knit.
- Work the Decrease rnd and Even rnd 2 (2, 3) more times.
- (20 (24, 24) sts)
- Then work the Decrease rnd every rnd 3 (4, 4) times.
- S: 20 − 12 = 8 ✓
- M: 24 − 16 = 8 ✓
- L: 24 − 16 = 8 ✓
- (8 sts)
- Cut the yarn, leaving a 6 in tail.
- Thread the tail through the remaining 8 sts, pull tight and fasten off on the inside.
Thumb
- Place the 11 (11, 13) held sts onto US 7 (4.5 mm) needles.
- Join the yarn and knit across them.
- Pick up and knit 2 sts across the cast-on gap: 1 st in each corner. Pm for BOR.
- (13 (13, 15) sts)
- Next rnd: K to the last 2 sts, k2tog. Then k the first st of the round together with the stitch before it as an ssk, and move the BOR marker so it sits after that stitch.
- Simpler method: k to the last 3 sts, k2tog, k1, then work the first 2 sts of the next round as ssk.
- Either method removes 2 sts.
- (11 (11, 13) sts)
- Knit every rnd until the thumb measures 2 (2.25, 2.5) in [5 (5.5, 6.5) cm] from the pick-up, or reaches the middle of your thumbnail.
- Decrease rnd: *K2tog; repeat from * to the last st, k1.
- (6 (6, 7) sts)
- Cut the yarn and thread the tail through the remaining sts. Pull tight and fasten off.
Finishing
- Use the yarn tails to close any small holes at the thumb corners.
- Weave in all ends on the wrong side.
- Make a second mitten exactly the same. The mittens are symmetrical, so they fit either hand.
- Wet block: soak the mittens, gently press out the water and lay them flat to dry at the measurements given above.
Beginner tips
- Count your stitches after every gusset Increase rnd. You should have 2 more sts each time.
- If ladders appear between your DPNs, pull the first stitch on each needle snug.
- Try the mitten on before you start the top shaping, and again before you finish the thumb.
Disclaimer: This pattern was generated by AI and should be reviewed for accuracy before use. While we strive for quality, AI-generated content may contain errors. Please verify measurements, stitch counts, charts, and instructions before beginning your project. Generated by purlJam.uk
Love this pattern?
Save this pattern to your free PurlJam libraryAccess your pattern anytime
Bookmark this page to access your pattern anytime