Type
Crochet
Difficulty
beginner
Category
amigurumi
AI Thinking Process
Planning
Verification
Pattern
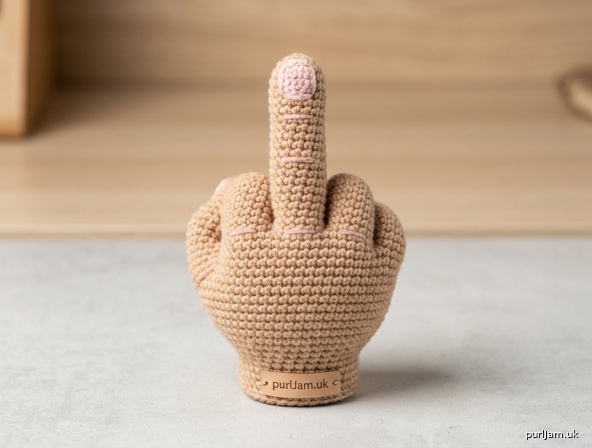
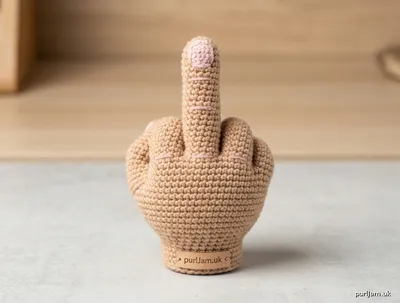
Flip the Bird (Middle Finger) Crochet Toy
Skill Level: Beginner
Finished Size: Approx. 4½" (11.5 cm) tall × 2½" (6.5 cm) wide
A cheeky desk toy or gag gift worked entirely in basic amigurumi shapes (cylinders + rounded fist). Only single crochet, increases, and decreases are used.
Materials
- Worsted weight (4) yarn:
– Main color (MC) skin tone: 40 yd (37 m)
– Optional Contrasting color (CC) for fingernail: 2 yd (2 m) - US E-4 (3.5 mm) crochet hook (or size needed for tight fabric)
- Polyester fiberfill
- Yarn needle
- Stitch marker
- Optional: small amount of pink or red embroidery floss for knuckle lines
Gauge
5 sc = 1" (2.5 cm) worked tightly in the round.
Exact gauge is not critical, but stitches must be dense so stuffing does not show. Finished middle finger should measure ~2½" (6.5 cm) long.
Abbreviations (US Terms)
- ch: chain
- sc: single crochet
- inc: 2 sc in same stitch
- dec: invisible decrease (sc2tog through front loops)
- st(s): stitch(es)
- rnd(s): round(s)
- MR: magic ring
- FO: fasten off
- [ ]: total stitch count after round
Notes
- Work continuously in a spiral unless stated. Mark first st of each rnd.
- Stuff firmly as you go—especially the middle finger—before the opening becomes too small.
- Use invisible decrease for a smooth surface.
- All pieces are worked in MC unless noted.
Pattern
Middle Finger (make 1)
Worked tip-down.
Rnd 1: 6 sc in MR. [6]
Rnd 2: inc in each st around. [12]
Rnds 3–12: sc in each st around. [12]
(12 rnds of 12 sts create a 2½" finger shaft ✓)
If adding a fingernail: at Rnd 3 only, switch to CC for 4 sc, then return to MC for remaining 8 sc; carry unused yarn inside.
Do not FO. Continue directly to fist.
Fist (continues from Middle Finger)
Rnd 13: (sc, inc) around. [18]
Rnd 14: (2 sc, inc) around. [24]
Rnd 15: (3 sc, inc) around. [30]
Rnds 16–20: sc in each st around. [30]
Stuff middle finger firmly now, then begin stuffing fist.
Rnd 21: (3 sc, dec) around. [24]
Rnd 22: (2 sc, dec) around. [18]
Rnd 23: (sc, dec) around. [12]
Finish stuffing solidly so fist feels firm and rounded.
Rnd 24: dec around. [6]
FO, leaving 8" tail. Thread tail through front loops of remaining 6 sts and pull tight to close. Weave in end.
Index Finger (make 1 – short curled)
Rnd 1: 6 sc in MR. [6]
Rnd 2: (sc, inc) around. [9]
Rnds 3–5: sc in each st around. [9]
Rnd 6: (sc, dec) around. [6]
Stuff lightly. FO, leaving long tail for sewing. Do not close hole fully—leave open for attachment.
Ring Finger (make 1)
Identical to Index Finger.
Pinky (make 1)
Rnd 1: 5 sc in MR. [5]
Rnd 2: inc in each st around. [10] wait—adjust for beginner simplicity:
Rnd 1: 6 sc in MR. [6]
Rnds 2–4: sc in each st around. [6]
Rnd 5: (sc, dec) around. [4]
Stuff lightly. FO with long tail.
Thumb (make 1)
Rnd 1: 6 sc in MR. [6]
Rnd 2: (sc, inc) around. [9]
Rnds 3–4: sc in each st around. [9]
Rnd 5: (sc, dec) around. [6]
Stuff lightly. FO with long tail.
Assembly
-
Pose the fingers:
– Middle finger is already attached and stands straight up from top center of fist.
– Pin Index, Ring, and Pinky along the top front edge of the fist so they curl downward/forward (tips point toward palm side). Space them evenly on either side of the middle finger base.
– Pin Thumb on the side of the fist at a natural angle, tip pointing slightly upward and inward. -
Sew: Using yarn tails and yarn needle, whip-stitch each open base securely to the fist. Work through both layers of the finger opening and deep into the fist fabric so digits cannot pull free. Weave in all ends.
-
Optional details:
– With 2 strands of matching or darker yarn, make 2–3 tiny horizontal stitches across the back of each knuckle for definition.
– Embroider a simple curved smile or leave blank for pure gesture.
– Add a tiny CC oval on the middle-finger tip if fingernail was not crocheted in.
Finishing
- Roll the fist gently between your hands to round it.
- Ensure middle finger is perfectly vertical; restitch base if needed.
- Weave in any remaining ends.
- Optional keychain: attach a jump ring through a st at the base of the middle finger.
Your Flip the Bird toy is ready to stand proudly on a desk or gift box. Stuffing is locked inside tight stitches, and the simple cylinder construction keeps the project fully beginner-friendly while delivering an unmistakable gesture.
Disclaimer: This pattern was generated by AI and should be reviewed for accuracy before use. While we strive for quality, AI-generated content may contain errors. Please verify measurements, stitch counts, charts, and instructions before beginning your project. Generated by purlJam.uk
Love this pattern?
Save this pattern to your free PurlJam libraryAccess your pattern anytime
Bookmark this page to access your pattern anytime