Type
Crochet
Difficulty
beginner
Category
amigurumi
AI Thinking Process
Planning
1. **Design Strategy**: A small seamless amigurumi whale worked in UK dc (US sc) using worsted yarn for a chunky keychain. Body is a modified sphere/oval flattened slightly, with a separate tail fin and small fins, plus an embroidered/safety-eye face and a spout accent. Keychain size kept to max 18 sts.
2. **Construction Plan**: Body worked seamlessly in continuous rounds from a magic ring, stuffed and closed; tail and fins made separately and sewn on; keyring finding attached at top.
3. **Quality Assurance**:
- Keep tension tight so stuffing doesn't show through.
- Track round starts with a stitch marker (continuous spiral).
- Pin tail/fins symmetrically before sewing.
4. **Final Calculations**: Tension 4 cm hook (UK), ~4 sts/2.5 cm in dc. Body max 18 sts → ~5–6 cm finished. Body rounds: 6→12→18, four straight rounds, 18→12→6 close. Tail: small triangle pair. Fins: 6-dc flat ovals ×2.
Verification
[PRE-FLIGHT CHECKS]
1. **Completeness**: Includes materials, tension, abbreviations (UK), body, tail, fins, spout, assembly, finishing — all template sections covered for a simple-shape toy.
2. **Consistency**: Body 6→12→18, 4 even rounds, 18→12→6 = symmetrical sphere; counts verified inline. Keychain ≤18 sts per template size guidance. ✓
3. **Constraints**: UK terminology (dc/tr), metric-first, worsted yarn, easy difficulty, keychain finding added per "keychain plush" common request. ✓
4. **Safety**: Decrease math: 18=(sc,dec)×6→12; 12=dec×6→6. Stitch counts close cleanly. ✓
Pattern
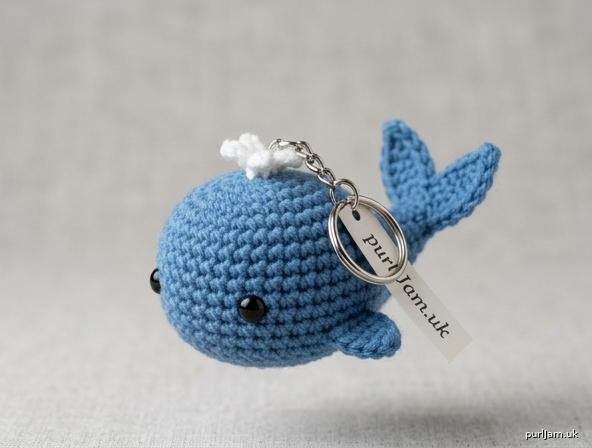
# Mini Whale Keychain 🐋

A quick, beginner-friendly amigurumi whale worked seamlessly in the round. Finished size approximately **5–6 cm** long — the perfect handheld keyring buddy.

**Difficulty:** Easy
**Terminology:** UK crochet terms throughout (UK dc = US sc; UK tr = US dc)

---

## Materials

- **Worsted (Aran/weight 4) yarn:**
  - Main colour (MC): blue or grey – small amount (~15 g)
  - White: tiny amount for belly/spout (optional)
- **Crochet hook:** 3.5 mm (UK) — going down from the ball-band recommendation for a tight amigurumi fabric
- **Polyester fibrefill** stuffing
- **Yarn needle** for assembly
- **Stitch marker** (to mark round beginnings)
- **6 mm safety eyes** (×2), OR black embroidery thread for embroidered eyes
- **Keyring finding** (split ring + short chain or lobster clasp)

---

## Tension (Gauge)

Tension is not critical for a keychain, but aim for a firm, tight fabric:
**Approx. 4 dc and 4 rounds = 2.5 cm** in dc worked in a spiral.
Work tightly so the stuffing does not peek through.

---

## Abbreviations (UK)

| Abbrev. | Meaning |
|---------|---------|
| dc | double crochet (US sc) |
| inc | increase (2 dc in same st) |
| dec | invisible decrease (2 sts together) |
| st(s) | stitch(es) |
| MR | magic ring |
| rnd | round |
| ( ) x n | repeat sequence n times |
| [ ] | total stitch count at end of round |

**Note:** Work in a continuous spiral (do not join or turn) unless told otherwise. Move your stitch marker up at the start of each round.

---

## BODY (make 1, in MC)

> Construction: a small sphere shaped exactly per the template, stuffed firmly.

- **Rnd 1:** 6 dc in MR **[6]**
- **Rnd 2:** inc in each st around **[12]**
  *(6 × 2 = 12 ✓)*
- **Rnd 3:** (dc, inc) around **[18]**
  *(6 × 3 = 18 ✓)*
- **Rnd 4:** dc around **[18]**
- **Rnd 5:** dc around **[18]**
- **Rnd 6:** dc around **[18]**
- **Rnd 7:** dc around **[18]**

*Insert safety eyes between Rnds 5–6, about 4 sts apart, before closing. If embroidering eyes, do so after stuffing.*

- **Rnd 8:** (dc, dec) around **[12]**
  *(18 → 12: 6 dc + 6 dec-pairs accounts for 6 + 12 = 18 sts in → 12 sts out ✓)*

**Stuff the body firmly now.**

- **Rnd 9:** dec around **[6]**
  *(12 → 6 ✓)*

Fasten off, leaving a tail. Using the yarn needle, weave through the front loops of the remaining 6 sts and pull tight to close the hole. Weave in the end.

---

## TAIL FIN (make 1, in MC)

The tail is a small flat double-triangle (the whale's fluke).

- **Ch 4.**
- **Row 1:** Starting in 2nd ch from hook, dc in each ch across, turn **[3]**
- **Row 2:** inc, dc, inc, turn **[5]**
  *(adds 2 sts: 3 + 2 = 5 ✓)*
- **Row 3:** dc across **[5]**
- **Row 4 (split the fluke):** dc, dc, then ch 2, turn — work back: dc in 2 sts to form first point. Fasten off.
- Rejoin yarn to remaining 2 sts, ch 2, dc back across to form the second point. Fasten off.

*If you prefer a simpler tail:* make a small triangle by working **Ch 4, Row 1: 3 dc, Row 2: dec, dc [2], Row 3: dec [1]** and fasten off — then pinch into a "V" shape when sewing. Both methods read as a whale tail at this size.

Leave a long tail for sewing.

---

## SIDE FINS (make 2, in MC)

Small flat ovals.

- **Ch 3.**
- **Row 1:** Starting in 2nd ch from hook, 2 dc in next ch, 3 dc in last ch — do not turn, work along opposite side: dc to end **[6]**

Fasten off, leaving a tail for sewing. They should curl slightly into a fin shape naturally.

---

## SPOUT (optional, in white)

For a cute water-spout detail:
- **Ch 5**, fasten off, leaving long tails at both ends.
- Fold into a small loop/cluster to sit on top of the head.

Alternatively, embroider 2–3 short white straight stitches on top of the head.

---

## ASSEMBLY

1. **Orient the body:** the closed hole (Rnd 9) becomes the **rear**; the rounded MR end becomes the **face/front**.
2. **Eyes:** If not using safety eyes, embroider two small French knots or satin-stitch dots near the front, about 4 sts apart.
3. **Mouth (optional):** Embroider a small curved line below the eyes with a single strand of black thread.
4. **Tail fin:** Pin the tail fin to the rear (closed end), centred. Sew firmly with the yarn needle, fanning the two points upward into a "V". Weave in ends.
5. **Side fins:** Pin one fin to each side of the body, roughly level with the eyes and slightly lower. Sew in place. Weave in ends.
6. **Spout:** Attach the white loop/cluster to the top-front of the head, just behind the face. Secure and weave in.
7. **Keyring:** Thread the keyring finding's split ring through 2–3 stitches at the **top** of the body (between the face and tail). For extra security, stitch a short loop of MC yarn through the body, pass the ring through it, and knot firmly on the inside before closing — or attach now with several tight passes of the needle. Weave in all ends.

---

## Construction Tips

- **Stuff firmly** before the final decrease round — it is very hard to add stuffing later through a 6 mm hole.
- **Use the invisible decrease** (work into front loops only of the next 2 sts) for a smooth surface.
- **Pin before sewing** so the fins sit symmetrically — check from the front and top.
- **Keyring strength:** anchor the ring through several stitches, not just one, so it holds up to daily use.

---

## Size Adjustments

- **Slightly larger whale (~7–8 cm):** add Rnd 3.5: (2 dc, inc) around **[24]**, work 5–6 even rounds, then mirror the decreases (24 → 18 → 12 → 6).
- **Even tinier (~4 cm):** use DK yarn and a 3.0 mm hook with the same instructions.

---

### Stitch-Count Validation Summary
- Body increases: 6 → 12 → 18 ✓
- Even body rounds (4): all **[18]** ✓
- Body decreases: 18 → 12 → 6 ✓ (closes cleanly)
- Tail: 3 → 5 sts, split into two points ✓
- Side fins: 6-st flat ovals ×2 ✓

Enjoy your little whale! 🐋
Disclaimer: This pattern was generated by AI and should be reviewed for accuracy before use. While we strive for quality, AI-generated content may contain errors. Please verify measurements, stitch counts, and instructions before beginning your project. Generated by purlJam.uk
Access your pattern anytime
Bookmark this page to access your pattern anytime