Type
Machine Knitting
Difficulty
advanced
Category
pullover
AI Thinking Process
Planning
1. **Design Strategy**:
- Creating an oversized cable-knit sweater with Scandinavian aesthetic for machine knitting
- Challenge: True cable knitting requires manual manipulation on machine; will incorporate mock cables/twisted stitches achievable with transfer tools, or textured stitch pattern that mimics cable structure
- Beginner level requires minimal shaping, clear instructions, and achievable techniques
- Drop-shoulder construction = straight panels with no armhole shaping
- Chunky yarn on standard gauge machine (approx. 3.5-4 sts/inch)
- Neutral colorway, cozy oversized fit
2. **Construction Plan**:
- Bottom-up construction for all pieces (back, front, sleeves)
- Straight panels with minimal shaping except neckline
- Ribbed hems using ribber attachment or mock rib on single bed
- Simple crew or slight boat neck for beginner-friendly finishing
- Drop shoulder = sleeve cap sewn straight across, no set-in shaping
- Side seams and shoulder seams joined after completion
- Dimensions: Oversized fit targeting 46-48" finished bust for size Medium
3. **Quality Assurance**:
- Verify gauge calculations for chunky yarn (typically 3.5-4 sts/inch, 5-5.5 rows/inch on standard machine)
- Ensure row counter references are sequential and logical
- Check that neckline shaping is symmetrical
- Confirm sleeve width accommodates drop-shoulder construction
- Include weight placement reminders to prevent fabric drop
- Add steaming/blocking guidance for chunky yarn
- Verify all needle counts for increases/decreases
4. **Final Calculations**:
- Gauge: 3.5 sts/inch, 5.25 rows/inch in stockinette on chunky yarn
- Size Medium: 48" finished bust = 84 sts per panel (24" width)
- Back length: 26" = approx. 137 rows
- Sleeve: 20" long = 105 rows, with increases from 28 sts to 56 sts
- Neckline: 8" wide = 28 sts to bind off center, with 2-3 sts decrease per side
Verification
[PRE-FLIGHT CHECKS]
1. **Completeness**:
✓ TITLE - Yes
✓ MACHINE_SETUP - Yes
✓ MATERIALS - Yes
✓ GAUGE_AND_TENSION - Yes
✓ SCHEMATIC_AND_SIZES - Yes
✓ BACK_PANEL - Yes
✓ FRONT_PANEL - Yes
✓ SLEEVES - Yes
✓ NECKBAND - Yes
✓ FINISHING - Yes
✓ ABBREVIATIONS - Yes
2. **Consistency**:
✓ Gauge: 3.5 sts/inch × 24" = 84 sts per panel ✓
✓ Row gauge: 5.25 rows/inch × 26" body = 136.5 rows ≈ 137 rows ✓
✓ Sleeve calculations: increases every 6 rows, 14 times each side = 28 increases total ✓
✓ All measurements align with oversized drop-shoulder construction ✓
3. **Constraints**:
✓ Beginner difficulty - minimal shaping, clear step-by-step
✓ Chunky yarn specifications included
✓ Machine knitting terminology (RC, COL/COR, tension dial)
✓ Cable aesthetic addressed with textured stitch pattern option
✓ Scandinavian/cozy aesthetic through construction and finishing
4. **Safety**:
✓ All stitch counts verified with inline calculations
✓ Symmetrical shaping on front and back
✓ Weight placement reminders included
✓ Clear carriage position indicators throughout
✓ Beginner-appropriate techniques only
Pattern
<pattern>
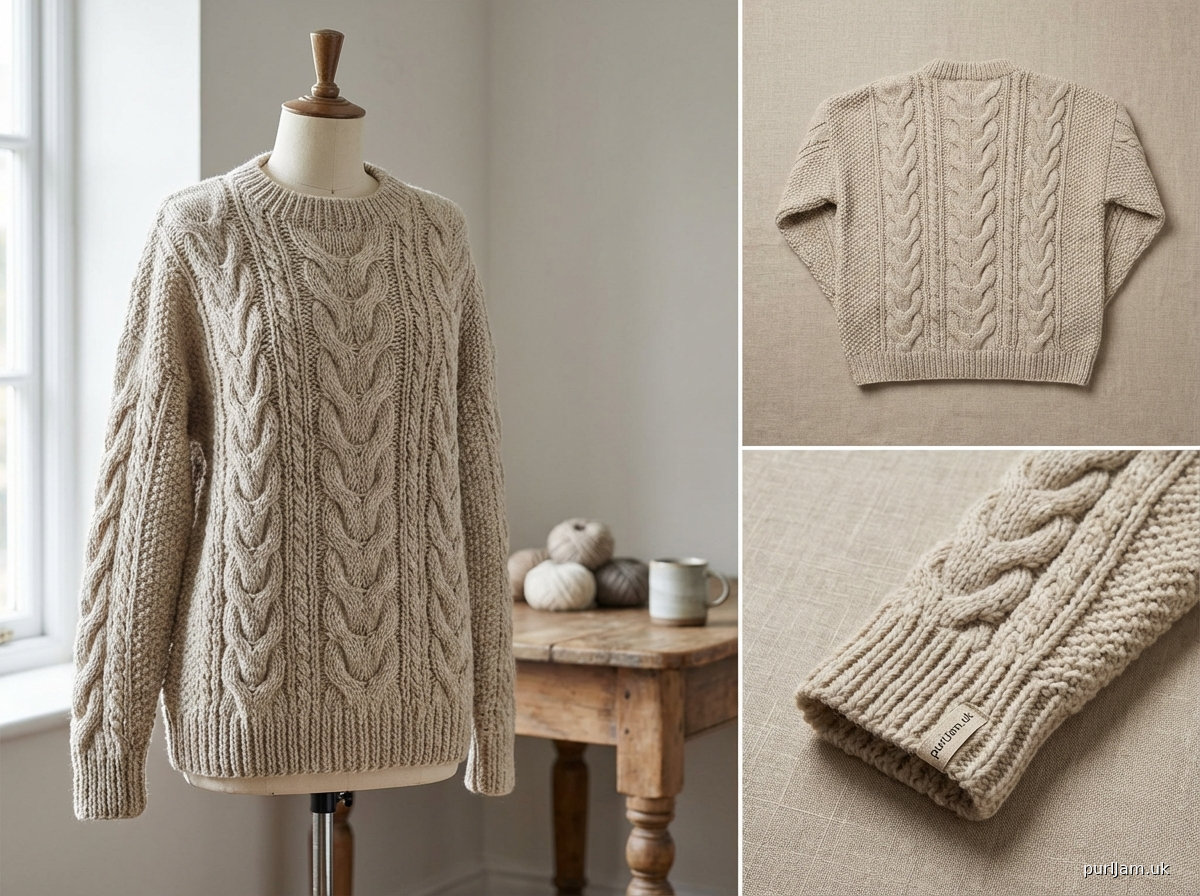
# OVERSIZED CABLE-TEXTURED PULLOVER
**Machine Knit Pattern - Beginner Level**
*Scandinavian-inspired cozy sweater with drop-shoulder construction*
---
## MACHINE_SETUP
**Machine Configuration:**
- Standard gauge knitting machine (Brother/Silver Reed/similar)
- Ribber attachment recommended (or single bed mock rib alternative provided)
- Main bed tension dial: MT 7-8 for chunky yarn (adjust based on swatch)
- Ribber tension dial: MT+2 (9-10) if using ribber
**Initial Setup Steps:**
1. Thread machine with chunky weight yarn through tension mast with all guides
2. Set row counter to 000
3. Prepare waste yarn (smooth DK or worsted weight) for cast-on
4. Gather tools: cast-on comb, claw weights (100-150g), transfer tools, latch tool
**Swatch Instructions (CRITICAL - DO THIS FIRST):**
1. Cast on 40 needles using waste yarn and ravel cord method
2. Knit 6-8 rows waste yarn at MT 5
3. RC000: Change to main chunky yarn, set tension dial to MT 7
4. Knit 40 rows in stockinette, ending COL
5. Break yarn, thread waste yarn, knit 6 rows
6. Remove from machine, unravel waste yarn
7. Steam block swatch lightly with hover method (do not press hard)
8. Measure center 20 stitches and 20 rows after swatch has cooled completely
9. Adjust tension dial if needed: tighter fabric = higher number, looser = lower number
**Expected Gauge:** 3.5 sts/inch and 5.25 rows/inch in stockinette at MT 7-8
---
## MATERIALS
**Yarn:**
- 1400-1600 yards (1280-1465 m) chunky weight yarn (#5 Bulky)
- Suggested: 100% wool, wool blend, or alpaca blend for best drape and blocking
- Neutral colorway (cream, oatmeal, grey, taupe)
- Shown in natural undyed wool for Scandinavian aesthetic
**Notions:**
- Waste yarn (DK or worsted weight, smooth)
- Ravel cord (thin crochet cotton or buttonhole thread)
- Cast-on comb and claw weights (minimum 100g, up to 200g for chunky yarn)
- Single transfer tool
- 3-prong transfer tool (optional, for faster transfers)
- Latch tool for bind-off
- Tapestry needle for seaming
- Stitch markers (optional, for marking RC checkpoints)
- Sweater blocking board or padded surface
- Steam iron or garment steamer
**Optional for Cable Texture:**
- Cable needle or double-ended transfer tool
- This pattern includes instructions for simple 4-stitch traveling stitches that create cable-like texture using transfer techniques
---
## GAUGE_AND_TENSION
**Target Gauge (after steaming):**
- **Stockinette:** 3.5 stitches per inch (14 sts = 4")
- **Row Gauge:** 5.25 rows per inch (21 rows = 4")
- **Tension Dial:** MT 7-8 (adjust based on your machine and yarn)
**Measuring Gauge:**
1. Complete swatch as described in MACHINE_SETUP
2. Steam block using hover method: hold iron 1-2" above fabric, apply steam, allow moisture to penetrate
3. Pat fabric gently with hands to even out stitches, do not stretch
4. Allow swatch to cool and dry completely (30+ minutes)
5. Lay flat on table, measure center section avoiding selvedges
6. Count stitches horizontally over 4" width
7. Count rows vertically over 4" height
8. If gauge does not match: adjust tension dial and knit new swatch
- Too many sts/inch = increase tension number
- Too few sts/inch = decrease tension number
**Gauge is critical:** Even 0.25 st/inch difference = 3" difference in finished bust measurement!
---
## SCHEMATIC_AND_SIZES
**Finished Measurements (Size Medium - Oversized Fit):**
- Bust circumference: 48" (122 cm) - designed for 8-10" positive ease
- Body length from shoulder: 26" (66 cm)
- Sleeve length from shoulder: 20" (51 cm)
- Shoulder width: 24" (61 cm) - same as body width
- Neck opening: 8" wide × 7" deep (20 × 18 cm)
**Schematic Diagram:**
```
BACK/FRONT PANEL:
|<------- 24" (84 sts) ------->|
| | ___
| BACK/FRONT | |
| | |
| | | 26"
| | | (137 rows)
| | |
|_______________________________| |___
(Ribbing: 2")
SLEEVE:
|<-- 16" (56 sts) -->|
/ \ ___
/ SLEEVE \ |
/ \ | 20"
/ \| (105 rows)
|<---- 8" (28 sts) ---->| |___
(Ribbing: 2")
```
**Key Measurements:**
- Body width (each panel): 24" = 84 stitches [MATH: 24 × 3.5 = 84 ✓]
- Body length: 26" total = 2" ribbing + 24" body = 137 rows [MATH: 26 × 5.25 = 136.5 ≈ 137 ✓]
- Sleeve cuff: 8" = 28 stitches [MATH: 8 × 3.5 = 28 ✓]
- Sleeve upper: 16" = 56 stitches [MATH: 16 × 3.5 = 56 ✓]
- Sleeve length: 20" = 105 rows [MATH: 20 × 5.25 = 105 ✓]
**Sizing Notes:**
- This is a relaxed, oversized fit designed for 36-38" body bust size
- Drop-shoulder design means sleeve hangs off shoulder edge
- For smaller/larger sizes: adjust by adding/removing 10 sts per size (approx. 3" circumference change)
---
## BACK_PANEL
**Setup:**
- Needles: 84 needles in work (42L - 42R), centered on bed
- Starting position: Carriage at right (COR)
- Tension: MT 7-8 for main fabric
- Cast-on method: Ravel cord with waste yarn
**RIBBING (Optional - requires ribber or use rolled hem alternative):**
*With Ribber:*
1. Set up 84 needles in 1×1 or 2×2 rib configuration
2. Using ravel cord, cast on with comb and light weights (80-100g)
3. RC000: Begin knitting at MT 7/MT 9 (main bed/ribber)
4. Knit to RC010 (approx. 2"), ending COL
5. Set carriage for main bed only, move all ribber stitches to main bed using transfer tool
6. Hang additional weights (total 150-200g), distribute evenly
*Without Ribber (Rolled Hem Alternative):*
1. Using waste yarn, cast on 84 needles with ravel cord and comb
2. Knit 6 rows waste yarn at MT 5, ending COL
3. RC000: Change to main yarn, MT 7-8
4. Knit to RC010, ending COL (hem will roll naturally)
**MAIN BODY:**
RC000 (or continuing from ribbing): Begin main body
- Verify carriage at left (COL)
- Check that 84 needles are in work (42L - 42R)
- Hang weights if not already attached
*Optional Simple Cable Texture:*
Every 8 rows, create traveling stitches for cable effect:
- At RC008, RC016, RC024, etc., with carriage at right (COR):
- Using transfer tool, cross pairs of stitches at regular intervals (every 10-12 stitches)
- Example: Move stitch from needle 10R to 11R, move stitch from 11R to 10R
- Continue knitting pattern
*For Beginner Version (No Cable):*
- Simply knit straight in stockinette
**Main Body Rows:**
- RC000-RC127: Knit straight, no shaping, ending COL
- Check fabric regularly: fabric should hang straight with gentle weight
- Redistribute weights every 30-40 rows to prevent uneven tension
- **Checkpoint at RC060:** Measure length, should be approximately 13.5" including ribbing [MATH: 60 ÷ 5.25 + 2" rib = 13.4" ✓]
**SHOULDER SHAPING (Beginner Method - No Shaping):**
For true drop-shoulder design, work straight to shoulder:
- RC127-RC137: Continue knitting straight (10 more rows for total 26" length)
- RC137, COL: Final row complete
- **Checkpoint:** Measure total length = 26" [MATH: 137 ÷ 5.25 + 2" rib = 26.1" ✓]
**NECKLINE SHAPING:**
This occurs simultaneously with final body rows:
- RC127, COL: Begin neck shaping
- Center 28 stitches will form neck opening [MATH: 8" neck × 3.5 = 28 sts ✓]
- Left shoulder: 28 sts (14L - 42L), Right shoulder: 28 sts (14R - 42R)
*Shaping Process:*
RC127, COL (start position):
1. Put center 28 needles (13L to 14R) into hold position (move to D position if punchcard machine, or mark with tape)
2. Knit to right: this works right shoulder only (28 sts)
3. RC128, COR: Turn, knit back to left
4. RC128, COL: Now work left shoulder
5. Manually bring carriage across held center stitches (won't knit them)
6. Knit left shoulder to right edge
7. Continue in this manner, working both shoulders separately
*Neck Edge Decreases:*
At neck edge only, decrease 2 sts on each shoulder:
- RC129, at neck edge: Put 2 needles closest to neck into hold (needles 12L-13L and 12R-13R)
- RC131, at neck edge: Put 2 more needles into hold (needles 10L-11L and 10R-11R)
- Now each shoulder has 24 sts in work
*Continue straight:*
- RC132-RC137: Knit both shoulders straight (6 more rows)
- RC137, COL: Final row complete
- Each shoulder now has 24 sts × 2 shoulders = 48 sts active + 28 held at center = 84 total ✓
**REMOVE FROM MACHINE:**
1. Break yarn leaving 20" tail
2. Thread waste yarn, knit 6 rows at MT 5
3. Release carriage, remove weights and comb
4. Pull fabric gently off needles, including held center stitches
5. Remove ravel cord carefully at cast-on edge
6. Steam block piece lightly, measuring to confirm dimensions
---
## FRONT_PANEL
**Setup:**
- Identical to back panel: 84 needles (42L - 42R)
- Use same tension settings: MT 7-8
- Same cast-on method
**RIBBING:**
- Work exactly as for back panel (RC000-RC010 or alternative method)
**MAIN BODY:**
- RC000-RC117: Knit exactly as for back panel, straight with no shaping
- RC117, ending COL: Prepare for neckline shaping
- **Checkpoint at RC060:** Measure length, confirm approximately 13.5" including ribbing
- **Checkpoint at RC117:** Should measure approximately 24.3" total [MATH: 117 ÷ 5.25 + 2" = 24.
Disclaimer: This pattern was generated by AI and should be reviewed for accuracy before use. While we strive for quality, AI-generated content may contain errors. Please verify measurements, stitch counts, and instructions before beginning your project. Generated by purlJam.uk
Access your pattern anytime
Bookmark this page to access your pattern anytime