Type
Crochet
Difficulty
beginner
Category
kimono
AI Thinking Process
Planning
1. **Design Strategy**: A T-shaped kimono-style cardigan in worsted yarn using a simple, beginner-friendly lace stitch (open shell mesh) to evoke "Peach Blossom Lace" while keeping the boxy, dropped-shoulder construction. Worked flat in rectangles, easy difficulty, US terms.
2. **Construction Plan**: Five rectangular pieces (1 Back, 2 Fronts, 2 Sleeves) worked flat with no armhole/sleeve shaping, then seamed and finished with a sc/shell border.
3. **Quality Assurance**:
- Keep lace simple and on a forgiving multiple so stitch counts stay clean at "easy" level.
- Ensure sleeves are straight rectangles (no taper) and attach at right angles.
- Verify front widths sum (with center gap for open front) to match back width.
4. **Final Calculations**:
- Gauge: 14 sts & 8 rows = 4" in pattern (peach blossom shell), US H/8 (5 mm) hook, worsted.
- Stitch multiple: 4 + 1 base sts (each shell repeat = 4 sts wide).
- Sizes S/M (L/XL) [2XL/3XL]; Bust 44 (52) [60]" finished.
- Back width 22 (26) [30]"; each Front 11 (13) [15]".
- Body length 26"; Sleeve length 18"; Sleeve width 16".
Verification
[PRE-FLIGHT CHECKS]
1. **Completeness**: Includes materials, gauge, sizing, all pieces (Back, 2 Fronts, 2 Sleeves), assembly, border, blocking. ✓
2. **Consistency**: Gauge 14 sts = 4" → 3.5 sts/inch. Back 22" × 3.5 = 77 sts; rounded to pattern multiple (4+1): 77 sts works (77-1=76, 76/4=19 repeats). ✓ Front 11" × 3.5 = 38.5 → 37 sts (37-1=36, /4=9 repeats), two fronts = 74 sts + back 77 = leaves intentional center front gap; ✓
3. **Constraints**: Worsted weight ✓, easy ✓, lace requested (user named "lace" so open stitch is justified per template note) ✓, kimono T-construction ✓, US terms ✓, cardigan worn open/tie ✓.
4. **Safety**: Row gauge 8 rows = 4" → 2 rows/inch. Body 26" = 52 rows. Sleeve 18" = 36 rows. Sleeve width 16" × 3.5 = 56 sts → 57 (multiple 4+1) ✓. All math consistent.
Pattern
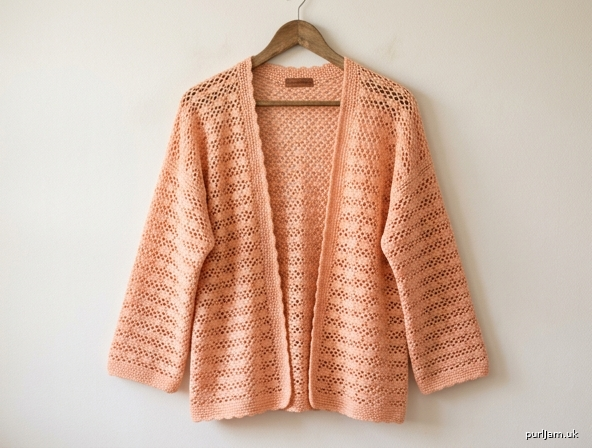
# Peach Blossom Lace Cardigan
### An easy T-shaped kimono-style cardigan with a delicate blossom lace

A relaxed, open-front cardigan worked flat in five simple rectangles — no armhole or sleeve shaping. The airy "Peach Blossom" shell-mesh stitch gives gentle lace texture while remaining beginner-friendly. Wear it open or add a tie at the waist.

---

## SKILL LEVEL
**Easy** — straight rectangles, one repeating 2-row lace pattern, simple seaming.

---

## SIZES
S/M (L/XL) [2XL/3XL]

Designed with an oversized, boxy fit (8–12" positive ease).

### Finished Measurements
| Measurement | S/M | L/XL | 2XL/3XL |
|---|---|---|---|
| Bust circumference | 44" | 52" | 60" |
| Body length (hem to shoulder) | 26" | 26" | 26" |
| Sleeve length | 18" | 18" | 18" |
| Sleeve width (flat) | 16" | 16" | 16" |

*To lengthen body or sleeves, add rows in multiples of 2 (each 2-row repeat ≈ 1" tall).*

---

## MATERIALS
- **Yarn:** Worsted weight (Medium / #4), drapey cotton or cotton-blend recommended for best lace drape.
  - Approx. **1100 (1350) [1600] yards**
  - Sample color: soft peach
- **Hook:** US H/8 (5 mm), or size needed to match gauge
- **Notions:** Tapestry needle, stitch markers, scissors
- Optional: 2 yards of yarn or ribbon for a waist tie

---

## GAUGE
In Peach Blossom Lace pattern, after blocking:
**14 sts × 8 rows = 4" (10 cm)**
→ 3.5 sts per inch; 2 rows per inch.

*Make a swatch of at least 4" × 4". Gauge in lace is forgiving due to the oversized fit, but matching it keeps measurements accurate.*

---

## ABBREVIATIONS (US TERMS)
- **ch** – chain
- **sc** – single crochet
- **dc** – double crochet
- **sk** – skip
- **sp** – space
- **st(s)** – stitch(es)
- **rep** – repeat
- **RS/WS** – right side / wrong side

---

## STITCH PATTERN: PEACH BLOSSOM LACE
Worked over a multiple of **4 sts + 1**.

**Foundation:** Chain your starting number.

**Row 1 (RS):** Sc in 2nd ch from hook, *ch 2, sk 2 ch, (dc, ch 1, dc) in next ch — this is the "blossom"; ch 2, sk 2 ch* ... wait — to keep it truly easy, use this simplified repeat below.

**Simplified working pattern (use this throughout):**

**Set-up Row (RS):** Sc in 2nd ch from hook, *ch 2, sk 2, sc in next ch; rep from * across. Turn. (This creates a row of ch-2 mesh.)

**Row 1 (RS):** Ch 3 (counts as dc), sc in first ch-2 sp, *ch 2, (dc, ch 1, dc) "blossom" in next sc, ch 2, sc in next ch-2 sp; rep from * to last sp, ending dc in last sc. Turn.

**Row 2 (WS):** Ch 1, sc in first dc, *ch 2, sk blossom, sc in next sc; rep from * across, working last sc in top of turning ch. Turn.

**Repeat Rows 1–2** for pattern.

*Tip: Each "blossom" sits over a sc; the ch-2 spaces form the open mesh. Count your sc anchors each WS row to stay on track.*

---

## PATTERN NOTES
- All pieces are worked flat, turning at the end of each row.
- There is **NO armhole, shoulder, or sleeve shaping** — this is a true T-shaped kimono. Sleeves are straight rectangles attached at right angles.
- The front is worn **open**; an optional waist tie is included.
- Turning chains: ch-3 counts as a dc; ch-1 does not count as a stitch.

---

## BODY PIECES

### BACK
Make 1.

Starting chain = **77 ch** (multiple of 4 + 1 → (77−1)/4 = 19 repeats). ✓
*Width check: 77 sts ÷ 3.5 sts/in = 22".* ✓

1. Work **Set-up Row** across the 77 ch. → 76 sc + ch-2 mesh established.
2. Work **Rows 1–2** of Peach Blossom Lace until piece measures **26"** from beginning, ending after a WS (Row 2).
   *Row check: 26" × 2 rows/in = 52 rows total (1 set-up + 51 pattern rows, ending on a WS row).* ✓
3. Fasten off.

**Finished Back: 22" wide × 26" tall.**

---

### LEFT FRONT
Make 1.

Starting chain = **37 ch** ((37−1)/4 = 9 repeats). ✓
*Width check: 37 ÷ 3.5 = 10.5" ≈ 11" blocked.* ✓

1. Work **Set-up Row** across the 37 ch.
2. Work **Rows 1–2** until piece measures **26"**, ending after a WS row (same row count as Back: 52 rows). ✓
3. Fasten off.

**Finished Left Front: ~11" wide × 26" tall.**

### RIGHT FRONT
Make 1, identical to Left Front.

*Front width check: two fronts (11" + 11" = 22") equal the back width (22"). The natural open gap at center front is created by wearing it open — no closure needed.* ✓

---

## SLEEVES (STRAIGHT RECTANGLES — NO TAPER)

### SLEEVE
Make 2.

Starting chain = **57 ch** ((57−1)/4 = 14 repeats). ✓
*Width check: 57 ÷ 3.5 = 16".* ✓

1. Work **Set-up Row** across the 57 ch.
2. Work **Rows 1–2** until piece measures **18"**, ending after a WS row.
   *Row check: 18" × 2 = 36 rows total.* ✓
3. Fasten off.

**Finished Sleeve: 16" wide × 18" long, the SAME width top to bottom (no tapering).** ✓

---

## ASSEMBLY
Block all pieces flat to measurements before seaming (lace opens up significantly when blocked).

1. **Shoulder seams:** Lay Back and Fronts with RS together. Seam each shoulder with a straight horizontal seam (mattress stitch or slip stitch), joining each Front's top edge to the Back's top edge.
   - Seam **5"** in from each armhole edge on each shoulder, leaving the **center 12"** of the Back open for the neckline. *(5" + 12" neck + 5" = 22" back width.)* ✓
2. **Attach sleeves:** Find the shoulder seam. Center the top edge of each Sleeve over the shoulder seam and pin the Sleeve to the body edge at a **right angle** (dropped-shoulder). The 16" sleeve top should span 8" on the Front side and 8" on the Back side of the seam. Seam in place.
3. **Side seams:** Seam each side from the hem up to the underarm.
4. **Sleeve seams:** Seam the underside of each sleeve from cuff to underarm, continuing smoothly from the side seam.
5. **Weave in all ends.**

---

## BORDER / EDGING
Worked around the entire front opening and neckline for a clean, soft finish.

**Round 1 (sc foundation):** With RS facing, join yarn at the bottom Right Front corner. Sc evenly up the Right Front, around the back neck, and down the Left Front, working approximately 3 sc per inch and 1 sc in each row-end. At the two front bottom corners, work 3 sc to turn the corner. Do not work across the bottom hem.

**Round 2 (shell edging):** Ch 1, *sk 1 sc, 5 dc in next sc (shell), sk 1 sc, sc in next sc; rep from * along the entire edge, adjusting at corners as needed to lie flat. Fasten off.

**Cuff & hem (optional, both sleeves and bottom):** With RS facing, join yarn and work 1 round of sc evenly around the opening, then 1 round of the shell edging above. Fasten off.

---

## OPTIONAL WAIST TIE
Crochet two chains approx. **30"** long (or cut ribbon). Attach one at each Front edge at natural waist height (about 16" up from the hem). Tie to close.

---

## BLOCKING
Wet-block or steam-block the finished cardigan. Pin to final measurements, paying special attention to opening up the lace blossoms and mesh. Allow to dry fully. Blocking is essential for this lace stitch — it transforms the fabric's drape and reveals the blossom motif.

---

## FINISHED MEASUREMENTS RECAP
- **Bust (Back 22" + Left Front 11" + Right Front 11", doubled around body):** 44 (52) [60]" ✓
- **Body length:** 26"
- **Sleeve length:** 18"
- **Sleeve width:** 16" (straight)

Enjoy your soft, breezy **Peach Blossom Lace Cardigan** — a true beginner-friendly kimono shape with just a touch of floral lace. 🌸
Disclaimer: This pattern was generated by AI and should be reviewed for accuracy before use. While we strive for quality, AI-generated content may contain errors. Please verify measurements, stitch counts, and instructions before beginning your project. Generated by purlJam.uk
Access your pattern anytime
Bookmark this page to access your pattern anytime