Type
Crochet
Difficulty
beginner
Category
amigurumi
AI Thinking Process
Planning
Verification
Pattern
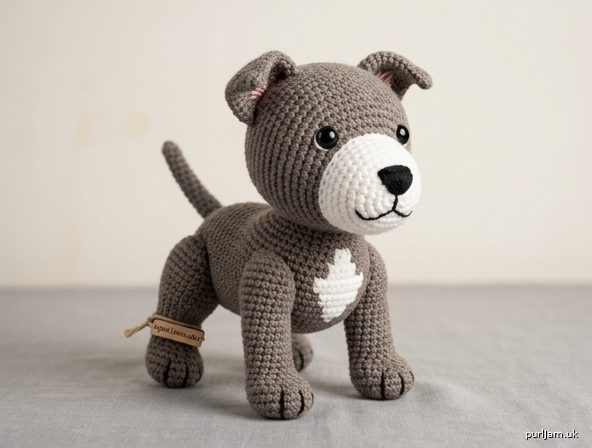
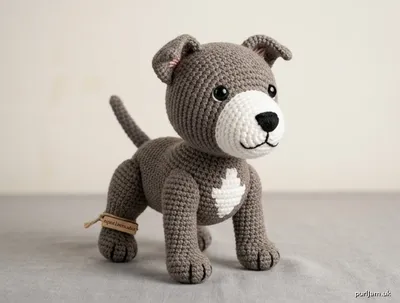
Pitbull Pup Amigurumi
Beginner Crochet Toy – Simple Shapes
A stocky little pitbull plush made from basic spheres, ovals, and cylinders. Perfect first animal project: only single crochet, increases, and decreases. Finished size about 7 inches (18 cm) long nose to tail when made in worsted weight.
Materials
- Worsted weight (4) yarn:
- Main color (MC): 80 yd (73 m) – gray, fawn, brindle, or white
- Contrast (CC): 15 yd (14 m) – white or black for muzzle/chest (optional)
- Small amount black or dark brown for nose/mouth embroidery
- Crochet hook: US E-4 (3.5 mm) — go down 1–2 sizes from yarn label for tight fabric
- Fiberfill stuffing
- Yarn needle
- Stitch marker
- 2 safety eyes, 8–10 mm (or embroider eyes)
- Optional: pink embroidery floss for inner ears
Abbreviations (US terms)
- ch: chain
- sc: single crochet
- inc: 2 sc in same stitch
- dec: invisible decrease (sc2tog through front loops)
- st(s): stitch(es)
- rnd(s): round(s)
- mr: magic ring
- FO: fasten off
- [ ]: stitch count at end of round
Gauge
5 sc × 5 rnds = 1 inch (2.5 cm) in continuous sc worked tightly.
Exact gauge is not critical; fabric should be dense so stuffing does not show.
Notes
- Work in continuous spiral rounds unless stated. Do not join. Mark first st of each rnd.
- Stuff firmly as you go for a muscular pitbull look.
- Use invisible decrease for smooth surface.
- Pitbull silhouette: broad head, short wide muzzle, sturdy legs, slim tail.
Pattern
Head (MC)
Rnd 1: 6 sc in mr [6]
Rnd 2: inc in each st [12]
Rnd 3: (sc, inc) around [18]
Rnd 4: (2 sc, inc) around [24]
Rnd 5: (3 sc, inc) around [30]
Rnds 6–10: sc around [30] (5 rnds)
Rnd 11: (3 sc, dec) around [24]
Insert safety eyes between Rnds 7–8, about 6–7 sts apart.
Rnd 12: (2 sc, dec) around [18]
Stuff head firmly, shaping a broad skull.
Rnd 13: (sc, dec) around [12]
Rnd 14: dec around [6]
FO, leaving 8-inch (20 cm) tail. Thread tail through front loops of remaining 6 sts and pull closed. Weave in.
Muzzle (CC or MC)
Rnd 1: 6 sc in mr [6]
Rnd 2: inc in each st [12]
Rnd 3: (sc, inc) around [18]
Rnds 4–5: sc around [18]
FO, leaving long tail for sewing. Stuff lightly.
Sew muzzle centered on lower front of head (covering Rnds 9–12 area). Embroider black nose as a wide triangle or oval on front of muzzle; add a short straight mouth line under nose and tiny smile curves at sides if desired.
Body (MC)
Rnd 1: 6 sc in mr [6]
Rnd 2: inc in each st [12]
Rnd 3: (sc, inc) around [18]
Rnd 4: (2 sc, inc) around [24]
Rnd 5: (3 sc, inc) around [30]
Rnd 6: (4 sc, inc) around [36]
Rnds 7–14: sc around [36] (8 rnds) — creates the deep chest
Rnd 15: (4 sc, dec) around [30]
Rnd 16: sc around [30]
Rnd 17: (3 sc, dec) around [24]
Rnd 18: sc around [24]
Stuff body very firmly, emphasizing a barrel chest.
Rnd 19: (2 sc, dec) around [18]
Rnd 20: (sc, dec) around [12]
Rnd 21: dec around [6]
FO and close hole same as head. Weave in.
Legs (make 4 – MC)
Rnd 1: 6 sc in mr [6]
Rnd 2: inc in each st [12]
Rnds 3–4: sc around [12]
Rnd 5: (2 sc, dec) around [9]
Rnds 6–9: sc around [9] (4 rnds)
Stuff lower half firmly (paw), upper half lightly.
FO, leaving long tail for sewing. Do not close; leave open.
Tail (MC)
Rnd 1: 4 sc in mr [4]
Rnd 2: (sc, inc) around [6]
Rnds 3–8: sc around [6]
Stuff lightly. FO, leaving tail for sewing. Leave open.
Ears (make 2 – MC)
Worked flat.
Row 1: ch 5, sc in 2nd ch from hook and each ch across [4]
Row 2: ch 1, turn, sc across [4]
Row 3: ch 1, turn, sc, dec, sc [3]
Row 4: ch 1, turn, sc across [3]
Row 5: ch 1, turn, sc3tog [1]
FO, leaving long tail.
Optional: embroider or sew a small pink triangle on inner ear.
Assembly
- Pin head to body (closed end of body = neck). Head should sit slightly forward. Sew securely with matching yarn, adding a tiny bit more stuffing at join if needed for a thick neck.
- Pin legs: two front legs under chest, two hind legs under rear, slightly splayed for a sturdy stance. Sew open edges to body.
- Sew tail to lower back, angled slightly upward or straight.
- Sew ears to top of head (Rnds 3–5 area), pointed tips up or folded slightly forward for classic pitbull look. Space about 4–5 sts apart.
- Optional chest blaze: with CC, embroider or surface-slip-stitch a small white patch on upper chest.
- Weave in all ends. Shape by rolling between hands so the body looks muscular and the head broad.
Finishing Touches
- Eyebrows: one or two straight black stitches above each eye for expression.
- Toes (optional): 2–3 short vertical stitches in contrasting yarn on each paw.
- Spot/patch: freehand embroider any desired markings with scrap yarn.
Size Notes
- Current size (worsted + 3.5 mm): ~7 inches (18 cm) long, ~5 inches (13 cm) tall – great handheld plush.
- Larger: switch to bulky yarn and 4.5–5 mm hook; add 1–2 extra even rounds on body and head.
- Keychain size: DK yarn + 2.75 mm hook; stop head increases at 24 sts and body at 30 sts.
Enjoy your pitbull pup! Stuff firmly and the simple shapes will read as a strong little bully breed.
Disclaimer: This pattern was generated by AI and should be reviewed for accuracy before use. While we strive for quality, AI-generated content may contain errors. Please verify measurements, stitch counts, charts, and instructions before beginning your project. Generated by purlJam.uk
Love this pattern?
Save this pattern to your free PurlJam libraryAccess your pattern anytime
Bookmark this page to access your pattern anytime