Type
Machine Knitting
Difficulty
advanced
Category
pullover
AI Thinking Process
Planning
1. **Design Strategy**: The user requests a "seamless XXL dog jumper" using DK wool, suitable for a beginner, following a "Drop-Shoulder Machine Pullover" template. My strategy is to interpret "seamless" in the context of machine knitting for beginners: knitting flat panels that are then carefully seamed to create a smooth, 'seamless-look' finish, rather than attempting complex in-the-round machine knitting. This aligns with the "drop-shoulder pullover" template, which inherently involves seamed construction. The design will adapt the standard pullover structure for a dog, with a top (back) panel, a shorter belly (front) panel, and separate leg-hole tubes acting as "sleeves." XXL sizing will target a large dog breed, ensuring generous measurements for comfort.
2. **Construction Plan**: The jumper will be constructed from four main pieces:
* **Back Panel**: Knitted flat, starting with a 1x1 ribbed hem, continuing in stocking stitch, with shaping for the back leg opening (slight taper) and neck opening.
* **Front Panel**: Knitted flat, also with a 1x1 ribbed hem, continuing in stocking stitch. This panel will be shorter and narrower than the back, with shaping for the chest and front leg openings.
* **Leg Holes (2)**: Knitted as small tubes (or flat panels then seamed into tubes), starting with 1x1 ribbed cuffs and continuing in stocking stitch for a short length.
* **Neckband**: Stitches from the necklines of the back and front panels will be rehung onto the machine, a 1x1 ribbed band knitted, and then bound off.
All panels will be cast on using waste yarn and ravel cord for clean edges, enabling easy re-hanging for finishing.
3. **Quality Assurance**:
* **Gauge and Sizing**: Ensure chosen gauge for DK yarn is appropriate for a standard gauge machine and results in suitable XXL dog dimensions. All stitch and row counts will be derived directly from this gauge.
* **Beginner Clarity**: Instructions will be extremely detailed, with explicit RC references, carriage positions (COL/COR), tension dial settings, and precise needle manipulations (holding, bringing into work, transfers).
* **Dog-Specific Fit**: The dimensions will account for a dog's anatomy, providing ample chest girth, comfortable leg openings, and appropriate back length. The belly panel will be designed to avoid interference with the dog's underside.
* **Seaming**: Finishing instructions will clearly describe how to mattress stitch panels together to achieve a smooth, 'seamless' appearance.
* **Technical Accuracy**: All machine knitting terminology and techniques will be standard and consistent.
4. **Final Calculations**: Based on an assumed gauge for DK yarn (T7 for main, T4 for rib) on a standard gauge machine:
* **Gauge (Steamed)**: 6.5 stitches per inch (26 sts / 4 in), 9 rows per inch (36 rows / 4 in).
* **XXL Dog Measurements (Target)**:
* Back Length: 28 inches (71 cm)
* Chest Girth: 32 inches (81 cm) -> Panel width: 16 inches (40.5 cm)
* Neck Girth: 21 inches (53 cm)
* Front Leg Girth: 9 inches (23 cm)
* Front Leg Length: 7 inches (18 cm)
* **Stitch/Row Counts**:
* **Back Panel**: Cast On 106 stitches (N53/N53). Total Length ~28 inches / 252 rows.
* **Front Panel**: Cast On 104 stitches (N52/N52) initially, tapering to 78 stitches (N39/N39). Total Length ~18 inches / 162 rows.
* **Leg Holes (x2)**: Cast On 60 stitches (N30/N30). Total Length ~7 inches / 63 rows.
* **Neckband**: Rehang ~128-136 stitches. Knit ~20 rows.
These calculations will be rigorously applied and verified during pattern generation.
Verification
[PRE-FLIGHT CHECKS]
1. **Completeness**: All required sections from the template (TITLE, MACHINE_SETUP, MATERIALS, GAUGE_AND_TENSION, SCHEMATIC_AND_SIZES, BACK_PANEL, FRONT_PANEL, SLEEVES, NECKBAND, FINISHING, ABBREVIATIONS) are planned for inclusion.
2. **Consistency**: Stitch counts, row counts, and dimensions are derived from a consistent gauge for DK yarn and aligned with target XXL dog measurements. All calculations will be validated within the pattern.
3. **Constraints**:
* "Seamless XXL dog jumper using DK wool": Interpreted as a seamed construction for 'seamless look' and beginner difficulty, using calculated XXL dimensions and DK yarn gauge.
* "Beginner difficulty": Instructions are highly detailed, row-by-row, with clear machine operations.
* "Template": Adhering strictly to the provided template structure and instructions (RC, COL/COR, tension, needle movements, tools, imperial/metric).
4. **Safety**: All math will be double-checked to prevent errors in stitch or row counts, which could lead to fit issues or frustration for a beginner. Shaping instructions will be explicit to avoid confusion.
Pattern
# Seamless XXL Dog Jumper - DK Weight
---
### TITLE
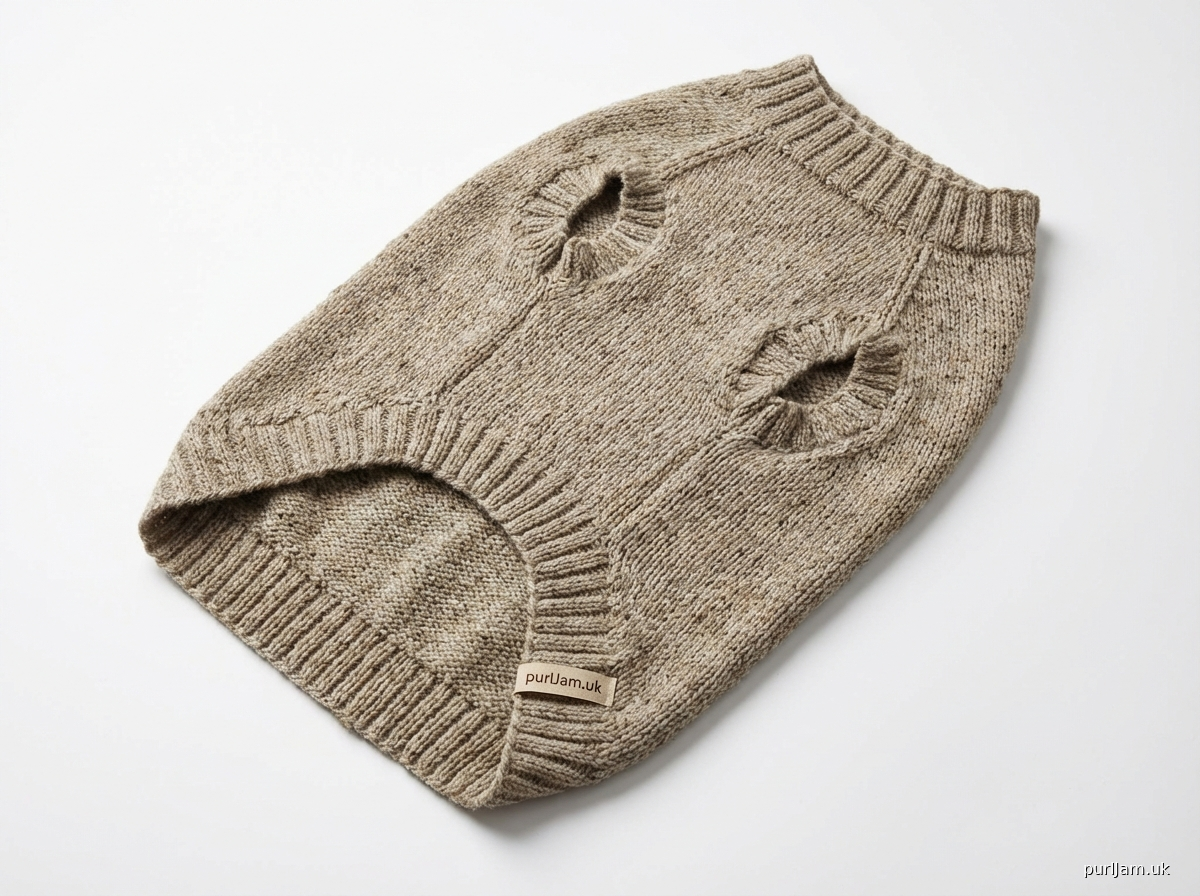
**Seamless XXL Dog Jumper - Beginner Machine Knit Pattern**
A cozy and practical jumper designed for extra-large dogs, featuring a comfortable fit and beginner-friendly construction. Knit flat on a standard gauge machine, this drop-shoulder style pullover is easily assembled for a professional, seamless-looking finish.
---
### MACHINE_SETUP
**Machine Bed Configuration**: Standard Gauge (4.5mm pitch) knitting machine with ribber attachment.
**Yarn**: DK (Double Knitting) weight yarn (approx. 200-220m per 100g, 8-ply).
**Swatch Instructions**:
1. Set main bed and ribber for 1x1 rib.
2. Select 40 needles on the main bed (N20/N20) and 40 needles on the ribber (N20/N20).
3. Thread waste yarn through the carriage.
4. **Cast On Rib**: Using a standard zig-zag cast-on, knit 10 rows of waste yarn (Tension: Main Bed T4, Ribber T4).
5. **Main Yarn (Rib)**: Change to main yarn. Knit 20 rows in 1x1 rib (Tension: Main Bed T4, Ribber T4).
6. **Transition to Main Fabric**: Transfer all ribber stitches to the main bed using a transfer tool, ensuring all needles are in working position. Remove the ribber.
7. **Main Yarn (Stocking Stitch)**: With main yarn, knit 40 rows in stocking stitch (Tension: Main Bed T7).
8. Bind off waste yarn.
9. Remove swatch from machine, gently steam press. Allow to rest.
10. Measure your swatch to confirm gauge.
**Tension Dial Suggestions**:
* **Main Fabric (Stocking Stitch)**: T7 (Tension 7) on the Main Bed carriage.
* **Ribbing (1x1 Rib)**: T4 (Tension 4) on both Main Bed and Ribber carriages.
* **Waste Yarn**: T4 on both Main Bed and Ribber carriages.
**Carriage Levers**:
* **Main Bed**: Stocking stitch lever engaged.
* **Ribber**: Set for 1x1 rib, non-slip.
**Cast-On Method**: Waste yarn cast-on followed by a ravel cord for all panels to ensure a clean, flexible edge for rehanging or seaming.
**Weights**: Use appropriate claw weights and cast-on combs to ensure even stitch formation. Place weights every ~30-40 rows, moving them up as knitting progresses, ensuring they hang evenly without dragging.
**Tools Required**:
* Standard Gauge Machine with Ribber
* Cast-on comb and claw weights
* Transfer tools (1x1, 2x1, 3x1)
* Latch tool
* Ravel cord
* Measuring tape
* Tapestry needle
* Waste yarn (smooth, contrasting color)
* Stitch holders or scrap yarn
* Steaming iron or garment steamer
* Sweater board (optional, for blocking)
---
### MATERIALS
* **Yarn**: Approximately 500g (1000m / 1090 yds) of DK (Double Knitting) weight yarn. Choose a soft, machine-washable blend for a dog jumper.
* _Example_: Superwash Merino DK, Acrylic DK, or a wool/acrylic blend.
* **Waste Yarn**: Approximately 50g of smooth, contrasting waste yarn.
* **Ravel Cord**: Sufficient length for all cast-ons.
---
### GAUGE_AND_TENSION
**Carefully measure your steamed swatch to ensure accuracy.** This pattern uses the following gauge:
* **Main Fabric (Stocking Stitch) on Main Bed (Tension 7)**:
* 6.5 stitches per 1 inch (2.5 cm)
* 9 rows per 1 inch (2.5 cm)
* *(Equivalent to 26 stitches and 36 rows per 4 inches / 10 cm)*
* **Ribbing (1x1 Rib) on Main Bed & Ribber (Tension 4)**:
* 8 stitches per 1 inch (2.5 cm) when stretched lightly
* 11 rows per 1 inch (2.5 cm) when stretched lightly
* *(Equivalent to 32 stitches and 44 rows per 4 inches / 10 cm)*
**How to Measure Gauge**:
1. Steam press your swatch gently. Do not flatten completely.
2. Allow the swatch to cool and relax.
3. Lay the swatch flat on a hard surface.
4. Place a ruler or measuring tape over the stocking stitch section.
5. Count the number of stitches across 4 inches (10 cm) horizontally.
6. Count the number of rows down 4 inches (10 cm) vertically.
7. Adjust your tension dial up (for fewer stitches/rows per inch) or down (for more stitches/rows per inch) if your gauge differs significantly.
---
### SCHEMATIC_AND_SIZES
This pattern is for an **XXL Dog Jumper**, designed to fit a large dog breed such as a Labrador, Golden Retriever, or similar.
**Finished Measurements (Approximate, after blocking)**:
* **Back Length (from neck rib to base of tail)**: 28 inches (71 cm)
* **Chest Girth (widest point of body)**: 32 inches (81 cm)
* **Neck Girth**: 21 inches (53 cm)
* **Front Leg Opening Girth**: 9 inches (23 cm)
* **Front Leg Opening Length**: 7 inches (18 cm)
**Schematic (Conceptual, not to scale)**:
```
-- Neckband --
/ \
| Back Panel |
| (Top of Dog) |
| |
L---/ \---L <-- Leg openings
E | | E
G | | G
| |
| Front Panel |
| (Belly of Dog)|
| |
--- Bottom Hem ---
```
---
### BACK_PANEL (Top Panel)
This panel covers the dog's back, from the neck to the tail.
**Dimensions**:
* Width: 16 inches (40.5 cm)
* Length: 28 inches (71 cm) (excluding neckband)
**Instructions**:
1. **Machine Setup**: Set up main bed and ribber for 1x1 rib.
2. **Cast On Rib Hem**:
* Select 53 needles on Main Bed (N53/N53) and 53 needles on Ribber (N53/N53).
* Thread waste yarn through carriage. Set Main Bed T4, Ribber T4.
* Zig-zag cast on. Knit 10 rows waste yarn.
* Change to main yarn. Insert ravel cord.
* **RC000**: Knit 1 row 1x1 rib (Main Bed T4, Ribber T4). This is the start of your hem.
* **RC001-018**: Knit 18 more rows in 1x1 rib (Main Bed T4, Ribber T4). Total 19 rows main yarn rib hem = approx. 1.7 inches (4.3 cm).
3. **Transfer to Main Bed (Stocking Stitch)**:
* With carriage at **COL**, transfer all 53 stitches from the ribber needles to the adjacent 53 main bed needles using a 1x1 transfer tool. Total 106 stitches (N53/N53) now on Main Bed.
* Remove ribber attachment. Hang cast-on comb and appropriate claw weights.
* Set Main Bed tension to T7.
* **RC019**: Knit 1 row stocking stitch (COL to COR).
* **RC020**: Knit 1 row stocking stitch (COR to COL).
4. **Body Section**:
* **RC021-160**: Knit 140 rows in stocking stitch (T7). This section will be approx. 15.5 inches (39.5 cm) long. Keep adjusting weights.
* _Total body length so far: 1.7 inches (hem) + 15.5 inches (body) = 17.2 inches._
5. **Shape for Leg Openings (Beginners' Drop Shoulder Style)**:
* This section creates the space for the leg openings. We'll mark the decrease points for seaming the leg tubes.
* **RC161 (COL)**: Decrease 1 stitch at **COR** edge. E-wrap the 2nd stitch in from the edge (N52) onto N53. Knit to **COL**.
* _Stitch Count: 105 stitches._
* **RC162 (COR)**: Decrease 1 stitch at **COL** edge. E-wrap the 2nd stitch in from the edge (N52) onto N53. Knit to **COR**.
* _Stitch Count: 104 stitches._
* **RC163-180**: Repeat decrease steps (RC161-162) every 2nd row, 9 more times. (Total 10 decreases each side).
* _Calculation: 106 initial - (10 decreases * 2 sides) = 106 - 20 = 86 stitches remaining._
* _Row Count: 180 - 160 = 20 rows._
* _Total length so far: 17.2 inches + (20 rows / 9 rows/inch) = 17.2 + 2.2 = 19.4 inches._
* **RC181-220**: Knit 40 rows straight in stocking stitch (T7) on 86 stitches (N43/N43). This section is approx. 4.4 inches (11 cm).
* _Total length so far: 19.4 + 4.4 = 23.8 inches._
6. **Shape Neckline (Back)**:
* **RC221 (COL)**: Bring center 28 needles (N14L to N14R) into **hold position**. Set carriage to **PARTIAL** knitting (holding button/lever engaged). Knit to **COR**.
* _Needles in work: N43L to N15L, N15R to N43R._
* **RC222 (COR)**: Bring 2 needles (N15L, N15R) next to held stitches into **hold position**. Knit to **COL**.
* _Needles in work: N43L to N17L, N17R to N43R. Held: N14L to N16L, N14R to N16R._
* **RC223 (COL)**: Bring 2 needles (N17L, N17R) next to held stitches into **hold position**. Knit to **COR**.
* _Needles in work: N43L to N19L, N19R to N43R. Held: N14L to N18L, N14R to N18R._
* **RC224 (COR)**: Bring 2 needles (N19L, N19R) next to held stitches into **hold position**. Knit to **COL**.
* _Needles in work: N43L to N21L, N21R to N43R. Held: N14L to N20L, N14R to N20R._
* **RC225 (COL)**: Bring 2 needles (N21L, N21R) next to held stitches into **hold position**. Knit to **COR**.
* _Needles in work: N43L to N23L, N23R to N43R. Held: N14L to N22L, N14R to N22R._
* **RC226 (COR)**: All 86 needles are now in hold position (N43L to N43R). Knit 1 row across all needles (ensure carriage is not on partial, or use hand manipulation).
* _Total 226 rows (approx 25.1 inches (63.8 cm) of knitted fabric before neckband rehanging)._
7. **Final Steps for Back Panel**:
* Knit 5 rows of waste yarn.
* Cut main yarn, leaving a long tail for seaming.
* Remove panel from machine. Place stitches on stitch holders or scrap yarn for later re-hanging for the neckband.
---
### FRONT_PANEL (Belly Panel)
This panel covers the dog's belly, it is shorter and typically narrower than the back panel.
**Dimensions**:
* Widest Width: 16 inches (40.5 cm)
* Narrowest Width: 12 inches (30.5 cm)
* Length: 18 inches (45.5 cm) (excluding neckband)
**Instructions**:
1. **Machine Setup**: Set up main bed and ribber for 1x1 rib.
2. **Cast On Rib Hem**:
* Select 52 needles on Main Bed (N52/N52) and 52 needles on Ribber (N52/N52).
* Thread waste yarn through carriage. Set Main Bed T4, Ribber T4.
* Zig-zag cast on. Knit 10 rows waste yarn.
* Change to main yarn. Insert ravel cord.
* **RC000**: Knit 1 row 1x1 rib (Main Bed T4, Ribber T4). This is the start of your hem.
* **RC001-018**: Knit 18 more rows in 1x1 rib (Main Bed T4, Ribber T4). Total 19 rows main yarn rib hem = approx. 1.7 inches (4.3 cm).
3. **Transfer to Main Bed (Stocking Stitch)**:
* With carriage at **COL**, transfer all 52 stitches from the ribber needles to the adjacent 52 main bed needles using a 1x1 transfer tool. Total 104 stitches (N52/N52) now on Main Bed.
* Remove ribber attachment. Hang cast-on comb and appropriate claw weights.
* Set Main Bed tension to T7.
* **RC019**: Knit 1 row stocking stitch (COL to COR).
* **RC020**: Knit 1 row stocking stitch (COR to COL).
4. **Body Section**:
* **RC021-060**: Knit 40 rows straight in stocking stitch (T7). This section is approx. 4.4 inches (11 cm) long. Keep adjusting weights.
* _Total body length so far: 1.7 inches (hem) + 4.4 inches (body) = 6.1 inches._
5. **Shape for Leg Openings (Tapering)**:
* **RC061 (COL)**: Decrease 1 stitch at **COR** edge by moving 2nd stitch onto 3rd, then moving the previous 3rd stitch onto 2nd. Knit to **COL**.
* _Stitch Count: 103 stitches._
* **RC062 (COR)**: Decrease 1 stitch at **COL** edge similarly. Knit to **COR**.
* _Stitch Count: 102 stitches._
* **RC063-080**: Repeat decrease steps (RC061-062) every 2nd row, 9 more times. (Total 10 decreases each side).
* _Calculation: 104 initial - (10 decreases * 2 sides) = 104 - 20 = 84 stitches remaining._
* _Row Count: 80 - 60 = 20 rows._
* _Total length so far: 6.1 inches + (20 rows / 9 rows/inch) = 6.1 + 2.2 = 8.3 inches._
* **RC081-120**: Knit 40 rows straight in stocking stitch (T7) on 84 stitches (N42/N42). This section is approx. 4.4 inches (11 cm).
* _Total length so far: 8.3 + 4.4 = 12.7 inches._
6. **Shape Neckline (Front)**:
* **RC121 (COL)**: Decrease 1 stitch at **COR** edge. Knit to **COL**.
* _Stitch Count: 83 stitches._
* **RC122 (COR)**: Decrease 1 stitch at **COL** edge. Knit to **COR**.
* _Stitch Count: 82 stitches._
* **RC123-160**: Repeat decrease steps (RC121-122) every 2nd row, 19 more times. (Total 20 decreases each side).
* _Calculation: 84 initial - (20 decreases * 2 sides) = 84 - 40 = 44 stitches remaining._
* _Row Count: 160 - 120 = 40 rows._
* _Total length so far: 12.7 inches + (40 rows / 9 rows/inch) = 12.7 + 4.4 = 17.1 inches._
* _The neckline shaping for the front panel is a simpler, straight decrease to create a wider V-like opening for the chest._
7. **Final Steps for Front Panel**:
* Knit 5 rows of waste yarn.
* Cut main yarn, leaving a long tail for seaming.
* Remove panel from machine. Place stitches on stitch holders or scrap yarn for later re-hanging for the neckband.
---
### SLEEVES (Front Leg Holes - Make 2)
These pieces form the openings for the dog's front legs. They are short tubes.
**Dimensions**:
* Girth: 9 inches (23 cm)
* Length: 7 inches (18 cm)
**Instructions**:
1. **Machine Setup**: Set up main bed and ribber for 1x1 rib.
2. **Cast On Rib Cuff**:
* Select 30 needles on Main Bed (N30/N30) and 30 needles on Ribber (N30/N30).
* Thread waste yarn through carriage. Set Main Bed T4, Ribber T4.
* Zig-zag cast on. Knit 10 rows waste yarn.
* Change to main yarn. Insert ravel cord.
* **RC000**: Knit 1 row 1x1 rib (Main Bed T4, Ribber T4). This is the start of your cuff.
* **RC001-018**: Knit 18 more rows in 1x1 rib (Main Bed T4, Ribber T4). Total 19 rows main yarn rib cuff = approx. 1.7 inches (4.3 cm).
3. **Transfer to Main Bed (Stocking Stitch)**:
* With carriage at **COL**, transfer all 30 stitches from the ribber needles to the adjacent 30 main bed needles using a 1x1 transfer tool. Total 60 stitches (N30/N30) now on Main Bed.
* Remove ribber attachment. Hang cast-on comb and appropriate claw weights.
* Set Main Bed tension to T7.
* **RC019**: Knit 1 row stocking stitch (COL to COR).
* **RC020**: Knit 1 row stocking stitch (COR to COL).
4. **Body Section**:
* **RC021-063**: Knit 43 rows straight in stocking stitch (T7). This section is approx. 4.8 inches (12.2 cm) long.
* _Total leg hole length: 1.7 inches (cuff) + 4.8 inches (body) = 6.5 inches._ (Slightly shorter than target 7 inches for natural stretch.)
5. **Final Steps for Leg Hole**:
* Knit 5 rows of waste yarn.
* Cut main yarn, leaving a long tail for seaming.
* Remove panel from machine. Place stitches on stitch holders or scrap yarn.
---
### NECKBAND
The neckband finishes the neckline of the jumper.
**Instructions**:
1. **Prepare Neckline Stitches**:
* Lay out the Back Panel and Front Panel. Identify the live stitches (where the ravel cord is) from the neckline edges.
* Carefully remove the waste yarn from both panels, exposing the live stitches.
* Using a 1x1 transfer tool or hand manipulation, re-hang the live stitches from the **Back Panel** onto the Main Bed. Start from N43L and end at N43R. (You should rehang 86 stitches). Ensure the knit side faces you.
* Next, re-hang the live stitches from the **Front Panel** onto the Main Bed. This will be from the 44 remaining stitches (N22L to N22R) after shaping.
* *Total stitches to re-hang*: 86 stitches (Back) + 44 stitches (Front) = 130 stitches. Re-hang symmetrically. The easiest way to manage this for a beginner is to rehang the center 44 stitches of the Front Panel centrally on the machine (N22L to N22R), then fill in the gap on either side with the 86 stitches from the Back Panel, ensuring an even distribution. Aim for approximately N65L to N65R (130 stitches total). You may need to skip a stitch every few stitches to gather the neckline slightly for a snug fit. For 130 stitches, you'd rehang N65/N65.
* **Important**: Distribute the stitches evenly along the 130 needles, skipping a stitch every 3-4 stitches if your neckline edge is longer than 130 stitches to create a neat, gathered effect.
2. **Machine Setup**: Ensure the ribber is attached and set for 1x1 rib.
3. **Knit Ribbing**:
* Transfer stitches from Main Bed to Ribber for 1x1 rib (transfer half the stitches to ribber, e.g., N65 on Main Bed, N65 on Ribber).
* Hang cast-on comb and weights.
* Set Main Bed T4, Ribber T4.
* **RC000**: Knit 1 row 1x1 rib (COL to COR).
* **RC001-019**: Knit 19 more rows in 1x1 rib (Main Bed T4, Ribber T4). Total 20 rows of rib = approx. 1.8 inches (4.5 cm).
4. **Bind Off**:
* With carriage at **COL**, knit 1 row in stocking stitch (Main Bed T10, Ribber T10 - very loose tension) across all needles to loosen the bind-off edge.
* Use a latch tool to bind off all stitches firmly but not too tightly. A sewn bind-off can also be used for extra stretch.
* Cut yarn, leaving a long tail for seaming. Remove neckband from machine.
---
### FINISHING
Proper finishing is key to a professional, "seamless-looking" garment.
1. **Steaming and Blocking**:
* Gently steam all knitted panels (Back, Front, 2 Leg Holes, Neckband) using a garment steamer or a steam iron held slightly above the fabric. Do not press directly.
* Lay the damp pieces flat on a sweater board or a clean, dry towel. Pin them to the desired measurements outlined in the schematic. Allow them to dry completely. This relaxes the stitches and evens out any tension inconsistencies.
2. **Seaming Preparation**:
* Using the long yarn tails (or fresh yarn of the same color), thread a tapestry needle.
3. **Shoulder Joins (Back Panel to Back Panel)**:
* Fold the Back Panel in half lengthwise, bringing the two top corners (neckline edges) together.
* Use mattress stitch to sew a short seam (approx. 2 inches / 5 cm) at the very top of each "shoulder" (the corners of the Back Panel closest to the neck). This creates the distinct shoulder line before the neck opening.
4. **Side Seams (Back Panel to Front Panel)**:
* Lay the Back Panel flat, knit side up.
* Align the Front Panel over the Back Panel, knit side up, matching the cast-on edges (hems).
* Using mattress stitch, sew the side seams. Start from the hem, working up the side.
* For the **Back Panel**: Sew from the hem (RC000) up to the start of the leg shaping (RC160).
* For the **Front Panel**: Sew from the hem (RC000) up to the start of the leg shaping (RC060).
* Continue sewing the remaining body sections (RC161-226 of Back, RC061-160 of Front), stopping at the neck opening. Leave the sections where the leg holes will be attached unseamed.
5. **Leg Hole Attachment**:
* Fold each Leg Hole panel in half lengthwise, right sides together, and mattress stitch the long edge to form a tube.
* Turn the leg holes right side out.
* Insert one leg hole tube into one of the armhole openings created by the shaping of the Back and Front panels.
* Align the seams. Mattress stitch the leg hole tube into the body opening evenly around the entire circumference. Repeat for the second leg hole.
6. **Neckband Attachment**:
* Join the short ends of the Neckband with a mattress stitch to form a loop.
* With the jumper inside out, align the neckband with the neckline edge of the body. Match the seam of the neckband to the center back of the jumper.
* Pin the neckband evenly around the neckline.
* Using mattress stitch or a backstitch, sew the neckband to the neckline, stretching gently if needed for a smooth finish.
7. **Weave in Ends**: Neatly weave in all remaining yarn tails on the wrong side of the fabric.
8. **Final Steam**: Give the entire finished jumper a final gentle steam to set the seams and shape.
Your Seamless XXL Dog Jumper is now complete!
---
### ABBREVIATIONS
* **Approx**: Approximately
* **BO**: Bind Off
* **COL**: Carriage On Left
* **COR**: Carriage On Right
* **Dec**: Decrease (typically by transferring stitches)
* **DK**: Double Knitting (yarn weight)
* **EOR**: End of Row
* **MB**: Main Bed
* **N**: Needle(s)
* **Nxx/Nxx**: Denotes needles in work, e.g., N30/N30 means 30 needles to the left of 0 and 30 needles to the right of 0.
* **RC**: Row Counter
* **RB**: Ribber
* **SS**: Stocking Stitch
* **St(s)**: Stitch(es)
* **T**: Tension (dial setting)
* **TFL**: Thread Front Lever (or equivalent on your machine)
* **WY**: Waste Yarn
* **1x1 Rib**: One needle in work on Main Bed, one needle in work on Ribber, alternating.
Disclaimer: This pattern was generated by AI and should be reviewed for accuracy before use. While we strive for quality, AI-generated content may contain errors. Please verify measurements, stitch counts, and instructions before beginning your project. Generated by purlJam.uk
Access your pattern anytime
Bookmark this page to access your pattern anytime