Type
Crochet
Difficulty
beginner
Category
amigurumi
AI Thinking Process
Planning
Verification
Pattern
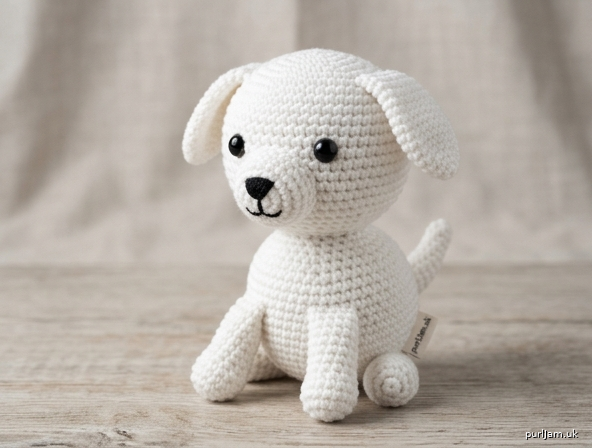
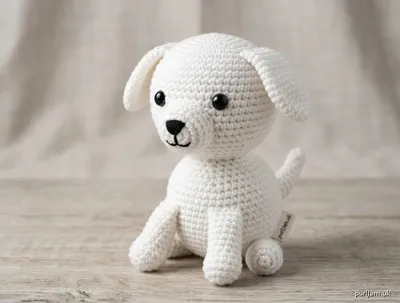
Snowy the White Puppy — Beginner Amigurumi
A sweet, sit-up white dog plush made from simple spheres and cylinders. No complicated animal shaping — just basic rounds you sew together. Finished size approximately 5 inches (12.5 cm) tall.
Skill Level
Beginner — uses only magic ring, single crochet, increase, and decrease.
Finished Size
Approximately 5 in (12.5 cm) tall, 3 in (7.5 cm) wide. Handheld size.
Materials
- Worsted weight (4) yarn in white — approx. 100 yds (90 m)
- Small amount of black yarn for nose (and optional embroidered mouth)
- US G-6 (4.0 mm) crochet hook
- Polyester fiberfill stuffing
- Yarn needle for assembly
- Stitch marker
- Two 9 mm safety eyes (or embroider with black yarn for children under 3)
- Scissors
Gauge
5 sc x 5 rounds = 1 in (2.5 cm). Gauge is not critical for toys, but work tightly so stuffing does not show.
Abbreviations (US terms)
- sc = single crochet
- inc = 2 sc in same stitch (increase)
- dec = invisible decrease (single crochet 2 stitches together)
- st(s) = stitch(es)
- rnd = round
- [ ] = total stitch count at end of round
Notes
- Work in continuous spiral rounds (do not join) unless stated. Move your stitch marker up each round.
- Stuff firmly as you go — it is hard to add stuffing later.
- Use invisible decrease for a smooth surface.
PART 1 — HEAD (make 1)
Using white yarn:
- Rnd 1: 6 sc in magic ring [6]
- Rnd 2: inc in each st around (6 inc → 6 + 6 = 12) [12]
- Rnd 3: (sc, inc) around (6 inc → 12 + 6 = 18) [18]
- Rnd 4: (2 sc, inc) around (6 inc → 18 + 6 = 24) [24]
- Rnds 5–9: sc in each st around [24] (5 rounds)
- Rnd 10: (2 sc, dec) around (6 dec → 24 − 6 = 18) [18]
Insert safety eyes between Rnds 6 and 7, about 5 sts apart. Begin stuffing firmly now.
- Rnd 11: (sc, dec) around (6 dec → 18 − 6 = 12) [12]
- Rnd 12: dec around (6 dec → 12 − 6 = 6) [6]
Finish stuffing. Fasten off, leaving a long tail. Weave through last 6 sts and pull tight to close.
PART 2 — BODY (make 1)
Using white yarn — this is an enlarged sphere:
- Rnd 1: 6 sc in magic ring [6]
- Rnd 2: inc in each st around (6 inc → 6 + 6 = 12) [12]
- Rnd 3: (sc, inc) around (6 inc → 12 + 6 = 18) [18]
- Rnd 4: (2 sc, inc) around (6 inc → 18 + 6 = 24) [24]
- Rnd 5: (3 sc, inc) around (6 inc → 24 + 6 = 30) [30]
- Rnds 6–11: sc in each st around [30] (6 rounds)
- Rnd 12: (3 sc, dec) around (6 dec → 30 − 6 = 24) [24]
- Rnd 13: (2 sc, dec) around (6 dec → 24 − 6 = 18) [18]
Stuff body firmly.
- Rnd 14: (sc, dec) around (6 dec → 18 − 6 = 12) [12]
- Rnd 15: dec around (6 dec → 12 − 6 = 6) [6]
Fasten off, leaving a long tail. Close hole. Keep the closed end as the bottom.
PART 3 — SNOUT (make 1)
Using white yarn:
- Rnd 1: 6 sc in magic ring [6]
- Rnd 2: (sc, inc) around (3 inc → 6 + 3 = 9) [9]
- Rnds 3–4: sc in each st around [9] (2 rounds)
Fasten off, leaving a long tail. Lightly stuff.
PART 4 — EARS (make 2)
Floppy flat ears — worked in rows. Using white yarn, ch 5.
- Row 1: starting in 2nd ch from hook, sc in each ch across (4 sc) [4], turn
- Rows 2–6: sc in each st across [4] (5 rows)
- Row 7: dec, dec (2 dec → 4 − 2 = 2) [2], turn
- Row 8: dec (1 dec → 2 − 1 = 1) [1]
Fasten off, leaving a tail for sewing. Do not stuff — ears stay flat and floppy.
PART 5 — LEGS (make 4)
Small cylinders. Using white yarn:
- Rnd 1: 6 sc in magic ring [6]
- Rnd 2: inc in each st around (6 inc → 6 + 6 = 12) [12]
- Rnds 3–5: sc in each st around [12] (3 rounds)
Fasten off, leaving a tail. Stuff lightly. Leave the open end for sewing.
PART 6 — TAIL (make 1)
Small tapered cylinder. Using white yarn:
- Rnd 1: 5 sc in magic ring [5]
- Rnds 2–4: sc in each st around [5] (3 rounds)
Fasten off, leaving a tail. Do not stuff (or stuff very lightly).
ASSEMBLY
Pin all pieces before sewing to check placement. Use the yarn needle and matching tails.
- Head to body: Sew the head onto the top of the body, centering it. Sew all the way around the join for a secure attachment.
- Snout: Sew the snout to the front-center of the head, just below and between the safety eyes.
- Nose: Using black yarn, embroider a small triangle or make a cluster of satin stitches at the top-center of the snout. Add a short vertical line and small mouth beneath if desired.
- Ears: Sew the wide (chain) edge of each ear to the sides/top of the head so they flop down. Space them evenly.
- Legs: Sew two front legs to the lower front of the body and two back legs to the lower sides/back so the puppy sits. Angle the front legs slightly forward.
- Tail: Sew the tail to the back of the body, curving slightly upward.
FINISHING
- Weave in all loose ends and trim.
- Gently shape the head and body by squeezing to redistribute stuffing.
- Optional: embroider tiny eyebrows or rosy cheeks for extra character.
Care
Hand wash gently in cool water, reshape, and air dry. Do not machine wash if using safety eyes/glued details.
Customization Tips
- Larger puppy: Work more even rounds (Rnds 6–11 of body) and add one more increase round to head and body.
- Keychain size: Use DK yarn and a smaller hook; stop head at 18 sts and body at 24 sts, then decrease. Attach a keychain finding to the top.
- Different breed look: Add a small contrasting patch over one eye, or use gray/tan yarn for accents.
- Safety: For babies and toddlers, skip safety eyes and embroider eyes with black yarn instead.
Enjoy making Snowy! 🐾
Disclaimer: This pattern was generated by AI and should be reviewed for accuracy before use. While we strive for quality, AI-generated content may contain errors. Please verify measurements, stitch counts, and instructions before beginning your project. Generated by purlJam.uk
Access your pattern anytime
Bookmark this page to access your pattern anytime