Type
Knitting
Difficulty
beginner
Category
scarf
Pattern
# The Cozy Sophie Scarf — A Large Garter-Stitch Wrap for Absolute Beginners
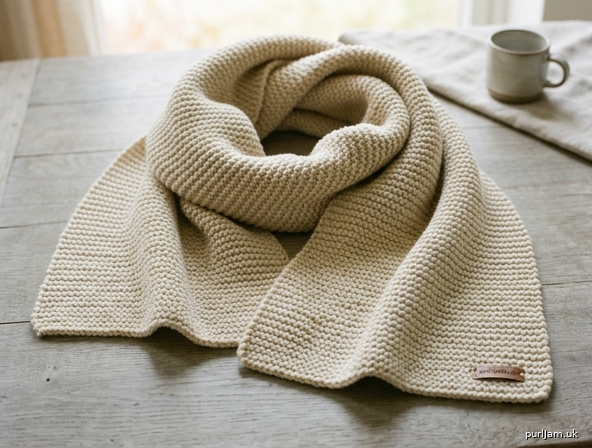
A generously oversized, squishy garter-stitch scarf you can loop, wrap, or drape. Garter stitch (knitting every single row) is the easiest stitch there is — it lies perfectly flat, looks the same on both sides, and is very forgiving of small mistakes. This is the ideal first project. Take your time and enjoy the rhythm!
---
## MATERIALS
- **Yarn:** Worsted weight (Medium / #4) yarn.
- **Amount needed:** approximately **650–750 yards (595–685 m)** total. This is a *large* scarf, so plan for about **4–5 skeins** of a typical 150–175 yard ball. *Buy all your yarn at once and check that the dye-lot numbers match so the color is consistent.*
- A smooth, light-colored yarn (not too fuzzy or dark) makes it easiest to see your stitches as a beginner.
- **Needles:** US 8 (5 mm) needles. Straight needles (10"–14" long) OR a circular needle (24"–32" cable) both work — a circular needle comfortably holds all the stitches and many beginners find it easier on the hands.
- **Notions:**
- 1 blunt-tip yarn needle (also called a tapestry or darning needle) for weaving in ends
- Scissors
- A tape measure
- Optional: a few stitch markers or scrap yarn to mark your progress
---
## GAUGE
**18 stitches and 36 rows = 4 inches (10 cm)** in garter stitch on US 8 (5 mm) needles.
> **Why gauge matters (and why you don't need to stress):** Gauge is just how big your stitches are. For a scarf, exact gauge is *not* critical — a slightly looser or tighter scarf is still a perfectly good scarf. But checking gauge tells you whether your scarf will end up the size described and helps you estimate yarn.
>
> **How to check (optional but recommended):** Cast on about 22 stitches and knit every row until you have a square about 5 inches tall. Lay it flat and measure 4 inches across the middle, counting the stitches. If you count about 18, you're on gauge. More than 18 = your knitting is tight, try the next size larger needle. Fewer than 18 = your knitting is loose, try one size smaller.
---
## FINISHED SIZE
- **Width:** approximately **12 inches (30 cm)**
- **Length:** approximately **72 inches (183 cm)**
This is intentionally wide and long ("large") so it can be wrapped twice around the neck or worn as a shoulder shawl. You can easily make it shorter or longer — see the **Customizing** notes in the Pattern section.
---
## ABBREVIATIONS
| Abbreviation | Meaning |
|---|---|
| **k** | knit |
| **st(s)** | stitch(es) |
| **CO** | cast on |
| **BO** | bind off (also called "cast off") |
| **RS / WS** | right side / wrong side (in garter stitch both sides look the same, so don't worry about these) |
| **" / in** | inch(es) |
*This pattern uses only the **knit** stitch. That's it! If you can knit, you can make this scarf.*
---
## PATTERN
### Math check (so you can trust the numbers)
- Target width = 12"
- Gauge = 18 sts over 4" → 18 ÷ 4 = **4.5 sts per inch**
- Cast-on = 12 × 4.5 = **54 stitches** ✓
- Length is worked by measuring (not by counting rows), so any small gauge difference simply means a few more or fewer rows — the scarf still comes out the right size.
---
### Step 1 — Cast On
Cast on **54 stitches**.
> **Beginner tip — which cast-on?** The **long-tail cast-on** gives a tidy, stretchy edge and is worth learning, but the **knitted cast-on** is the simplest if you're brand new. Either is fine. Whichever you choose, leave a **6-inch (15 cm) tail** hanging at the start — you'll weave it in later.
>
> **Don't cast on too tightly!** Beginners tend to make a tight cast-on edge. Keep your stitches loose enough to slide easily along the needle. If yours feels tight, cast on over two needles held together, then slip one out before you start knitting.
**Count your stitches now. You should have 54.** Counting is the single best habit you can build. Count again after the first few rows.
---
### Step 2 — Knit Every Row (Garter Stitch)
This is the entire body of the scarf:
> **Every Row:** Knit all 54 stitches across. Turn your work and do it again. Repeat forever (well, for about 72 inches!).
That's the whole pattern. Knit one row, turn, knit the next row, turn, and keep going. Because you knit every row, you are making **garter stitch** — the cozy, ridged, bumpy fabric that looks identical front and back.
**What garter stitch looks like:** Pairs of rows form a raised horizontal "ridge." It takes **2 rows to make 1 ridge**. About every **18 ridges (36 rows) ≈ 4 inches** of length.
> **Beginner tips while you knit:**
> 1. **Keep counting your stitches** every few rows. You should always have **54**. If you suddenly have 53 or 55, you may have accidentally added or dropped a stitch — see Troubleshooting below.
> 2. **Watch your edges.** Don't knit too tightly at the start of a row, and make sure you only have *one* loop at each edge, not an accidental extra one (this happens when the yarn flips over the needle). Pulling the first stitch of each row gently snug helps keep neat edges.
> 3. **Relax your hands.** Tight knitting is slow and tiring. Let the yarn flow.
> 4. **Stop in the middle of a row only if you must.** It's easier to keep your place if you stop at the end of a row.
---
### Step 3 — Knit to Length
Continue knitting every row until your scarf measures approximately **72 inches (183 cm)** from the cast-on edge.
> **How to measure:** Lay the scarf flat on a table (don't stretch it) and run your tape measure from the cast-on edge to the needle. Garter stitch is stretchy, so measure relaxed.
>
> **Run-out-of-yarn safety:** When you have only a small ball of yarn left and you're near your target length, it's fine to bind off a little short rather than risk running out mid-bind-off. The bind-off uses roughly **3 times the width in yarn** (about 36"/1 m here), so make sure you have at least that much plus a 6" tail before starting Step 4.
---
### Step 4 — Bind Off
Bind off all 54 stitches loosely:
1. Knit the first 2 stitches.
2. Using the tip of your left needle, lift the **first** stitch over the **second** stitch and off the needle. (1 stitch remains on the right needle.)
3. Knit 1 more stitch (now 2 on the right needle again).
4. Lift the first over the second again.
5. Repeat steps 3–4 until **1 stitch** remains.
6. Cut the yarn leaving a **6-inch (15 cm) tail**, pull the tail through that last loop, and gently tighten.
> **Bind off loosely!** A tight bind-off makes the end of the scarf pucker. If yours tends to be tight, bind off using a needle one or two sizes larger in your right hand.
---
### Customizing (optional)
- **Shorter scarf:** Stop at 60" for a single-wrap length.
- **Even larger / blanket-scarf:** Add more cast-on stitches in multiples of 1 to widen (every additional 4–5 sts ≈ 1 extra inch of width), and/or knit to 80"+. Remember more size = more yarn.
- **Stripes:** Switch yarn colors at the start of any row. Carry the unused color loosely up the side, or cut and rejoin. Garter stripes look great in even bands (e.g., change color every 12 rows / 6 ridges).
---
## FINISHING
1. **Weave in the ends.** Thread one yarn tail onto your blunt yarn needle. On the wrong side, weave the tail in and out through the bumps of the garter ridges for about 2 inches, then back the other way for an inch to lock it. Trim the excess close to the fabric (don't cut the scarf!). Repeat with the other tail. If you joined new balls of yarn along the way, weave those ends in the same way.
2. **Block the scarf (optional but lovely).** Blocking evens out your stitches and makes the scarf lie flat and look polished.
- **Wet blocking:** Soak the scarf in cool water with a little wool wash for 15 minutes. Gently squeeze out water (don't wring), roll in a towel and press. Lay flat on a dry towel, pat into a neat rectangle (about 12" × 72"), and let it dry completely.
- Garter stitch doesn't curl, so no pinning is strictly required — just smooth it into shape.
3. **Wear it!** Loop it twice around your neck, drape it over your shoulders, or wrap it as a shawl. You made this. 🎉
---
### Quick Troubleshooting for Beginners
- **My stitch count changed.** You likely added a stitch (often by knitting into the yarn that flips over the needle at the start of a row — that's not a stitch, it's just the working yarn) or dropped one. Knit back to find it, or simply on the next row knit two of the suspicious loops together / make one to get back to 54. A stitch or two off in a scarf is barely noticeable.
- **There's a hole / dropped stitch.** A loose loop hanging below the others is a dropped stitch. Use your needle tip to gently lift it back up through the bars above it, or ask a knitting friend — it's an easy rescue.
- **My edges are loopy/uneven.** Snug up the first stitch of each row and keep tension even. Blocking also helps a lot.
- **One side looks different.** It shouldn't in garter stitch — both sides are identical, which is part of why it's perfect for a scarf.
Happy knitting!
Disclaimer: This pattern was generated by AI and should be reviewed for accuracy before use. While we strive for quality, AI-generated content may contain errors. Please verify measurements, stitch counts, and instructions before beginning your project. Generated by purlJam.uk
Access your pattern anytime
Bookmark this page to access your pattern anytime