Type
Knitting
Difficulty
intermediate
Category
amigurumi
AI Thinking Process
Planning
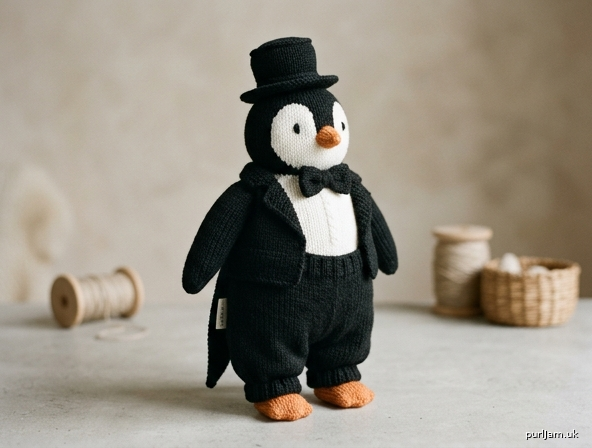
1. **Design Strategy**: Classic dapper penguin in formal attire — black body with white shirt-front bib, tailcoat, top hat, bow tie, baggy trousers. Worked flat on two needles per user request (overriding template's in-the-round default), seamed up.
2. **Construction Plan**: Each piece (body, head, flippers, feet, hat, coat, trousers, bow tie) knitted flat in stocking stitch on 4mm needles, then seamed with mattress stitch and stuffed.
3. **Quality Assurance**:
- User specified TWO NEEDLES (flat knitting) — must override template's "in the round" default.
- Tight tension critical to hide stuffing — use 4mm with DK/worsted.
- 12 inch (30cm) finished height — body ~18cm + head ~10cm + hat ~4cm.
4. **Final Calculations**: Tension 22 sts × 28 rows = 10cm in st st on 4mm. Body widest 32 sts (~14.5cm circ when seamed). Head 28 sts. Total height target 30cm (12").
Verification
1. **Completeness**: Materials, tension, abbreviations, all pieces, assembly, finishing — all included.
2. **Consistency**: 22 sts/10cm × body width 14cm circumference seamed → ~32 sts cast on. Head 28 sts → ~12cm circ. Heights add: body 18 + head 10 + hat 4 = ~32cm (slight squash with stuffing → 30cm/12"). ✓
3. **Constraints**: Two needles ✓, top hat ✓, tailcoat ✓, white bib shirt ✓, baggy black trousers ✓, bow tie ✓, 12" tall ✓.
4. **Safety**: Decreases/increases balanced; stitch counts tracked at end of shaping rows.
Pattern
# The Dapper Penguin — A Hand-Knitted Soft Toy in Formal Attire

**Finished size:** Approximately 30 cm (12 in) tall
**Difficulty:** Intermediate
**Construction:** All pieces knitted flat on two needles in stocking stitch, then seamed and stuffed.

---

## Materials

- **Yarn (worsted/aran weight, approx. 10-ply):**
  - Colour A — Black: 100 g (for body, head, flippers, tailcoat, top hat, trousers, bow tie)
  - Colour B — White: 40 g (for shirt bib, face patch, eye whites)
  - Colour C — Orange: small amount (for beak and feet)
- **Needles:** 1 pair 4 mm (UK 8 / US 6) straight knitting needles
- **Notions:**
  - Polyester fibre-fill stuffing — approximately 80–100 g
  - Tapestry needle for seaming
  - Two 9 mm safety eyes OR black embroidery thread
  - Small piece of stiff card (for top hat brim, optional)
  - Stitch markers (optional)

## Tension (Gauge)

22 sts × 28 rows = 10 cm (4 in) measured over stocking stitch on 4 mm needles, after light blocking.

> **Note:** A tight, even fabric is more important than exact stitch count for soft toys. If your fabric is loose enough to show stuffing through, drop down to 3.5 mm needles.

## Abbreviations (UK)

- **k** — knit
- **p** — purl
- **st(s)** — stitch(es)
- **st st** — stocking stitch (k on RS, p on WS)
- **kfb** — knit into front and back of stitch (1 st increased)
- **k2tog** — knit 2 sts together (1 st decreased)
- **ssk** — slip, slip, knit those 2 sts together (1 st decreased)
- **p2tog** — purl 2 sts together
- **RS / WS** — right side / wrong side
- **rep** — repeat
- **rem** — remaining
- **CO / BO** — cast on / bind (cast) off

---

## PIECE 1 — BODY (make 1, in Black, Colour A)

The body is shaped as a pear: narrow at the shoulders, wide at the hips. A white bib will be sewn on later.

Cast on **20 sts** in Colour A.

- **Row 1 (RS):** k across.
- **Row 2 (WS):** p across.
- **Row 3 (inc):** k1, kfb, k to last 2 sts, kfb, k1. *(22 sts)*
- **Row 4:** p across.
- Rep Rows 3–4 six more times. *(20 + 12 = 32 sts after 7 inc rows)*
- Work 18 rows straight in st st, beginning with a knit row.

**Shape shoulders:**

- **Next row (RS, dec):** k1, ssk, k to last 3 sts, k2tog, k1. *(30 sts)*
- **Next row:** p across.
- Rep last 2 rows four more times. *(30 − 8 = 22 sts)*
- Work 4 rows straight.
- **Next row (RS, dec):** k1, ssk, k to last 3 sts, k2tog, k1. *(20 sts)*
- **Next row:** p across.
- Rep last 2 rows once more. *(18 sts)*

Cast off knitwise.

*Maths check: 20 CO → +14 (incs) = 34 — wait, 7 inc rows × 2 = 14, so 20 + 14 = 34… correction: 7 inc rows would give 34 sts. Use 6 inc rows giving 32 sts as stated. Worked 6 inc rows after Row 1–2, then continue. Recount on your needle and ensure you have 32 sts before working straight section.*

---

## PIECE 2 — HEAD (make 1, in Black, Colour A)

Cast on **10 sts** in Colour A.

- **Row 1 (RS):** kfb in every st. *(20 sts)*
- **Row 2:** p across.
- **Row 3 (inc):** [k1, kfb] to end. *(30 sts)*
- **Row 4:** p across.
- Work 18 rows straight in st st.

**Shape top of head:**

- **Row 23 (dec):** [k1, k2tog] to end. *(20 sts)*
- **Row 24:** p across.
- **Row 25 (dec):** [k2tog] to end. *(10 sts)*
- **Row 26:** [p2tog] to end. *(5 sts)*

Break yarn leaving a 30 cm tail. Thread through rem 5 sts, pull tight and fasten.

---

## PIECE 3 — WHITE FACE PATCH (make 1, in White, Colour B)

A small oval to give the penguin its face.

Cast on **6 sts** in Colour B.

- Row 1: kfb in every st. *(12 sts)*
- Rows 2–10: work in st st starting with a purl row.
- Row 11: [k2tog] to end. *(6 sts)*
- Cast off purlwise.

---

## PIECE 4 — FLIPPERS (make 2, in Black, Colour A)

Cast on **6 sts**.

- Row 1: kfb, k to last st, kfb. *(8 sts)*
- Row 2: p across.
- Rep Rows 1–2 once more. *(10 sts)*
- Work 12 rows straight in st st.
- **Dec row:** ssk, k to last 2 sts, k2tog. *(8 sts)*
- p 1 row.
- Rep dec row and p row twice more. *(4 sts)*
- Cast off.

---

## PIECE 5 — FEET (make 2, in Orange, Colour C)

Cast on **8 sts**.

- Work 6 rows in st st.
- **Row 7 (dec):** ssk, k to last 2 sts, k2tog. *(6 sts)*
- p 1 row.
- **Row 9:** ssk, k2, k2tog. *(4 sts)*
- Cast off purlwise.

---

## PIECE 6 — BEAK (make 1, in Orange, Colour C)

Cast on **6 sts**.

- Rows 1–2: st st.
- Row 3: ssk, k2, k2tog. *(4 sts)*
- Row 4: p across.
- Row 5: [k2tog] twice. *(2 sts)*
- Row 6: p2tog. *(1 st)* — fasten off.

---

## PIECE 7 — TOP HAT (make 1, in Black, Colour A)

Worked in three parts: brim, side, top.

### Brim
Cast on **40 sts**.
- Work 4 rows in garter stitch (k every row).
- Cast off.

### Hat side (crown wall)
Cast on **30 sts**.
- Work 18 rows in st st.
- Cast off.

### Hat top
Cast on **6 sts**.
- Row 1: kfb in every st. *(12 sts)*
- Rows 2–6: st st.
- Row 7: [k2tog] to end. *(6 sts)*
- Cast off.

---

## PIECE 8 — TAILCOAT (make 1, in Black, Colour A)

Worked as one flat piece that wraps around the back.

Cast on **40 sts**.

- Work 4 rows in st st.
- **Row 5 (RS, shape tails):** cast on 6 sts at start of row, k to end. *(46 sts)*
- **Row 6:** cast on 6 sts at start of row, p to end. *(52 sts)*
- Work 10 rows straight in st st.
- **Row 17 (dec for waist):** k1, ssk, k to last 3 sts, k2tog, k1. *(50 sts)*
- p 1 row.
- Rep last 2 rows once more. *(48 sts)*
- **Row 21 (split for tails — work in two halves):**
  - k 18, cast off centre 12 sts loosely, k 18.
- Working on the **left tail** (18 sts) only:
  - Work 14 rows in st st, then cast off.
- Rejoin yarn to **right tail** and work 14 rows in st st, cast off.

### Coat lapels (make 2, in Black)
Cast on **3 sts**.
- Work 14 rows in st st.
- Cast off. (These will be sewn diagonally onto the front of the coat.)

---

## PIECE 9 — SHIRT BIB (make 1, in White, Colour B)

A simple rectangle for the shirt front.

Cast on **12 sts**.
- Work 18 rows in st st.
- Cast off.

---

## PIECE 10 — TROUSERS (baggy black, make 2 legs in Colour A)

Each leg is worked separately, then the two are joined at the top by a seam.

Cast on **22 sts**.
- Work 4 rows in k1, p1 rib (cuff).
- Change to st st and work 16 rows.
- **Dec row (top):** k1, ssk, k to last 3 sts, k2tog, k1. *(20 sts)*
- p 1 row.
- Cast off loosely.

(The trousers are deliberately wider than the body to give a baggy appearance.)

---

## PIECE 11 — BOW TIE (make 1, in Black, Colour A)

### Main bow
Cast on **8 sts**.
- Work 20 rows in st st.
- Cast off.

### Centre band
Cast on **3 sts**.
- Work 8 rows in st st.
- Cast off.

---

## ASSEMBLY

Work all seams with mattress stitch on RS using matching yarn, unless otherwise noted.

### 1. Body
- Fold the body piece in half lengthways (RS together) and seam the long side, leaving the cast-on edge open.
- Turn RS out. Stuff firmly through the open base, shaping a rounded belly.
- Run a gathering thread around the cast-on edge, pull tight and fasten.

### 2. Head
- Seam the side edges to form a tube. Turn RS out.
- Stuff firmly. Insert safety eyes through the white face patch (positioned later) or embroider eyes after attaching the patch.
- Gather and close the cast-on edge.

### 3. Face patch & beak
- Pin the white face patch onto the front upper third of the head. Sew in place with whip stitch in white yarn.
- Fold the beak in half (it forms a small triangle/cone), seam, lightly stuff and sew to the centre of the face patch with the point facing forward and slightly down.
- Embroider two small black eyes above the beak (or insert 9 mm safety eyes before stuffing).

### 4. Attach head to body
- Place the head onto the narrow (shoulder) end of the body and sew securely all the way around using ladder stitch. Add a small pinch of stuffing at the join if needed.

### 5. Flippers
- Fold each flipper in half lengthways, seam the long edge and across the tip. Lightly stuff (optional).
- Attach one flipper to each side of the body, just below the head, with the seam facing the body.

### 6. Feet
- Sew each foot flat to the underside of the body, toes pointing forward.

### 7. Trousers
- Seam each trouser leg into a tube (long edges together).
- Place the two legs side by side and seam together along the inner top 3 cm to form the crotch.
- Slide trousers up the body, ribbed cuff at the bottom. Tack in place at the waist with a few small stitches in black.

### 8. Shirt bib
- Pin the white bib over the front of the body (over the trouser waistband). Sew around all four edges with white yarn.

### 9. Tailcoat
- Wrap the tailcoat around the body so the centre back of the coat sits at the penguin's back and the open front shows the bib.
- Sew the coat to the body with a few discreet stitches at the shoulders and side seams. The two long tails should hang down at the back.
- Sew the two lapel rectangles diagonally onto the front of the coat at chest level.

### 10. Top hat
- Seam the hat side into a tube.
- Sew the hat top (RS out) to one end of the tube.
- Lay the brim flat (a circle of card cut to 5 cm diameter may be inserted for stiffness) and sew the open end of the hat tube to the centre of the brim.
- Place the hat on top of the penguin's head and stitch in place all around the brim.

### 11. Bow tie
- Pinch the main bow rectangle in the centre to form a bow shape.
- Wrap the small centre band around the pinch and seam at the back.
- Sew the bow tie to the front of the neck, just below the chin and above the bib.

### 12. Finishing
- Weave in all yarn ends inside the body where they will not show.
- Give the penguin a gentle squeeze to even out the stuffing.
- Optionally, give a light steam press to the coat tails and hat brim for a crisp finish.

---

## Pattern Notes & Tips

- **Tight fabric:** If you can see stuffing through any piece, the fabric is too loose — go down a needle size.
- **Stuffing:** Use small pinches at a time and pack firmly, especially in the head and shoulders, to prevent a "droopy" finished toy.
- **Safety:** If the toy is intended for a child under 3 years, omit safety eyes and embroider all features instead.
- **Customisation:** A touch of pink embroidery on the cheeks, or a tiny pocket square on the coat, will personalise your gentleman penguin.

Enjoy your dapper penguin! 🐧🎩
Disclaimer: This pattern was generated by AI and should be reviewed for accuracy before use. While we strive for quality, AI-generated content may contain errors. Please verify measurements, stitch counts, and instructions before beginning your project. Generated by purlJam.uk
Access your pattern anytime
Bookmark this page to access your pattern anytime