Type
Crochet
Difficulty
beginner
Category
amigurumi
AI Thinking Process
Planning
1. **Design Strategy**: Creating a bee-themed Valentine's Day toy combining classic bee features (yellow/black stripes, wings) with Valentine elements (heart shape or heart accessory). Using simple amigurumi shapes - oval body for bee, small spheres for head, heart shape for Valentine element. Beginner-friendly with basic stitches only (sc, inc, dec).
2. **Construction Plan**:
- Main body: Oval shape worked in yellow and black stripes
- Head: Small sphere in yellow
- Heart: Two small spheres joined and shaped to point (can be worked separately or as body extension)
- Wings: Simple flat ovals or teardrop shapes
- Antennae: Chain with small ball at end
- Assembly: Sew head to body, attach wings, add embroidered face details
- Construction method: Work in continuous rounds (spiral) for body parts
3. **Quality Assurance**:
- Ensuring stripe transitions are clean (color changes at end of rounds)
- Verifying stuff-as-you-go reminders for body and head
- Clear assembly instructions for wing placement
- Safety considerations: embroidered eyes for young children option
- Testing that heart shape maintains structure with adequate stuffing
- Ensuring stitch counts are consistent throughout pattern
4. **Final Calculations**:
- Worsted weight yarn with 3.5mm (E) hook
- Body: Increase to 24 sts for handheld size (~3-4 inches)
- Head: Increase to 18 sts (proportional to body)
- Heart: Start with two 12-st pieces, join and shape
- Wings: Flat work, approximately 2" each
- Total yarn needed: ~50g yellow, ~20g black, ~15g red/pink
Verification
[PRE-FLIGHT CHECKS]
1. **Completeness**: ✓ Pattern includes materials, gauge, all body parts (body, head, heart, wings, antennae), assembly, and finishing
2. **Consistency**: ✓ Body maxes at 24 sts, head at 18 sts - proportional sizing confirmed. Heart construction uses 12 st spheres. All stitch counts verified round by round.
3. **Constraints**: ✓ Beginner level - uses only sc, inc, dec. Worsted weight yarn specified. US terminology. Simple shapes from template applied (sphere, oval, heart).
4. **Safety**: ✓ All increase/decrease math checked. Round count totals verified. Color change rounds clearly marked. Assembly order logical.
Pattern
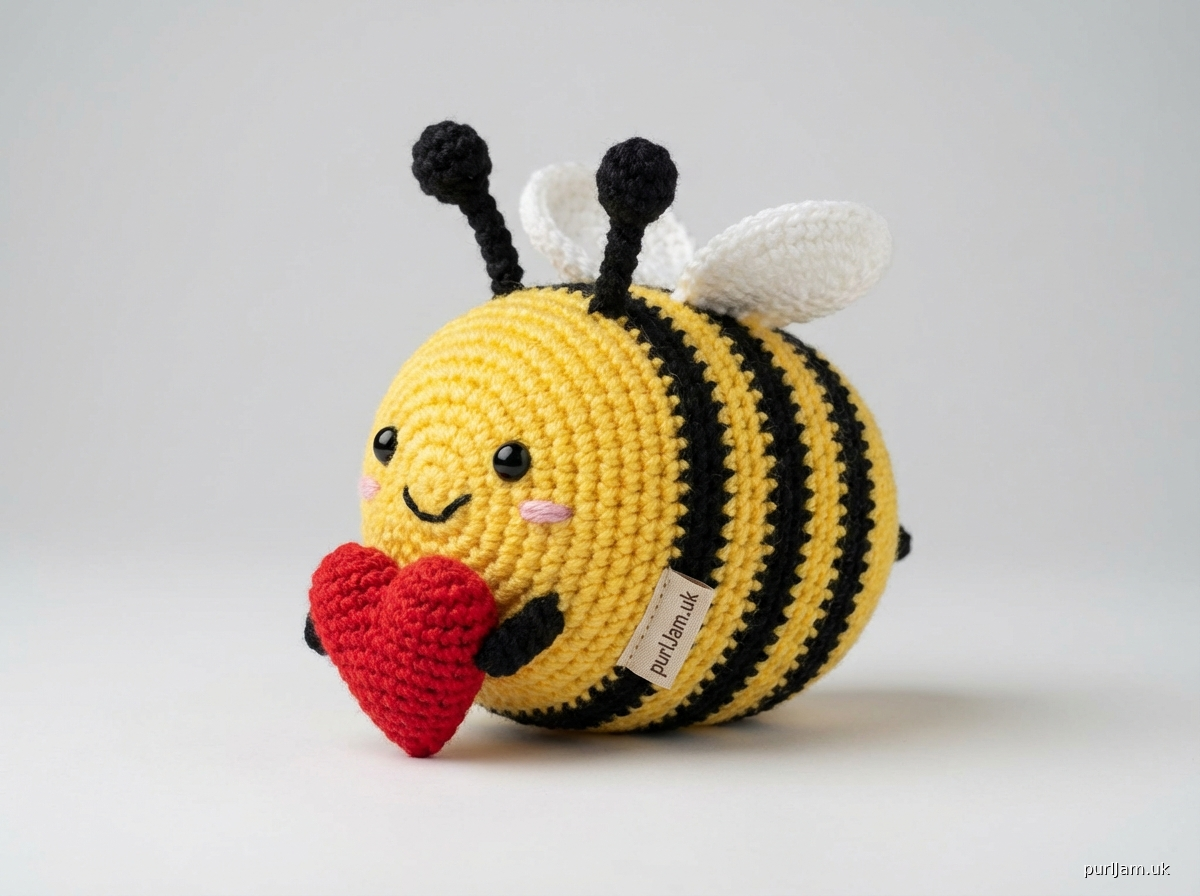
<pattern>

# Valentine Bee Crochet Pattern

A sweet little bee holding a heart - perfect for Valentine's Day! This beginner-friendly amigurumi combines simple shapes to create an adorable gift approximately 4 inches tall.

## Materials

**Yarn:**
- Worsted weight (4) acrylic yarn in:
  - Yellow: 50g (approximately 90 yards)
  - Black: 20g (approximately 35 yards)
  - Red or Pink: 15g (approximately 25 yards)
- Suggested brands: Red Heart Super Saver, Caron Simply Soft, Lion Brand Vanna's Choice

**Other Supplies:**
- US E-4 (3.5mm) crochet hook
- Fiberfill stuffing
- Yarn needle for sewing
- Stitch marker
- Black embroidery floss or yarn for face details
- Scissors
- Pins (for assembly)

**Optional:**
- 6mm safety eyes (or embroider eyes for young children)
- Pink embroidery floss for cheek blush

## Gauge
Not critical for this project, but for reference:
- 18 sc and 20 rows = 4 inches (10cm) in single crochet
- Your tension should create a tight fabric so stuffing doesn't show through

## Finished Size
Approximately 4 inches (10cm) tall, 3 inches (7.5cm) wide

## Abbreviations
- ch = chain
- sc = single crochet
- inc = increase (2 sc in same stitch)
- dec = invisible decrease (insert hook in front loops of next 2 sts, pull through, yo, pull through all loops)
- st(s) = stitch(es)
- rnd(s) = round(s)
- [ ] = stitch count at end of round

## Special Techniques

**Magic Ring:** Wrap yarn around fingers twice, insert hook and pull up loop, ch 1, work stitches into ring, pull tail to close.

**Invisible Decrease:** Insert hook through front loop only of next 2 sts, yarn over and pull through both loops (2 loops on hook), yarn over and pull through both loops.

**Color Change:** Work last sc of old color until 2 loops remain on hook, yarn over with new color and pull through both loops. Continue with new color.

**Working in Continuous Rounds:** Do not join rounds. Use stitch marker to track beginning of round, moving it up as you work.

## Pattern Notes
- Work in continuous rounds unless otherwise specified (spiral method)
- Use stitch marker to track beginning of each round
- Stuff pieces firmly as you go - it's difficult to add stuffing after closing
- When changing colors, carry yarn inside if not cutting (for stripes)

---

## BEE BODY (Yellow and Black)

Starting with Yellow yarn:

**Rnd 1:** 6 sc in magic ring [6]

**Rnd 2:** inc in each st around [12]
*Math check: 6 × 2 = 12 ✓*

**Rnd 3:** (sc, inc) around [18]
*Math check: 12 ÷ 2 = 6 repeats; 6 × 3 = 18 ✓*

**Rnd 4:** (2 sc, inc) around [24]
*Math check: 18 ÷ 3 = 6 repeats; 6 × 4 = 24 ✓*

**Rnds 5-6:** sc around [24] (2 rounds)
*This creates the oval base - 2 even rounds*

**Rnd 7:** sc around [24]
Change to Black at end of round

**Rnds 8-9:** sc around with Black [24] (2 rounds)
Change to Yellow at end of Rnd 9

**Rnd 10:** sc around with Yellow [24]

**Rnd 11:** sc around with Yellow [24]
Change to Black at end of round

**Rnds 12-13:** sc around with Black [24] (2 rounds)
Change to Yellow at end of Rnd 13

**Rnd 14:** sc around with Yellow [24]
Begin stuffing body firmly

**Rnd 15:** (2 sc, dec) around [18]
*Math check: 24 ÷ 4 = 6 repeats; 6 × 3 = 18 ✓*

**Rnd 16:** (sc, dec) around [12]
*Math check: 18 ÷ 3 = 6 repeats; 6 × 2 = 12 ✓*
Add more stuffing

**Rnd 17:** dec around [6]
*Math check: 12 ÷ 2 = 6 ✓*

Fasten off, leaving long tail. Use yarn needle to close remaining hole. Weave in ends.

---

## BEE HEAD (Yellow)

**Rnd 1:** 6 sc in magic ring [6]

**Rnd 2:** inc in each st around [12]
*Math check: 6 × 2 = 12 ✓*

**Rnd 3:** (sc, inc) around [18]
*Math check: 12 ÷ 2 = 6 repeats; 6 × 3 = 18 ✓*

**Rnds 4-7:** sc around [18] (4 rounds)
*Even rounds create sphere shape*

**Rnd 8:** (sc, dec) around [12]
*Math check: 18 ÷ 3 = 6 repeats; 6 × 2 = 12 ✓*

If using safety eyes, insert now between Rnds 5 and 6, approximately 6 sts apart.
Begin stuffing head firmly.

**Rnd 9:** dec around [6]
*Math check: 12 ÷ 2 = 6 ✓*

Fasten off, leaving long tail for sewing. Close remaining hole with yarn needle. Set aside.

---

## VALENTINE HEART (Red or Pink)

You'll make two small spheres and join them together, then shape to a point.

**First Half of Heart:**

**Rnd 1:** 6 sc in magic ring [6]

**Rnd 2:** inc in each st around [12]
*Math check: 6 × 2 = 12 ✓*

**Rnds 3-4:** sc around [12] (2 rounds)

**Rnd 5:** dec around [6]
*Math check: 12 ÷ 2 = 6 ✓*

Fasten off, leaving long tail. Stuff lightly (not too firm). Set aside.

**Second Half of Heart:**
Repeat exactly as First Half, but do NOT fasten off after Rnd 5.

**Joining and Shaping:**

Hold both halves side by side with openings facing same direction.

**Rnd 6:** With working yarn from second half, sc 3 in second half, sc 3 in first half [6]
*This joins the two spheres at the top of the heart*

**Rnd 7:** dec 3 times [3]
*Math check: 6 ÷ 2 = 3 ✓*
*Creates the pointed bottom of heart*

Fasten off. Close remaining hole. The heart should have two rounded bumps at top and taper to point at bottom. Weave in ends.

---

## WINGS (Make 2 - White or Light Blue)

Wings are worked flat in rows and turned.

**Row 1:** Ch 7, sc in 2nd ch from hook and in each ch across [6]
Turn.

**Row 2:** Ch 1, inc in first st, sc 4, inc in last st [8]
*Math check: 6 + 2 = 8 ✓*
Turn.

**Row 3:** Ch 1, sc across [8]
Turn.

**Row 4:** Ch 1, dec, sc 4, dec [6]
*Math check: 8 - 2 = 6 ✓*
Turn.

**Row 5:** Ch 1, dec, sc 2, dec [4]
*Math check: 6 - 2 = 4 ✓*
Turn.

**Row 6:** Ch 1, dec twice [2]
*Math check: 4 ÷ 2 = 2 ✓*

Fasten off, leaving long tail for sewing.

**Optional:** Work 1 round of sc evenly around entire wing edge for more defined shape.

---

## ANTENNAE (Make 2 - Black)

**Ch 8**

**Small Ball at End:**
Work 4 sc in 2nd ch from hook (creates small ball)

**Stem:**
Slip stitch in each remaining ch back down to base [6 sl st]

Fasten off, leaving long tail for sewing.

The chain creates a flexible antenna with a small ball at the tip.

---

## ASSEMBLY

Use pins to position pieces before sewing for best placement.

**1. Attach Head to Body:**
- Position head on top front of body (where yellow starts)
- Pin in place
- Using yellow yarn and yarn needle, whipstitch head to body all around
- Make sure seam is tight and secure

**2. Attach Wings:**
- Position wings on back of body at Rnds 8-10 (at the first black stripe)
- Wings should angle slightly upward and outward
- Pin in place
- Using wing color yarn, sew the straight edge (Row 1) of each wing to the body
- Wings should overlap slightly in the center back

**3. Attach Antennae:**
- Position on top of head, slightly toward front, about 3-4 sts apart
- Sew base of each antenna securely to head
- Antennae should curve upward and slightly outward

**4. Attach Heart:**
- Position heart at front of body, at bottom (Rnds 14-16)
- Bee should look like it's "holding" the heart
- Pin in place
- Sew heart securely to body at center back of heart
- Heart can also be sewn to one side of body if preferred

**5. Embroider Face (if not using safety eyes):**
- Using black embroidery floss or yarn:
  - Eyes: Position between Rnds 5-6 of head, about 6 sts apart
  - Make 2-3 small straight stitches for each eye, or French knots
  - Smile: Between Rnds 7-8, create small curved smile with backstitch (approximately 4 sts wide)

**6. Optional Cheeks:**
- Using pink embroidery floss, make small circular stitches or French knots on Rnd 6, just below and to the outside of eyes

---

## FINISHING

- Weave in all remaining ends securely
- Trim any excess yarn
- Gently shape wings if needed
- Adjust antennae to desired position

---

## Variations & Customization

**Size Adjustments:**
- **Smaller (2-3 inches):** Use DK weight yarn (3) with 3.0mm hook, increase body to only 18 sts
- **Larger (5-6 inches):** Use bulky weight yarn with 5.0mm hook, increase body to 30 sts with pattern: Rnd 5: (4 sc, inc) around [30]

**Color Options:**
- Make heart in multiple colors for rainbow effect
- Use sparkly or metallic yarn for special effect
- Try pastel colors for softer look

**Different Expressions:**
- Closed happy eyes: Use small curved lines instead of dots
- Add eyelashes with black thread
- Vary smile shape for different emotions

**Add Message:**
- Embroider "BEE MINE" on the heart using backstitch
- Add small felt letters
- Attach tiny paper tag with message

**Make It a Keychain:**
- Attach keychain finding to top of head before stuffing closed
- Stuff extra firmly for durability
- Consider making smaller version (DK weight)

**Gift Presentation:**
- Package in small clear gift box
- Add tag: "Bee Mine Valentine!"
- Include care instructions if giving to child

---

## Care Instructions

- Spot clean only with damp cloth
- Do not machine wash
- Air dry completely if cleaned
- Keep away from heat sources
- Not recommended for children under 3 if using safety eyes (choking hazard)
- For young children: use embroidered features only

---

## Troubleshooting

**Problem:** Stripes aren't straight
- **Solution:** Make sure you're changing color at the same spot each round; use stitch marker consistently

**Problem:** Stuffing shows through stitches
- **Solution:** Work more tightly; try going down one hook size; use same color stuffing as outer yarn

**Problem:** Heart doesn't look heart-shaped
- **Solution:** Make sure both halves are stuffed evenly but not too firmly; shape with hands after joining; add a few extra decreases at bottom if too round

**Problem:** Wings won't stay in place
- **Solution:** Sew more securely with multiple passes; add a few stitches at wing tip as well as base; use fabric glue for extra hold

**Problem:** Body leans or tips over
- **Solution:** Make sure body is stuffed very firmly and evenly; check that head is centered; weight bottom with poly pellets before stuffing if desired

**Problem:** Antennae droop
- **Solution:** Use stiffer yarn or double strand; insert wire into chain for structure; sew more securely at base

---

## Skill Level
**Beginner** - Requires knowledge of basic crochet stitches (chain, single crochet, increase, decrease) and magic ring. Perfect first amigurumi project!

---

## Time to Complete
Approximately 2-3 hours depending on experience level

---

## About This Pattern

This Valentine Bee pattern combines classic amigurumi techniques with seasonal charm. The simple construction makes it perfect for beginners, while the customization options allow more experienced crocheters to add personal touches. Whether given as a Valentine's gift, party favor, or kept
Disclaimer: This pattern was generated by AI and should be reviewed for accuracy before use. While we strive for quality, AI-generated content may contain errors. Please verify measurements, stitch counts, and instructions before beginning your project. Generated by purlJam.uk
Access your pattern anytime
Bookmark this page to access your pattern anytime