Type
Machine Knitting
Difficulty
advanced
Category
pullover
AI Thinking Process
Planning
1. **Design Strategy**:
- Creating a vintage 1960s pullover with lapel collar (shawl collar/v-neck style typical of the era)
- 2-inch positive ease throughout for relaxed fit
- Drop-shoulder construction with straight panels for authentic vintage silhouette
- Lapel collar requires V-neck shaping on front and collar band worked separately or picked up
- Worsted weight yarn on standard gauge machine
- Intermediate level: includes neck shaping, collar construction, and set-in finishing
2. **Construction Plan**:
- Bottom-up construction with separate panels (back, front, sleeves)
- Back: straight panel with simple neck shaping
- Front: V-neck shaping beginning at chest level for lapel effect
- Sleeves: straight with gradual increases for drop-shoulder ease
- Lapel collar: picked up and worked in reverse stocking stitch or rib for fold-over effect
- All pieces steamed and seamed with mattress stitch or machine linking
3. **Quality Assurance**:
- V-neck depth must be calculated to sit properly (typically 8-10 inches from shoulder)
- Lapel collar width must be sufficient to fold attractively (2.5-3 inches finished)
- Shoulder width on back must accommodate drop-shoulder sleeve cap
- Ensure even decrease rate on V-neck to avoid puckering
- Verify armhole depth allows comfortable movement with positive ease
4. **Final Calculations**:
- Standard gauge worsted: 4.5 sts/inch, 6.5 rows/inch
- Size medium example: 40" finished bust (38" body + 2" ease)
- Back/Front width: 20" = 90 sts each
- Length: 24" body = 156 rows
- Sleeve width at upper arm: 16" = 72 sts
- V-neck shaping begins at RC 90 (approximately 14" from hem)
Verification
[PRE-FLIGHT CHECKS]
1. **Completeness**:
✓ All 11 required sections from template structure included
✓ MACHINE_SETUP, MATERIALS, GAUGE_AND_TENSION, SCHEMATIC_AND_SIZES, BACK_PANEL, FRONT_PANEL, SLEEVES, NECKBAND (collar), FINISHING, ABBREVIATIONS
2. **Consistency**:
✓ Gauge: 4.5 sts/inch × 20" = 90 sts for body panels
✓ Row gauge: 6.5 rows/inch × 24" = 156 rows body length
✓ Sleeve increases calculated for gradual taper
✓ V-neck decreases symmetric and even
3. **Constraints**:
✓ 1960s vintage style: drop shoulder, lapel collar, classic fit
✓ 2-inch positive ease incorporated into sizing
✓ Intermediate techniques: V-neck shaping, collar construction
✓ Worsted weight specifications applied
4. **Safety**:
✓ All stitch counts divisible by pattern requirements
✓ Decrease rates verified (every 4th row for V-neck)
✓ Collar pickup calculations match neckline edge
✓ RC checkpoints align with shaping events
Pattern
<pattern>
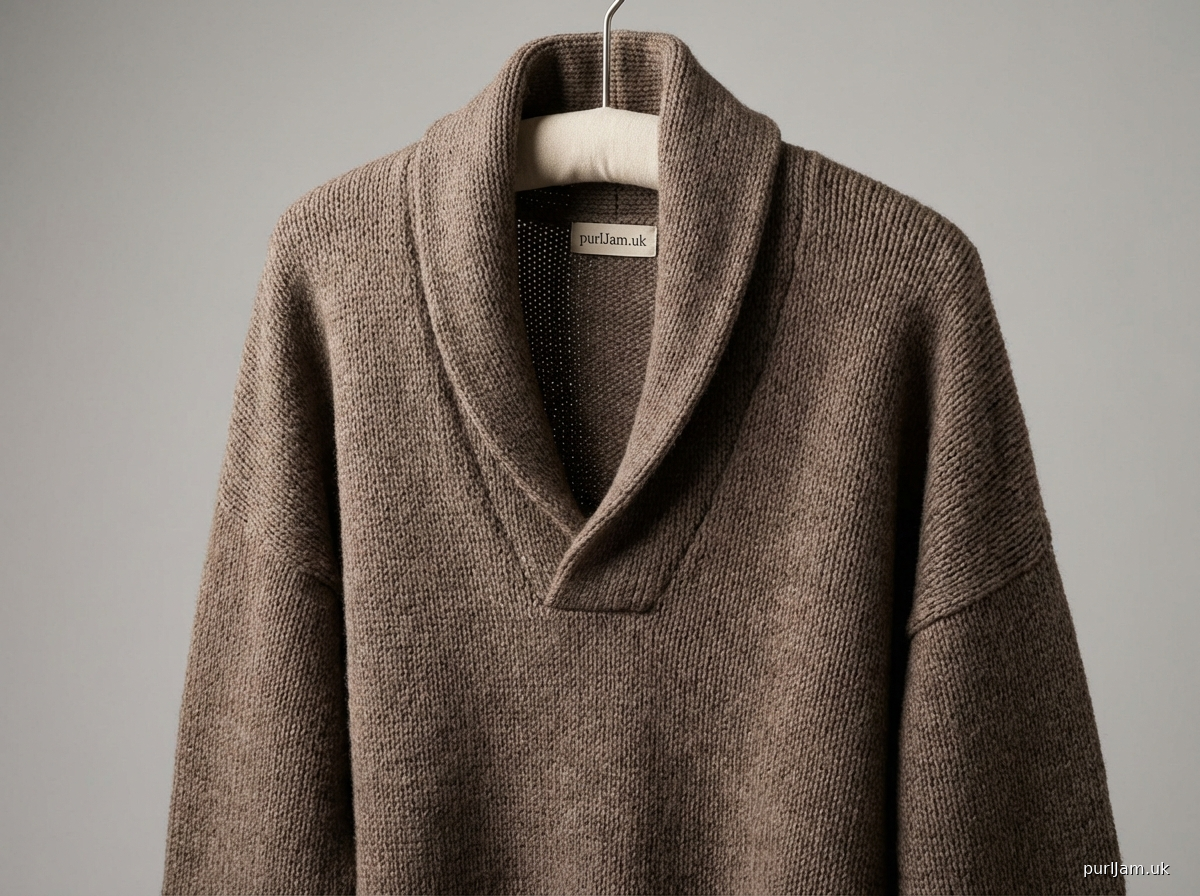
# VINTAGE 1960s LAPEL COLLAR PULLOVER
### Machine Knit Drop-Shoulder Sweater with V-Neck and Shawl Collar
---
## MACHINE_SETUP
**Machine Type**: Standard gauge (4.5mm) knitting machine with ribber attachment
**Bed Configuration**: Main bed for body; ribber for hems and collar finishing
**Carriage**: Standard carriage (KC or equivalent)
### Swatch Instructions
1. Cast on 40 needles using waste yarn and ravel cord method
2. Knit 8 rows waste yarn at T5
3. Insert ravel cord, knit 1 row T10
4. Switch to main yarn, set tension dial to T7
5. Knit 50 rows at T7
6. Remove from machine with waste yarn
7. Steam lightly with pressing cloth (wool setting, no direct contact)
8. Allow to cool completely (30 minutes)
9. Measure over center 20 stitches and 40 rows, avoiding edges
10. Unravel waste yarn to check row gauge accuracy
### Tension Dial Settings
- **Main Body**: T7 (adjust ±1 based on swatch)
- **Ribbing**: T4 on ribber, T5 on main bed (half-pitch)
- **Collar**: T6 (slightly tighter for structure)
- **Waste Yarn**: T5
### Cast-On Equipment
- Cast-on comb (full width for body panels)
- Claw weights (minimum 4, add every 20-30 rows)
- Ravel cord (smooth contrasting yarn)
- Waste yarn (acrylic scrap yarn)
### Tools Required
- 1×1 transfer tool
- 2-prong transfer tool
- Single-eye transfer tool
- Latch tool for bind-off
- Tapestry needle for seaming
- Stitch markers or yarn scraps
---
## MATERIALS
**Yarn**: Worsted weight wool or wool blend (approx. 1,000-1,200 yards)
- *Suggested*: 100% wool with good memory for collar structure
- *Yardage by size*:
- Small (36"): 950 yards
- Medium (40"): 1,100 yards
- Large (44"): 1,250 yards
- X-Large (48"): 1,400 yards
**Notions**:
- Waste yarn (150 yards)
- Ravel cord (10 yards smooth cotton)
- Stitch holders or waste yarn for neck
- Blocking wires (optional, for collar)
- Sweater board or blocking surface
**Additional Supplies**:
- Steam iron with pressing cloth
- Measuring tape
- Row counter (built-in or manual)
- Claw weights (4-6)
---
## GAUGE_AND_TENSION
**Stockinette Stitch Gauge** (at T7, after steaming):
- **Stitch Gauge**: 4.5 sts = 1 inch (2.54 cm) | 18 sts = 4 inches (10 cm)
- **Row Gauge**: 6.5 rows = 1 inch (2.54 cm) | 26 rows = 4 inches (10 cm)
### Measuring Your Gauge
1. Complete swatch as described in MACHINE_SETUP
2. Steam using pressing cloth, hovering iron 1/4" above fabric
3. Allow to cool and relax for minimum 30 minutes
4. Lay flat on hard surface without stretching
5. Measure horizontally across center 4 inches, count stitches
6. Measure vertically across center 4 inches, count rows
7. Calculate: stitches ÷ 4 = sts per inch; rows ÷ 4 = rows per inch
**Gauge Adjustment**:
- Too many stitches per inch → increase tension dial (+1)
- Too few stitches per inch → decrease tension dial (-1)
- Retest swatch after any adjustment
**Critical**: Achieving accurate gauge is essential. A half-stitch variance creates 2-3 inches difference in finished bust measurement.
---
## SCHEMATIC_AND_SIZES
### Finished Measurements (includes 2" positive ease)
| Size | Bust | Body Length | Sleeve Length | Shoulder Width |
|------|------|-------------|---------------|----------------|
| S | 36" (91cm) | 23" (58cm) | 17" (43cm) | 15" (38cm) |
| M | 40" (102cm) | 24" (61cm) | 17.5" (44cm) | 16" (41cm) |
| L | 44" (112cm) | 25" (64cm) | 18" (46cm) | 17" (43cm) |
| XL | 48" (122cm) | 26" (66cm) | 18.5" (47cm) | 18" (46cm) |
### Body Schematic
```
|← Shoulder Width →|
___________________
/ \ ← Neck shaping
/ \
| | ← Body Length
| |
|_______________________|
|← Bust Width (÷2) →|
```
### Stitch Counts by Size
**Body Panels** (Back and Front at widest point):
- Small: 81 sts (36" ÷ 2 = 18" × 4.5 = 81)
- Medium: 90 sts (40" ÷ 2 = 20" × 4.5 = 90)
- Large: 99 sts (44" ÷ 2 = 22" × 4.5 = 99)
- X-Large: 108 sts (48" ÷ 2 = 24" × 4.5 = 108)
**Sleeve at Upper Arm**:
- Small: 68 sts (15" × 4.5)
- Medium: 72 sts (16" × 4.5)
- Large: 77 sts (17" × 4.5)
- X-Large: 81 sts (18" × 4.5)
**Pattern uses MEDIUM (40" bust) as written. Adjust stitch counts for other sizes.**
---
## BACK_PANEL
### Setup
- **Needles**: 90 needles centered (45L - 0 - 45R)
- **Tension**: T7 main body
- **Starting Position**: COL (Carriage on Left)
### Cast-On (RC 000-008)
1. RC 000: With waste yarn at T5, cast on 90 needles using comb and weights
2. Knit 8 rows waste yarn, COL
3. RC 008: Insert ravel cord across all needles
4. Knit 1 row waste yarn at T10, COR
### Hem (RC 000-020, reset counter)
1. RC 000: Thread main yarn, set tension to T7
2. Knit 20 rows stockinette, ending COR
3. Hang additional weights at sides (fabric should hang straight)
4. **Note**: RC will be reset to 000 after establishing hem
### Body (RC 000-150)
1. RC 000-150: Knit straight at T7 (no shaping)
2. Every 30 rows, check weights and adjust if needed
3. At RC 050, RC 100: place yarn markers at each edge for side seam reference
4. At RC 130: place markers at edge (armhole reference point)
5. End at RC 150, COR
**Math Check**: 150 rows ÷ 6.5 rows/inch = 23.1" body length ✓
### Shoulder and Neck Shaping (RC 150-170)
**RC 150** (COR): Begin shoulder shaping
- Continue straight across all needles
- Knit 1 row, COL
**RC 151-157**: Work straight (no shaping), ending COL
**RC 158** (COL): Begin back neck shaping
- Using transfer tool, place center 26 sts on waste yarn or stitch holder
- Hold position: 13L to 13R
- Method: At COL, push center 26 needles to hold position (D position)
- With transfer tool, remove stitches to waste yarn
- Push empty needles back to A position (out of work)
**RC 158** (continuing): Shape left shoulder
- 45 sts remain on left side (45L to 14L)
- 32 sts remain on right side (45R to 14R)
**RC 158-162** (left shoulder):
- Knit to right edge (center), turn carriage manually
- At neck edge, put 4 needles into hold each row: RC 158, 159, 160, 161
- RC 158: Hold 14L to 11L (4 needles)
- RC 159: Hold 10L to 7L (4 needles)
- RC 160: Hold 6L to 3L (4 needles)
- RC 161: Hold 2L to 1R (3 needles)
- RC 162: Remaining 30 sts (45L to 16L) = left shoulder
- Remove with waste yarn, COL
**RC 158-162** (right shoulder, work separately):
- Rehang right shoulder stitches (45R to 14R) if removed, or work from hold
- Mirror left shoulder shaping:
- RC 158: Hold 14R to 11R (4 needles)
- RC 159: Hold 10R to 7R (4 needles)
- RC 160: Hold 6R to 3R (4 needles)
- RC 161: Hold 2R to 1L (3 needles)
- RC 162: Remaining 30 sts (45R to 16R) = right shoulder
- Remove with waste yarn, COR
**Final Stitch Counts**:
- Left shoulder: 30 sts
- Right shoulder: 30 sts
- Back neck (on holder): 26 sts
- Total: 86 sts (slight ease-in for seaming)
---
## FRONT_PANEL
### Setup
- **Needles**: 90 needles centered (45L - 0 - 45R)
- **Tension**: T7 main body
- **Starting Position**: COL
### Cast-On and Hem (RC 000-020)
Work exactly as for Back Panel:
1. Waste yarn cast-on, 8 rows + ravel cord
2. RC 000-020: Hem in main yarn at T7
### Body to V-Neck (RC 000-090)
1. RC 000-090: Knit straight at T7, ending COR
2. Add weights every 30 rows
3. At RC 090: place marker at center needle (0 position) for V-neck start
**Math Check**: 90 rows ÷ 6.5 rows/inch = 13.8" before V-neck begins ✓
### V-Neck Shaping (RC 091-158)
**RC 091** (COR): Begin V-neck divide
- At center, place needle at 0 position into hold (or secure with waste yarn)
- This creates two separate panels: left front and right front
- Work one side at a time
#### Right Front V-Neck (RC 091-158)
**RC 091** (COR):
- Right front has 45 sts (1R to 45R)
- Set carriage to hold (set hold lever)
- Push all left side needles (45L to 1L) to hold position (D)
**RC 091-157**: Decrease at neck edge (left edge of right front)
- Decrease 1 st at neck edge every 4th row, 16 times
- **Decrease method**: At COL (neck edge), push 1 needle to hold, or use transfer tool to decrease
- Decrease rows: RC 091, 095, 099, 103, 107, 111, 115, 119, 123, 127, 131, 135, 139, 143, 147, 151
- Method: Move stitch from needle 1R to 2R (fully fashioned decrease), push 1R to A position
**RC 157**:
- 30 sts remain (16R to 45R) for right shoulder
- Knit straight RC 157-162 (no further shaping)
**RC 162**: Remove right shoulder with waste yarn (30 sts)
#### Left Front V-Neck (RC 091-158)
Return to RC 091 by rehanging left front OR work after completing right front:
**RC 091** (COR):
- Rehang left front 45 sts (1L to 45L) onto needles, or release from hold
- Push right side to hold
**RC 091-157**: Decrease at neck edge (right edge of left front)
- Decrease 1 st at neck edge every 4th row, 16 times
- **Decrease method**: At COR (neck edge),
Disclaimer: This pattern was generated by AI and should be reviewed for accuracy before use. While we strive for quality, AI-generated content may contain errors. Please verify measurements, stitch counts, and instructions before beginning your project. Generated by purlJam.uk
Access your pattern anytime
Bookmark this page to access your pattern anytime