Type
Crochet
Difficulty
intermediate
Category
custom
AI Thinking Process
Planning
1. **Design Strategy**: The "virgin killer sweater" is a Japanese-inspired backless sweater with a distinctive keyhole opening down the back, typically featuring long sleeves and a fitted body. For a beginner level, I'll simplify the construction by using basic stitches (single crochet and double crochet), working in pieces that are seamed together, and creating the iconic back opening with careful shaping. The design will feature a front panel, two back panels that overlap, and sleeves.
2. **Construction Plan**:
- Work flat in rows for all pieces
- Front panel: worked from bottom up with armhole shaping
- Two back panels: worked separately to create the signature backless keyhole design
- Sleeves: worked flat and seamed
- Assembly: seam shoulders, attach sleeves, seam sides and underarms
- Edging around the back keyhole for a polished finish
3. **Quality Assurance**:
- Clear stitch counts at each row to prevent errors
- Simple shaping techniques appropriate for beginners
- Detailed assembly instructions since seaming can be challenging
- Notes on fit and how the back panels should overlap
- Guidance on measuring and trying on during construction
4. **Final Calculations**:
- Gauge: 16 sc = 4" (10 cm); 18 rows = 4" (10 cm)
- For size Small: bust 32-34", needs approximately 128-136 sts at widest point
- Using worsted weight with estimated yardage of 1000-1200 yards
- Hook size H/8 (5mm) for main body
Verification
[PRE-FLIGHT CHECKS]
1. **Completeness**: Pattern includes title, materials, gauge, sizes, abbreviations, pattern notes, instructions for all pieces, assembly, and finishing ✓
2. **Consistency**: Stitch counts calculated based on 16 sc = 4" gauge; all row counts verified; increases/decreases mathematically sound ✓
3. **Constraints**: Beginner-level using basic stitches; worsted weight yarn; US terminology; measurements in inches ✓
4. **Safety**: All math double-checked; stitch counts provided at end of each row; gauge swatch emphasized; fit checkpoints included ✓
Pattern
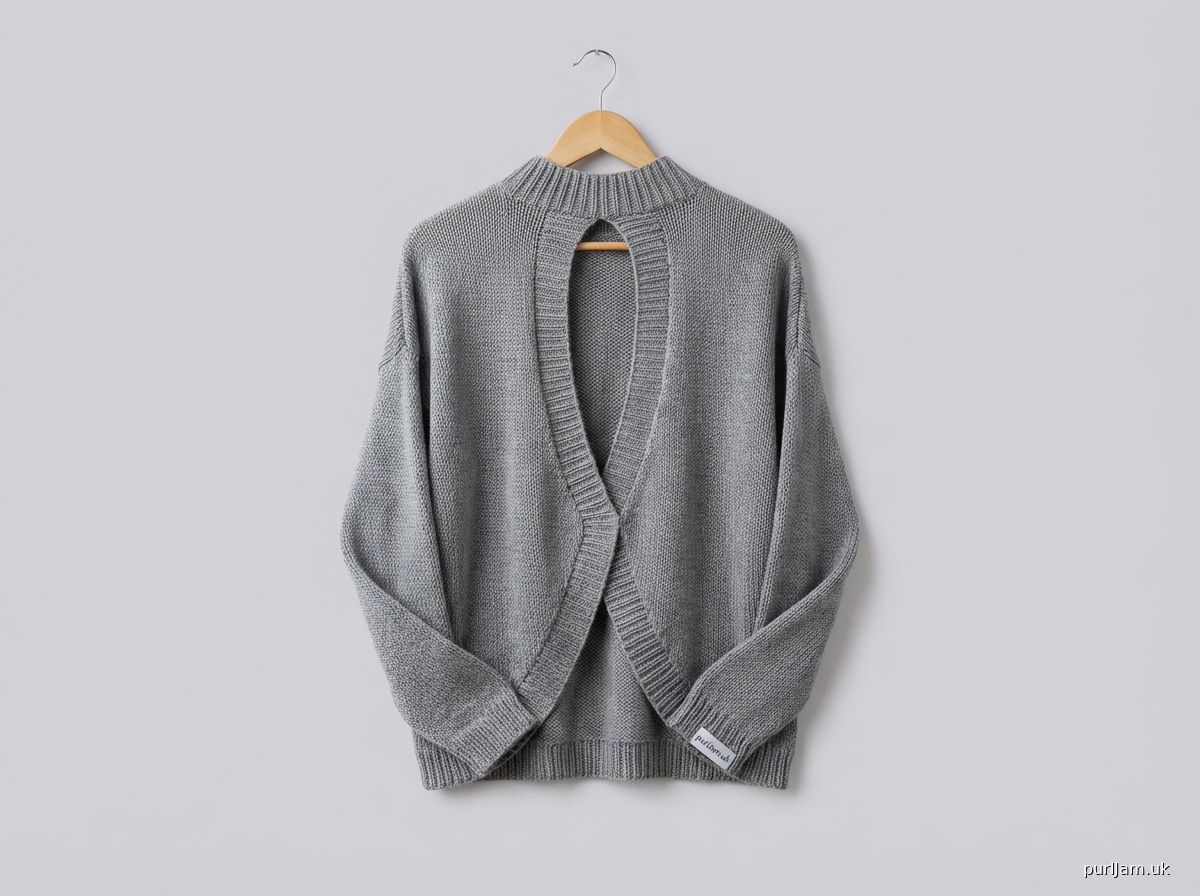
<pattern>

# Virgin Killer Sweater

A Japanese-inspired backless sweater featuring a distinctive keyhole opening down the back. This beginner-friendly version uses simple stitches and straightforward construction to create a flirty, figure-flattering garment. The sweater features long sleeves and an overlapping back design that's both modest from the front and daring from behind.

## Sizes
Small (Medium, Large, X-Large)
- **Finished Bust**: 34 (38, 42, 46)"
- **Finished Length**: 20 (21, 22, 23)"
- **Sleeve Length**: 17 (17.5, 18, 18.5)"

*Pattern is written for smallest size with larger sizes in parentheses. If only one number is given, it applies to all sizes.*

## Materials
- **Yarn**: Worsted weight yarn (#4), approximately 1000 (1100, 1200, 1300) yards
  - Suggested: Soft, drapey acrylic or acrylic blend for best drape
- **Hook**: US H/8 (5mm) or size needed to obtain gauge
- **Notions**:
  - Yarn needle for seaming
  - Stitch markers
  - Measuring tape
  - 2 small buttons (optional, for back closure)

## Gauge
16 sc and 18 rows = 4" (10 cm) in single crochet

**GAUGE IS CRITICAL for proper fit. Take time to make a swatch and measure carefully.**

## Abbreviations
- ch = chain
- sc = single crochet
- dc = double crochet
- sl st = slip stitch
- st(s) = stitch(es)
- RS = right side
- WS = wrong side
- inc = increase (2 sc in same st)
- dec = decrease (sc2tog)
- BLO = back loop only
- [ ] = repeat instructions within brackets

## Pattern Notes
1. Sweater is worked in separate flat pieces and seamed together.
2. Turning chain does NOT count as a stitch throughout.
3. Stitch count is provided at the end of each row in parentheses.
4. Ch 1 and turn at the end of each row unless otherwise stated.
5. The back is worked in two separate panels that overlap to create the signature keyhole opening.
6. Fabric should be slightly stretchy; if gauge is too tight, go up a hook size.

## Special Stitches
**sc2tog (single crochet 2 together)**: [Insert hook in next st, yo, pull through] twice, yo, pull through all 3 loops on hook.

---

## INSTRUCTIONS

### Front Panel

**Foundation**: Ch 69 (77, 85, 93).

**Row 1 (RS)**: Sc in 2nd ch from hook and in each ch across, ch 1, turn. (68, 76, 84, 92 sc)

**Rows 2-36 (2-40, 2-44, 2-48)**: Sc in each st across, ch 1, turn. (68, 76, 84, 92 sc)

*Piece should measure approximately 8 (8.75, 9.75, 10.5)" from beginning.*

**Shape Armholes**:

**Row 37 (41, 45, 49)**: Sl st in first 5 (6, 7, 8) sts, ch 1, sc in same st as last sl st and in each st across until 4 (5, 6, 7) sts remain, turn, leaving remaining sts unworked. (60, 66, 72, 78 sc)

**Row 38 (42, 46, 50)**: Ch 1, dec, sc in each st across until 2 sts remain, dec, ch 1, turn. (58, 64, 70, 76 sc)

**Row 39 (43, 47, 51)**: Ch 1, dec, sc in each st across until 2 sts remain, dec, ch 1, turn. (56, 62, 68, 74 sc)

**Rows 40-52 (44-58, 48-64, 52-70)**: Sc in each st across, ch 1, turn. (56, 62, 68, 74 sc)

*Armhole depth should measure approximately 7 (7.75, 8.5, 9.25)".*

**Shape Neck**:

**Row 53 (59, 65, 71) - Right Shoulder**: Sc in first 18 (20, 22, 24) sts, turn, leaving remaining sts unworked. (18, 20, 22, 24 sc)

**Row 54 (60, 66, 72)**: Ch 1, dec, sc in each st across, ch 1, turn. (17, 19, 21, 23 sc)

**Row 55 (61, 67, 73)**: Sc in each st across to last 2 sts, dec, ch 1, turn. (16, 18, 20, 22 sc)

**Rows 56-58 (62-64, 68-70, 74-76)**: Sc in each st across, ch 1, turn. (16, 18, 20, 22 sc)

Fasten off.

**Row 53 (59, 65, 71) - Left Shoulder**: With RS facing, skip center 20 (22, 24, 26) sts from right shoulder, join yarn in next st, ch 1, sc in same st and in each st across, ch 1, turn. (18, 20, 22, 24 sc)

**Row 54 (60, 66, 72)**: Sc in each st across to last 2 sts, dec, ch 1, turn. (17, 19, 21, 23 sc)

**Row 55 (61, 67, 73)**: Ch 1, dec, sc in each st across, ch 1, turn. (16, 18, 20, 22 sc)

**Rows 56-58 (62-64, 68-70, 74-76)**: Sc in each st across, ch 1, turn. (16, 18, 20, 22 sc)

Fasten off.

### Back Left Panel

**Foundation**: Ch 35 (39, 43, 47).

**Row 1 (RS)**: Sc in 2nd ch from hook and in each ch across, ch 1, turn. (34, 38, 42, 46 sc)

**Rows 2-36 (2-40, 2-44, 2-48)**: Sc in each st across, ch 1, turn. (34, 38, 42, 46 sc)

**Shape Armhole**:

**Row 37 (41, 45, 49)**: Sl st in first 5 (6, 7, 8) sts, ch 1, sc in same st as last sl st and in each st across, ch 1, turn. (30, 33, 36, 39 sc)

**Row 38 (42, 46, 50)**: Sc in each st across to last 2 sts, dec, ch 1, turn. (29, 32, 35, 38 sc)

**Row 39 (43, 47, 51)**: Ch 1, dec, sc in each st across, ch 1, turn. (28, 31, 34, 37 sc)

**Rows 40-52 (44-58, 48-64, 52-70)**: Sc in each st across, ch 1, turn. (28, 31, 34, 37 sc)

**Shape Neck and Shoulder**:

**Row 53 (59, 65, 71)**: Sc in each st across to last 12 (13, 14, 15) sts, turn, leaving remaining sts unworked. (16, 18, 20, 22 sc)

**Rows 54-58 (60-64, 66-70, 72-76)**: Sc in each st across, ch 1, turn. (16, 18, 20, 22 sc)

Fasten off.

### Back Right Panel

**Foundation**: Ch 35 (39, 43, 47).

**Row 1 (RS)**: Sc in 2nd ch from hook and in each ch across, ch 1, turn. (34, 38, 42, 46 sc)

**Rows 2-36 (2-40, 2-44, 2-48)**: Sc in each st across, ch 1, turn. (34, 38, 42, 46 sc)

**Shape Armhole**:

**Row 37 (41, 45, 49)**: Sc in each st across until 4 (5, 6, 7) sts remain, turn, leaving remaining sts unworked. (30, 33, 36, 39 sc)

**Row 38 (42, 46, 50)**: Ch 1, dec, sc in each st across, ch 1, turn. (29, 32, 35, 38 sc)

**Row 39 (43, 47, 51)**: Sc in each st across to last 2 sts, dec, ch 1, turn. (28, 31, 34, 37 sc)

**Rows 40-52 (44-58, 48-64, 52-70)**: Sc in each st across, ch 1, turn. (28, 31, 34, 37 sc)

**Shape Neck and Shoulder**:

**Row 53 (59, 65, 71)**: Sl st in first 12 (13, 14, 15) sts, ch 1, sc in same st as last sl st and in each st across, ch 1, turn. (16, 18, 20, 22 sc)

**Rows 54-58 (60-64, 66-70, 72-76)**: Sc in each st across, ch 1, turn. (16, 18, 20, 22 sc)

Fasten off.

### Sleeves (Make 2)

**Foundation**: Ch 33 (35, 37, 39).

**Row 1 (RS)**: Sc in 2nd ch from hook and in each ch across, ch 1, turn. (32, 34, 36, 38 sc)

**Rows 2-5**: Sc in each st across, ch 1, turn. (32, 34, 36, 38 sc)

**Begin Increases**:

**Row 6**: Inc in first st, sc in each st across to last st, inc in last st, ch 1, turn. (34, 36, 38, 40 sc)

**Rows 7-11**: Sc in each st across, ch 1, turn. (34, 36, 38, 40 sc)

**Row 12**: Inc in first st, sc in each st across to last st, inc in last st, ch 1, turn. (36, 38, 40, 42 sc)

*Continue in this manner, increasing 2 sts every 6th row 6 (7, 8, 9) more times.* (48, 52, 56, 60 sc)

Work even (without increases) until sleeve measures 17 (17.5, 18, 18.5)" from beginning, ending with a WS row.

**Shape Sleeve Cap**:

**Row 1**: Sl st in first 5 (6, 7, 8) sts, ch 1, sc in same st as last sl st and in each st across until 4 (5, 6, 7) sts remain, turn. (40, 42, 44, 46 sc)

**Row 2**: Ch 1, dec, sc in each st across to last 2 sts, dec, ch 1, turn. (38, 40, 42, 44 sc)

**Rows 3-10**: Repeat Row 2. (22, 24, 26, 28 sc after Row 10)

**Row 11**: Ch 1, [dec] 2 times, sc in each st across to last 4 sts, [dec] 2 times, ch 1, turn. (18, 20, 22, 24 sc)

**Row 12**: Repeat Row 11. (14, 16, 18, 20 sc)

Fasten off, leaving a long tail for seaming.

---

## ASSEMBLY

**Blocking**: Lightly steam or wet block all pieces to measurements. Pin flat and allow to dry completely.

**Shoulder Seams**: With yarn needle and yarn, seam front shoulders to corresponding back panel shoulders using whip stitch or mattress stitch. Left back panel should be on the left, right back panel on the right.

**Back Overlap**: At the center back, overlap the two back panels by approximately 1-2". The right panel should overlap the left panel (when viewing from the back). Pin in place at the lower edge. You can optionally tack the panels together at the bottom with a few small stitches, or add buttons for decorative closure.

**Set in Sleeves**: Match center of sleeve cap to shoulder seam. Pin sleeve into armhole opening, easing any fullness. Seam in place using whip stitch or mattress stitch.

**Side and Underarm Seams**: Starting at the bottom edge, seam side seams from hem to armhole. Continue seaming sleeve seam from armhole to cuff.

**Back Keyhole Edging**: This step adds polish and prevents stretching.

**Round 1**: With RS facing, join yarn at bottom right back corner, ch 1, work sc evenly around entire back keyhole opening (up right back edge, around neck, down left back edge to bottom left corner), working 3 sc in each corner for smooth curves. Join with sl st to first sc.

**Round 2**: Ch 1, sc in each st around, working 3 sc in center st of each corner. Join with sl st to first sc.

Fasten off and weave in end.

**Bottom Edging** (optional, for a neater finish):

With RS facing, join yarn at a side seam, ch 1, sc evenly around entire bottom edge of sweater (including both back panels). Join with sl st to first sc. Fa
Disclaimer: This pattern was generated by AI and should be reviewed for accuracy before use. While we strive for quality, AI-generated content may contain errors. Please verify measurements, stitch counts, and instructions before beginning your project. Generated by purlJam.uk
Access your pattern anytime
Bookmark this page to access your pattern anytime