Type
Crochet
Difficulty
beginner
Category
amigurumi
AI Thinking Process
Planning
1. **Design Strategy**: Creating a beginner-friendly dragon using simple shapes from the template. The dragon will use sphere shapes for head and body, cylinder/tube shapes for legs, arms, tail, and cone shapes for spikes/horns. Keeping construction simple with basic amigurumi techniques - only sc, inc, and dec stitches. Using worsted weight yarn for a 4-5" finished toy size that's easy to handle for beginners.
2. **Construction Plan**: Each piece worked separately in the round using continuous spiral technique (no joining). Body will be an elongated sphere (oval shape), head a smaller sphere, four legs as short cylinders, two arms as shorter cylinders, tail as tapered cylinder, small cone horns, and triangular spikes along the back. All pieces stuffed individually then sewn together. Face details embroidered or with safety eyes for simplicity.
3. **Quality Assurance**: Common beginner issues to address:
- Clear stitch counts at end of each round in brackets
- Reminders to stuff before closing pieces
- Placement guidance for limb attachment
- Using stitch markers to track rounds
- Invisible decrease technique explained for smooth finish
- Assembly order clearly defined to avoid awkward sewing angles
4. **Final Calculations**:
- Worsted weight with 3.5mm hook = approx 5-6 sts per inch
- Body sphere increasing to 30 sts = ~5" circumference = ~1.6" diameter
- Head sphere increasing to 24 sts = ~4" circumference = ~1.3" diameter
- Legs/arms as 9-12 st cylinders = small proportional limbs
- Total yarn needed: approximately 50-75 yards for main color, 10-20 yards for accent colors
Verification
[PRE-FLIGHT CHECKS]
1. **Completeness**: ✓ Pattern includes all template sections - materials, abbreviations, notes, gauge, instructions for all components, assembly, finishing
2. **Consistency**: ✓ Stitch counts verified for each round; sphere increases follow standard 6-increment pattern; decreases mirror increases
3. **Constraints**: ✓ Beginner difficulty maintained - only basic stitches (sc, inc, dec); worsted weight yarn specified; simple shape assembly; clear instructions
4. **Safety**: ✓ All math verified:
- Head: 6→12→18→24, then even, then 24→18→12→6 ✓
- Body: 6→12→18→24→30, then even, then 30→24→18→12→6 ✓
- Legs/arms: consistent stitch counts maintained ✓
- Tail taper: gradual decreases from 12→6 ✓
Pattern
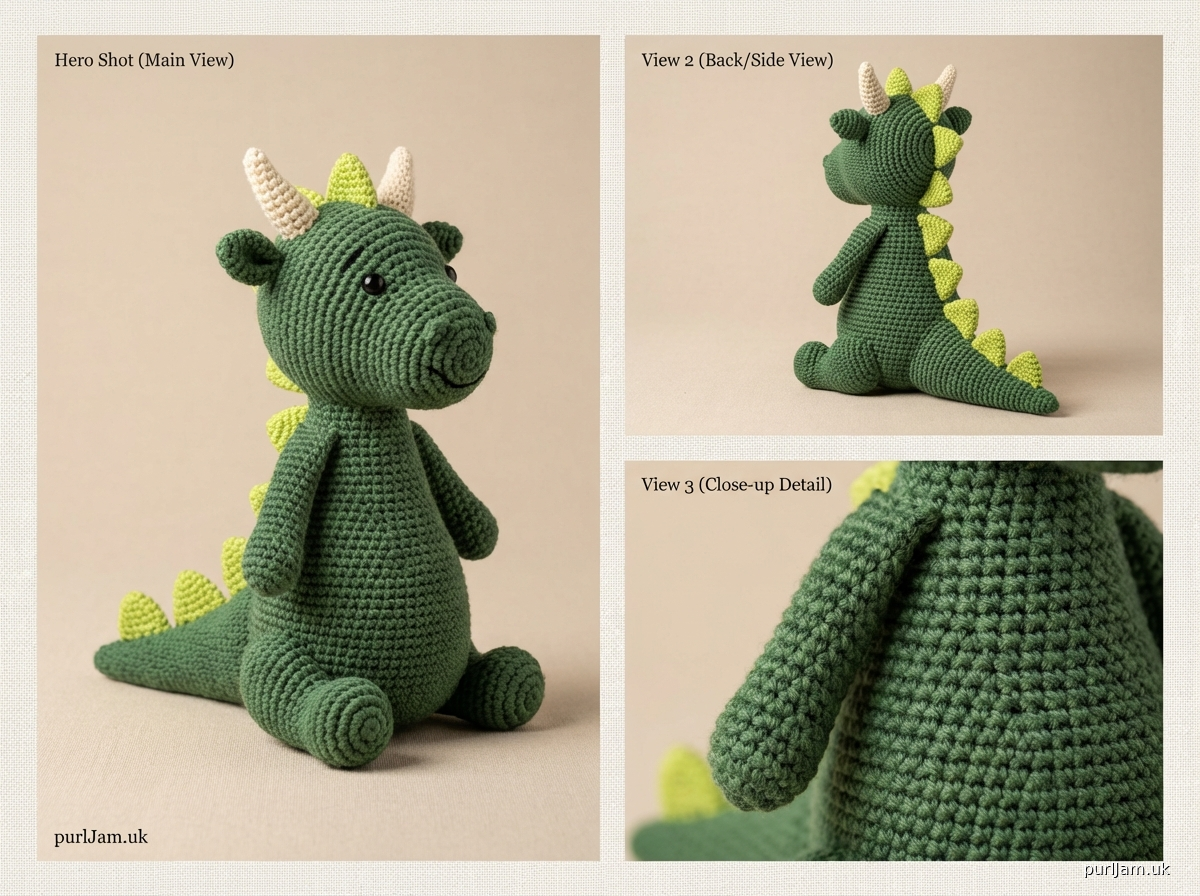
<pattern>

# BEGINNER DRAGON
## Crochet Amigurumi Toy Pattern

**Designed for beginners** | A cute simple dragon made with basic shapes

---

## FINISHED MEASUREMENTS
- **Height**: Approximately 4-5 inches (10-13 cm) when sitting
- **Length**: Approximately 5-6 inches (13-15 cm) from nose to tail tip

---

## MATERIALS

### Yarn
- **Weight**: Worsted (4/Medium)
- **Yardage**:
  - Main Color (MC - dragon body): 60-80 yards
  - Contrast Color 1 (CC1 - belly/spikes): 15-20 yards
  - Contrast Color 2 (CC2 - details - optional): 5-10 yards
- **Suggested yarn**: Any worsted weight acrylic or cotton blend
- **Suggested colors**: Green, blue, red, purple, or any dragon color you prefer!

### Hook & Notions
- **Hook**: US E-4 (3.5mm) - this is smaller than the yarn label recommends for tight amigurumi fabric
- **Stitch markers**: 1-2 to mark beginning of rounds
- **Yarn needle**: Blunt tip for seaming and weaving in ends
- **Stuffing**: Polyester fiberfill, approximately 1-2 oz
- **Safety eyes**: 9mm or 10mm (optional - can embroider eyes instead)
- **Scissors**
- **Pins**: For positioning pieces before sewing (optional but helpful)

---

## GAUGE
Not critical for toys, but affects finished size.

**Gauge swatch**: 5 sts × 5 rows = 1 inch (2.5 cm) in sc

**Gauge notes**:
- Work tightly to prevent stuffing from showing through
- If your fabric is too loose, go down a hook size
- Consistent tension is more important than exact gauge

---

## ABBREVIATIONS
- **ch**: chain
- **sc**: single crochet
- **inc**: increase (2 sc in same stitch)
- **dec**: invisible decrease (insert hook in front loops of next 2 sts, yarn over, pull through both front loops, yarn over, pull through 2 loops on hook)
- **st(s)**: stitch(es)
- **rnd(s)**: round(s)
- **MR**: magic ring
- **MC**: main color
- **CC1**: contrast color 1
- **CC2**: contrast color 2
- **[ ]**: total stitch count at end of round

---

## PATTERN NOTES

### Technique
- **Construction**: Each piece is worked separately in continuous rounds (spiral), then assembled
- **Stitch marker**: Place marker at beginning of each round and move it up as you work
- **Stuffing**: Stuff pieces firmly as you go - it's difficult to add more later
- **Invisible decrease**: This technique creates a smoother finish than regular sc2tog

### Special Techniques

**Magic Ring (MR)**: Wrap yarn around fingers to form a loop, pull working yarn through loop, ch 1, work stitches into ring, pull tail to close ring tightly.

**Invisible Decrease (dec)**: Insert hook into front loop only of next stitch, then into front loop only of following stitch (2 loops on hook), yarn over and pull through both front loops (2 loops on hook), yarn over and pull through both loops. This creates a neater decrease than sc2tog.

**Color Change**: When changing colors, work last stitch of old color until 2 loops remain on hook, yarn over with new color and pull through to complete stitch. Cut old color leaving 6" tail.

### Before You Begin
1. Read through entire pattern before starting
2. Practice the magic ring if you're unfamiliar with it (or chain 2 and work into 2nd ch from hook as alternative)
3. Keep stitch marker handy - it's easy to lose track in continuous rounds
4. Work tightly! Amigurumi should have dense fabric

---

## INSTRUCTIONS

### HEAD (Make 1 in MC)

**Rnd 1**: 6 sc in MR [6]

**Rnd 2**: inc in each st around [12]
*Math check: 6 × 2 = 12 ✓*

**Rnd 3**: (sc, inc) around [18]
*Math check: 12 ÷ 2 = 6 repeats, 6 × 3 = 18 ✓*

**Rnd 4**: (2 sc, inc) around [24]
*Math check: 18 ÷ 3 = 6 repeats, 6 × 4 = 24 ✓*

**Rnds 5-9**: sc in each st around [24]
*5 rounds of even stitches*

**Insert safety eyes** between rounds 6 and 7, approximately 6-7 sts apart (if using safety eyes - do this now before decreasing).

**Rnd 10**: (2 sc, dec) around [18]
*Math check: 24 ÷ 4 = 6 repeats, 6 × 3 = 18 ✓*

**Rnd 11**: (sc, dec) around [12]
*Math check: 18 ÷ 3 = 6 repeats, 6 × 2 = 12 ✓*

**Begin stuffing head firmly.**

**Rnd 12**: dec around [6]
*Math check: 12 ÷ 2 = 6 ✓*

Fasten off leaving 12" tail for sewing. Using yarn needle, weave tail through remaining 6 sts and pull tight to close hole. Don't cut tail - use it to attach head to body.

---

### BODY (Make 1 in MC)

**Rnd 1**: 6 sc in MR [6]

**Rnd 2**: inc in each st around [12]
*Math check: 6 × 2 = 12 ✓*

**Rnd 3**: (sc, inc) around [18]
*Math check: 12 ÷ 2 = 6 repeats, 6 × 3 = 18 ✓*

**Rnd 4**: (2 sc, inc) around [24]
*Math check: 18 ÷ 3 = 6 repeats, 6 × 4 = 24 ✓*

**Rnd 5**: (3 sc, inc) around [30]
*Math check: 24 ÷ 4 = 6 repeats, 6 × 5 = 30 ✓*

**Rnds 6-11**: sc in each st around [30]
*6 rounds of even stitches*

**Optional belly**: If adding a belly patch in CC1, embroider or appliqué a small oval shape on the front before decreasing.

**Rnd 12**: (3 sc, dec) around [24]
*Math check: 30 ÷ 5 = 6 repeats, 6 × 4 = 24 ✓*

**Rnd 13**: (2 sc, dec) around [18]
*Math check: 24 ÷ 4 = 6 repeats, 6 × 3 = 18 ✓*

**Begin stuffing body very firmly.**

**Rnd 14**: (sc, dec) around [12]
*Math check: 18 ÷ 3 = 6 repeats, 6 × 2 = 12 ✓*

**Rnd 15**: dec around [6]
*Math check: 12 ÷ 2 = 6 ✓*

Fasten off leaving 8" tail. Using yarn needle, weave tail through remaining 6 sts and pull tight to close hole. Weave in end securely.

---

### LEGS (Make 4 in MC)

**Rnd 1**: 6 sc in MR [6]

**Rnd 2**: inc in each st around [12]
*Math check: 6 × 2 = 12 ✓*

**Rnds 3-7**: sc in each st around [12]
*5 rounds of even stitches*

**Optional claws**: Before closing, you can embroider 3 small lines on the end of each leg with CC2 using straight stitches.

Stuff leg lightly (not too firm or it won't pose well).

**Rnd 8**: dec around [6]
*Math check: 12 ÷ 2 = 6 ✓*

Fasten off leaving 12" tail for sewing. Using yarn needle, weave tail through remaining 6 sts and pull tight to close hole. Don't cut tail - use it to attach leg to body.

---

### ARMS (Make 2 in MC)

**Rnd 1**: 6 sc in MR [6]

**Rnd 2**: (sc, inc) around [9]
*Math check: 6 ÷ 2 = 3 repeats, 3 × 3 = 9 ✓*

**Rnds 3-6**: sc in each st around [9]
*4 rounds of even stitches*

**Optional claws**: Before closing, you can embroider 3 small lines on the end of each arm with CC2.

Stuff arm lightly.

**Rnd 7**: (sc, dec) around [6]
*Math check: 9 ÷ 3 = 3 repeats, 3 × 2 = 6 ✓*

Fasten off leaving 12" tail for sewing. Using yarn needle, weave tail through remaining 6 sts and pull tight to close hole. Don't cut tail - use it to attach arm to body.

---

### TAIL (Make 1 in MC)

**Rnd 1**: 6 sc in MR [6]

**Rnd 2**: (sc, inc) around [9]
*Math check: 6 ÷ 2 = 3 repeats, 3 × 3 = 9 ✓*

**Rnd 3**: (2 sc, inc) around [12]
*Math check: 9 ÷ 3 = 3 repeats, 3 × 4 = 12 ✓*

**Rnds 4-8**: sc in each st around [12]
*5 rounds of even stitches*

**Rnd 9**: (2 sc, dec) around [9]
*Math check: 12 ÷ 4 = 3 repeats, 3 × 3 = 9 ✓*

**Rnds 10-11**: sc in each st around [9]

**Rnd 12**: (sc, dec) around [6]
*Math check: 9 ÷ 3 = 3 repeats, 3 × 2 = 6 ✓*

**Rnds 13-14**: sc in each st around [6]

Stuff tail lightly (just the thicker end - leave the tip unstuffed so it can curl).

Fasten off leaving 12" tail for sewing. Using yarn needle, weave tail through remaining 6 sts and pull tight to close hole. Don't cut tail - use it to attach tail to body.

---

### HORNS (Make 2 in CC1 or CC2)

**Rnd 1**: 4 sc in MR [4]

**Rnds 2-4**: sc in each st around [4]
*3 rounds of even stitches*

Do not stuff horns.

Fasten off leaving 10" tail for sewing. Don't close the end - you'll sew the open end to the head.

---

### SPIKES FOR BACK (Make 3-4 in CC1)

**Rnd 1**: 4 sc in MR [4]

**Rnds 2-3**: sc in each st around [4]
*2 rounds of even stitches*

Do not stuff spikes.

Fasten off leaving 10" tail for sewing. Don't close the end - you'll sew the open end to the back.

---

### WINGS (Make 2 in CC1 or CC2) - OPTIONAL

For a simple beginner version, you can skip wings or make simple triangle flaps:

**Row 1**: Ch 6, sc in 2nd ch from hook and in each ch across, turn [5]

**Row 2**: Ch 1, dec, sc, dec, turn [3]
*Math check: 5 sts - 2 decs = 3 sts ✓*

**Row 3**: Ch 1, dec 3 (pulling through all 3 sts), ch 1 [1]

Fasten off leaving 10" tail for sewing.

**Alternative**: Skip wings entirely for a simpler dragon, or embroider wing shapes on the sides with surface slip stitch.

---

## ASSEMBLY

**Assembly Order** (work in this sequence for easiest construction):

### Step 1: Attach Head to Body
- Position head on top/front of body, slightly tilted forward
- Using the long tail from head, sew head securely to body using whip stitch
- Stitch all the way around the neck, adding a bit more stuffing to body if needed before completing
- Weave in end securely

### Step 2: Attach Legs to Body
- Position legs on bottom of body:
  - Back legs: toward the back/tail end, spaced evenly
  - Front legs: toward the front/head end, spaced evenly
- Pin in place if desired to check positioning
- Using long tails from legs, sew each leg securely to body
-
Disclaimer: This pattern was generated by AI and should be reviewed for accuracy before use. While we strive for quality, AI-generated content may contain errors. Please verify measurements, stitch counts, and instructions before beginning your project. Generated by purlJam.uk
Access your pattern anytime
Bookmark this page to access your pattern anytime