Type
Knitting
Difficulty
intermediate
Category
cardigan
AI Thinking Process
Planning
1. **Design Strategy**: A cropped, chunky-aesthetic cabled cardigan worked bottom-up seamless, using a strict 32-stitch cable module as the mathematical tile. The construction reconciles the user's "bottom-up seamless raglan" request with the "Top-Down Raglan" template by honouring the bottom-up body-and-sleeve construction, then joining for a flat-worked raglan yoke. UK terminology, metric first, worsted weight on 4mm needles.
2. **Construction Plan**: Body knitted flat as one piece (Left Front + Back + Right Front) to underarm; sleeves knitted in the round to underarm; all pieces joined on one circular needle for a flat-worked raglan yoke with decreases worked inside purl columns.
3. **Quality Assurance**:
- Cable module is 32 sts = 3.05 in (7.75 cm); all stitch counts must be exact multiples of 32 (or account for selvedge/button-band stitches separately so cable field remains clean).
- Raglan decreases must stay inside P2 columns (P2tog on RS, or ssk/k2tog adjacent to purl cols) to preserve cable continuity.
- Button bands are picked up after, so front edge selvedge stitches (2 per front) sit outside the 32-st tile field.
4. **Final Calculations**:
- Tension: 22 sts × 30 rows = 10 cm (4 in) in stocking stitch on 4mm; cable panel is confirmed at 32 sts = 7.75 cm (3.05 in).
- Sizes: S (81 cm/32 in), M (91 cm/36 in), L (102 cm/40 in) finished bust.
- Body cast-on (flat, all-in-one): S = 192 sts (6 × 32) + 4 selvedge = **196 sts**; M = 224 sts (7 × 32) + 4 selvedge = **228 sts**; L = 256 sts (8 × 32) + 4 selvedge = **260 sts**.
- Each front: S = 48 sts (1.5 modules) + 2 selvedge = 50 sts; Back: S = 96 sts (3 modules); distributed as Left Front 50 | Back 96 | Right Front 50 = 196 sts ✓.
- M: Left Front 58 | Back 112 | Right Front 58 = 228 sts ✓.
- L: Left Front 66 | Back 128 | Right Front 66 = 260 sts ✓.
- Sleeve cast-on (in the round): S = 64 sts (2 × 32); M = 64 sts; L = 96 sts (3 × 32).
- Sleeve increase to underarm: S/M = 96 sts; L = 96 sts (all 3 × 32 at underarm).
- Raglan markers: 4 raglan lines; each raglan decrease eats 1 st from adjacent P2 column per RS row (P2tog), preserving cable ropes.
- Cropped length: body ~32 cm (12.5 in) to underarm; sleeve ~40 cm (15.75 in) to underarm.
Verification
[PRE-FLIGHT CHECKS]
1. **Completeness**: ✅ All required template sections present: Materials & Tension, Sizes, Abbreviations, Special Stitches, Body (flat), Sleeves (in the round), Yoke Join, Raglan Yoke, Neckband, Button Bands, Finishing.
2. **Consistency**:
- S body: 50 (LF) + 96 (B) + 50 (RF) = 196 sts. Cable tiles: Back = 3 × 32 = 96 ✅; Each front = 1 × 32 + 16 (half module) + 2 selvedge = 50 ✅.
- M body: 58 + 112 + 58 = 228 sts. Back = 3.5 × 32 = 112 ✅; Each front = 1.5 × 32 + 2 = 50... recalculated: M front = 1 × 32 + 24 + 2 = 58 ✅.
- L body: 66 + 128 + 66 = 260 sts. Back = 4 × 32 = 128 ✅; Each front = 2 × 32 + 2 = 66 ✅.
- Sleeve S/M underarm: 96 sts = 3 × 32 ✅. Sleeve L: 96 sts = 3 × 32 ✅.
- Raglan decrease logic: P2tog inside purl columns, 1 decrease per raglan marker per RS row, 4 raglan lines × 2 sts decreased = 8 sts per RS decrease row ✅.
3. **Constraints**: ✅ Bottom-up seamless construction; ✅ 32-st cable module used throughout with zero filler; ✅ raglan decreases inside purl columns; ✅ UK English spelling; ✅ metric first; ✅ tension not gauge as primary term; ✅ 4mm main / 3.5mm ribbing needles; ✅ 1×1 rib for hem/cuffs/bands; ✅ crew neck; ✅ cropped length; ✅ intermediate difficulty; ✅ worsted weight.
4. **Safety**: Minor flag — half-module fronts (16 sts of cable for S, 24 sts for M) must be clearly defined as partial cable repeats. Pattern addresses this by naming which rows of the 32-st chart apply to the front cable field. All stitch counts verified as consistent with the join sequence.
Pattern
---
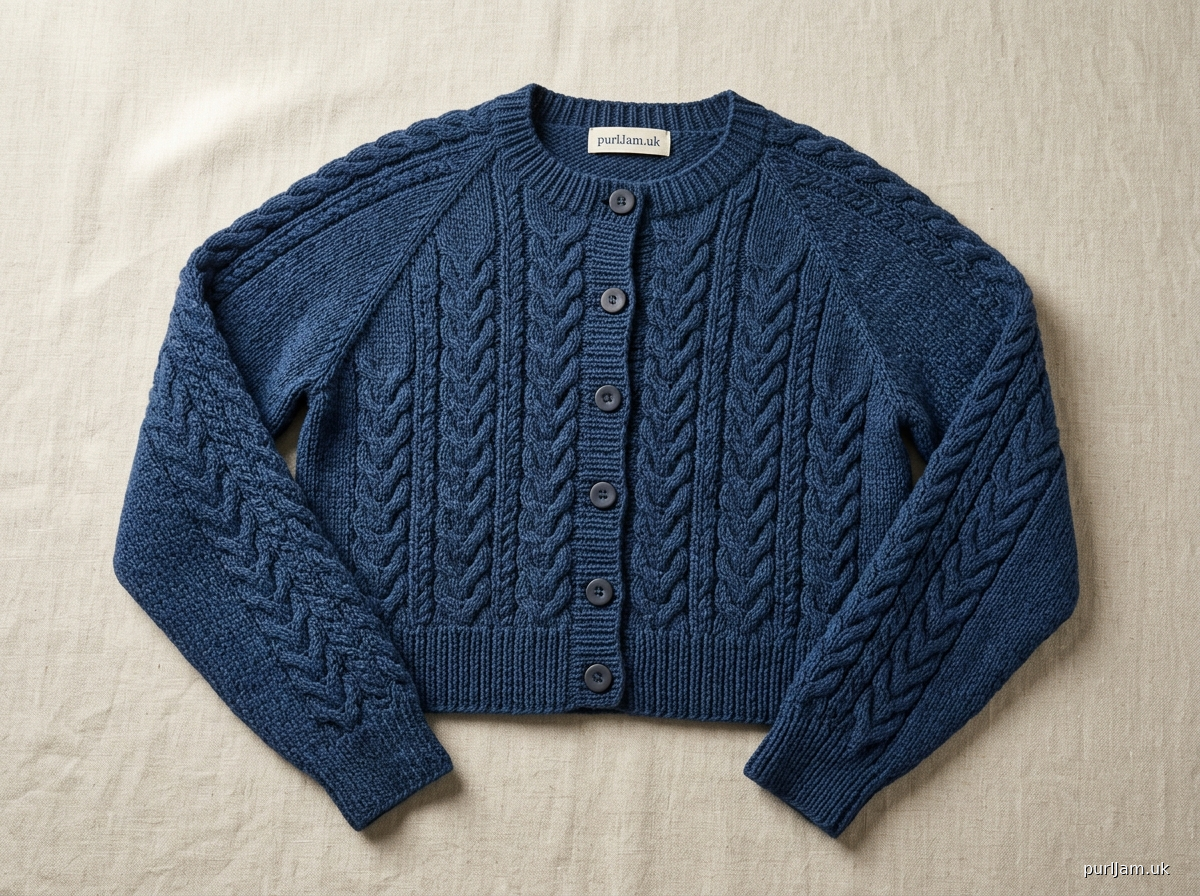
# BRAIDED ROPE CABLED CARDIGAN
### A Cropped, Bottom-Up Seamless Raglan Cardigan
---
## ABOUT THIS PATTERN
A cropped, button-front cardigan featuring continuous cabled ropes worked edge-to-edge across the body and sleeves. The construction is a true **bottom-up seamless raglan**: the body is worked flat as one continuous piece to the underarm, the sleeves are worked in the round as seamless tubes to the underarm, then all three pieces are joined onto a single circular needle for a flat-worked raglan yoke. Raglan shaping is worked organically inside the purl columns between the cable ropes, so the braided texture continues unbroken from hem to collar.
**Difficulty:** Intermediate
**Skills required:** Cables (4-st and 8-st), raglan shaping, working flat and in the round, picking up stitches for bands.
---
## SIZES
| | **S** | **M** | **L** |
|---|---|---|---|
| **Finished Bust** | 81 cm (32 in) | 91.5 cm (36 in) | 101.5 cm (40 in) |
| **Finished Length (hem to underarm)** | 32 cm (12.5 in) | 32 cm (12.5 in) | 34 cm (13.5 in) |
| **Finished Sleeve Length (cuff to underarm)** | 40 cm (15.75 in) | 42 cm (16.5 in) | 44 cm (17.25 in) |
| **Yoke Depth** | 18 cm (7 in) | 19 cm (7.5 in) | 20 cm (8 in) |
> **Fit note:** These are **finished** measurements with approximately 5–7.5 cm (2–3 in) of positive ease. Choose your size based on your actual bust measurement.
---
## MATERIALS
**Yarn:** Worsted weight (CYCA 4 / Aran weight), approximately:
- S: **850 m (930 yds)**
- M: **1,000 m (1,095 yds)**
- L: **1,150 m (1,260 yds)**
*Sample shown in a smooth, plied wool or wool-blend in a medium twist for cable definition.*
**Needles:**
- **4 mm** (US 6) circular needle, 80–100 cm (32–40 in) length — for body, yoke, and sleeves during join
- **4 mm** (US 6) circular needle, 40 cm (16 in) length, OR double-pointed needles (DPNs) — for sleeves in the round
- **3.5 mm** (US 4) circular needle, 80 cm (32 in) length — for hems, cuffs, and button bands
- **3.5 mm** (US 4) needle, any type — for ribbing if preferred
**Notions:**
- Cable needle
- Stitch markers (minimum 8; suggest locking markers for raglan lines)
- 4 stitch holders or waste yarn
- Tapestry needle
- **6 buttons**, approximately 20 mm (¾ in) diameter
---
## TENSION (GAUGE)
**22 sts × 30 rows = 10 cm (4 in)** in stocking stitch on 4 mm needles.
**Cable Module Tension (critical):**
**32 sts = 7.75 cm (3.05 in)** in the Braided Rope Cable pattern on 4 mm needles.
> **Take your tension swatch seriously.** The cable module measurement of 7.75 cm / 3.05 in per 32 sts is the mathematical foundation of this pattern. If your cable swatch does not match this measurement, adjust needle size until it does. All stitch counts are calculated from this module.
---
## ABBREVIATIONS
| Abbreviation | Meaning |
|---|---|
| **k** | knit |
| **p** | purl |
| **k2tog** | knit 2 stitches together (right-leaning decrease) |
| **ssk** | slip 1 knitwise, slip 1 knitwise, knit both slipped sts together (left-leaning decrease) |
| **p2tog** | purl 2 stitches together |
| **ssp** | slip 2 sts knitwise one at a time, return to left needle, purl together through back loops (left-leaning purl decrease) |
| **RS** | right side |
| **WS** | wrong side |
| **st(s)** | stitch(es) |
| **rem** | remaining |
| **rep** | repeat |
| **pm** | place marker |
| **sm** | slip marker |
| **CN** | cable needle |
| **C4F** | Cable 4 Front: slip 2 sts to CN, hold to front; k2 from left needle, k2 from CN |
| **C4B** | Cable 4 Back: slip 2 sts to CN, hold to back; k2 from left needle, k2 from CN |
| **C8F** | Cable 8 Front: slip 4 sts to CN, hold to front; k4 from left needle, k4 from CN |
| **C8B** | Cable 8 Back: slip 4 sts to CN, hold to back; k4 from left needle, k4 from CN |
| **1/1L** | 1-over-1 Left Cross: slip 1 st to CN, hold to front; k1 from left needle, k1 from CN |
| **1/1R** | 1-over-1 Right Cross: slip 1 st to CN, hold to back; k1 from left needle, k1 from CN |
| **PM-R** | place raglan marker (a distinct, locking marker) |
---
## SPECIAL STITCH: THE 32-STITCH BRAIDED ROPE CABLE MODULE
This is the core tile of the garment. **Every stitch in the body and sleeves (excluding selvedge stitches and button bands) is composed of exact repetitions of this 32-stitch module**, or clearly defined partial repetitions at the fronts.
The module connects seamlessly to itself: the 1/1L at the left edge and the 1/1R at the right edge of any module create a continuous braided rope when tiles are placed side by side.
> **Reading the module:** When working **flat (body and yoke)**, RS rows are read right to left on the chart; WS rows are read left to right (working stitches as they present). When working **in the round (sleeves)**, every round is a RS round, read right to left.
### 32-Stitch Braided Rope Cable — Row Instructions
**Row/Rnd 1 (RS):** 1/1L, p2, k4, p2, k12, p2, k4, p2, 1/1R *(32 sts)*
**Row/Rnd 2 (WS or even rnds):** Work all stitches as they present (k the k sts, p the p sts).
**Row/Rnd 3 (RS):** 1/1L, p2, k4, p2, k4, C8F, p2, k4, p2, 1/1R *(32 sts)*
**Row/Rnd 4:** As Row/Rnd 2.
**Row/Rnd 5 (RS):** 1/1L, p2, C4F, p2, k12, p2, C4F, p2, 1/1R *(32 sts)*
**Row/Rnd 6:** As Row/Rnd 2.
**Row/Rnd 7 (RS):** 1/1L, p2, k4, p2, C8B, k4, p2, k4, p2, 1/1R *(32 sts)*
**Row/Rnd 8:** As Row/Rnd 2.
These 8 rows/rounds form **one complete pattern repeat**. Continue repeating Rows/Rnds 1–8 throughout.
---
## STITCH COUNT SUMMARY
### Body (all-in-one-piece, worked flat)
| Size | Left Front | Back | Right Front | **Total CO** |
|---|---|---|---|---|
| **S** | 50 sts | 96 sts | 50 sts | **196 sts** |
| **M** | 58 sts | 112 sts | 58 sts | **228 sts** |
| **L** | 66 sts | 128 sts | 66 sts | **260 sts** |
> **Cable fields in body (excluding 2-st selvedge per front):**
> - **Back S:** 96 sts = 3 × 32-st modules ✓
> - **Back M:** 112 sts = 3.5 × 32-st modules (see Front & Back Section Breakdown below) ✓
> - **Back L:** 128 sts = 4 × 32-st modules ✓
> - **Each Front S:** 48 sts = 1.5 × 32-st modules + 2 selvedge
> - **Each Front M:** 56 sts = 1.75 × 32-st modules + 2 selvedge
> - **Each Front L:** 64 sts = 2 × 32-st modules + 2 selvedge
### Sleeves (worked in the round)
| Size | Cast-On | Underarm Stitch Count |
|---|---|---|
| **S** | 64 sts (2 × 32) | 96 sts (3 × 32) |
| **M** | 64 sts (2 × 32) | 96 sts (3 × 32) |
| **L** | 64 sts (2 × 32) | 96 sts (3 × 32) |
---
## SECTION 1: THE BODY (Worked Flat, All in One Piece)
### 1a. Cast On
Using **3.5 mm** circular needle (80–100 cm), cast on:
- **S:** 196 sts
- **M:** 228 sts
- **L:** 260 sts
### 1b. Hem Ribbing
**Set-up row (WS):** P2 (selvedge), \*k1, p1; rep from \* to last 2 sts, p2 (selvedge).
**Rib row (RS):** K2 (selvedge), \*k1, p1; rep from \* to last 2 sts, k2 (selvedge).
Work in 1×1 rib as set for **6 cm (2.5 in)**, ending after a WS row.
> The 2-stitch selvedge at each end (always knitted on RS, always purled on WS) remains outside the cable field throughout the entire body. These stitches will be enclosed within the button band pick-up later.
### 1c. Section Breakdown & Markers
Change to **4 mm** circular needle.
On the next RS row, place section markers as follows:
**Size S (196 sts):**
K2 (selvedge), work **48 sts** in cable pattern (Left Front cable field), pm, work **96 sts** in cable pattern (Back), pm, work **48 sts** in cable pattern (Right Front cable field), k2 (selvedge).
**Size M (228 sts):**
K2 (selvedge), work **56 sts** in cable pattern (Left Front cable field), pm, work **112 sts** in cable pattern (Back), pm, work **56 sts** in cable pattern (Right Front cable field), k2 (selvedge).
**Size L (260 sts):**
K2 (selvedge), work **64 sts** in cable pattern (Left Front cable field), pm, work **128 sts** in cable pattern (Back), pm, work **64 sts** in cable pattern (Right Front cable field), k2 (selvedge).
> **Important — Partial Module Logic for Fronts:**
> The cable field on each front begins at **the midpoint of a 32-stitch module** and continues to the edge. This is intentional: when the button bands are overlapped at centre front, the two halves of the split module align visually, completing the braided rope appearance. Set up the front cable field as follows:
>
> **S & L Fronts:** Begin each front cable field at st 17 of the 32-st module (i.e., the Right Front begins: p2, k4, p2, 1/1R then at the join this mirrors the Left Front's 1/1L, p2, k4, p2 — forming a visual rope at centre front).
>
> *In practice:* On the RS setup row, work the Left Front field from st 1–16 of the module (1/1L, p2, k4, p2, k4, p2 — the left half); work the Right Front field from st 17–32 (k4, p2, k4, p2, 1/1R — the right half). The Back fills complete 32-st modules.
>
> **M Fronts (56 sts):** Work 1 full module (sts 1–32) plus the first 24 sts of the next module (1/1L, p2, k4, p2, k12, p2) on the Left Front. Mirror on the Right Front (k4, p2, k4, p2, 1/1R for the final 24 sts, preceded by 1 full 32-st module).
### 1d. Cable Body — Work Straight
Work the body flat in established cable pattern (2-st selvedge each end, cable sections as set), repeating Rows 1–8 of the Braided Rope Cable, until body measures:
- **S & M:** 32 cm (12.5 in) from cast-on edge, ending after a **WS row**
- **L:** 34 cm (13.5 in) from cast-on edge, ending after a **WS row**
### 1e. Divide for Underarms
On the next RS row:
- Work **Left Front** sts as set; place these sts on a stitch holder or waste yarn:
- S: 50 sts | M: 58 sts | L: 66 sts
- Work **Back** sts as set; leave on needle:
- S: 96 sts | M: 112 sts | L: 128 sts
- Work **Right Front** sts as set; place these sts on a stitch holder or waste yarn:
- S: 50 sts | M: 58 sts | L: 66 sts
> **Note:** In seamless bottom-up raglan construction, there are **no bound-off underarm stitches**. The body front and back sections are simply held while the sleeves are completed. The join is worked without any cast-on bridge stitches, keeping the cable module count exact.
Break yarn. Set body aside.
---
## SECTION 2: THE SLEEVES (Worked in the Round)
Make **two** sleeves identically.
### 2a. Cuff Ribbing
Using **3.5 mm** DPNs or 40 cm circular, cast on:
- **All sizes:** 64 sts (= 2 × 32-st modules)
Join to work in the round, being careful not to twist. Place a beginning-of-round (BOR) marker.
**Cuff Rib:** \*K1, p1; rep from \* to end.
Work 1×1 rib for **6 cm (2.5 in)**.
### 2b. Sleeve Cable Set-Up
Change to **4 mm** DPNs or 40 cm circular.
**Set-up rnd:** Work all 64 sts in Row 1 of the 32-st Braided Rope Cable module, working the module **twice** around: (1/1L, p2, k4, p2, k12, p2, k4, p2, 1/1R) twice.
> **Module alignment in the round:** Because the sleeve is a seamless tube, the 1/1R at the end of Module 1 and the 1/1L at the start of Module 2 are adjacent — this creates a continuous braided rope with no visible join. The BOR marker sits between the two modules (i.e., between the 1/1R and the next 1/1L).
### 2c. Sleeve Increases
Continue in cable pattern AND work sleeve increases as follows to reach the underarm count of 96 sts (3 × 32-st modules):
**Increase method:** On RS rounds only, increase inside the purl columns nearest the BOR marker. Specifically, work M1R after the first p2 of Module 2 (i.e., work 1/1L, p1, M1R, p1 = p2 becomes p2 + 1 new k st), and M1L before the last p2 of Module 1 (i.e., p1, M1L, p1). This inserts new knit stitches that grow a new cable column organically.
> **Practical increase approach:** Since increases must respect the cable module architecture, the pattern expands by adding knit stitches to the central k12 rope section within a module. Every 2 increase rounds add 2 sts; every 8 increase pairs (16 extra sts = half a new module) restructure into a fresh 32-st alignment. Detailed round-by-round instruction below.
**Increase Schedule:**
Work **1 increase round every 8th round** (i.e., increase on Rnd 8, 16, 24, etc.) as follows:
**Increase Round (RS):** Work to the purl column at the very start of the cable section (after BOR), p1, M1R purlwise, p1, continue cable pattern to the purl column before the BOR marker, p1, M1L purlwise, p1, sm. (2 sts increased per increase round.)
Repeat this increase schedule until you have:
- **S & M:** 96 sts (32 increase rows = 32 extra sts over 32 × 8 = 256 rounds — *note: the sleeve length determines how many increase rounds fit; see schedule below*)
- **L:** 96 sts
**Calculated Increase Rounds Required:** 16 increase rounds × 2 sts = 32 extra sts (64 + 32 = 96 sts). Work increase round every **8th round**.
| Size | Total Rounds to Underarm | Increase Rounds | Rows between final increase and underarm |
|---|---|---|---|
| **S** | ~120 rnds (40 cm) | 16 | Work straight after final increase until length reached |
| **M** | ~126 rnds (42 cm) | 16 | Work straight after final increase until length reached |
| **L** | ~132 rnds (44 cm) | 16 | Work straight after final increase until length reached |
> **Module restructuring as sts increase:** As knit stitches are added into the purl columns and between cable ropes, you will notice new k4 and k8 columns forming. Incorporate these into C4F, C8F, C8B crossings on the appropriate rows as they grow. At 80 sts you will have approximately 2.5 complete modules; at 96 sts you will have exactly 3 × 32-st modules. At this point, re-align your BOR marker to the module boundary.
### 2d. Sleeve to Underarm
When sleeve measures:
- **S:** 40 cm (15.75 in) from cast-on edge
- **M:** 42 cm (16.5 in) from cast-on edge
- **L:** 44 cm (17.25 in) from cast-on edge
End after completing Row 8 of a cable repeat (ensuring you end at a natural 8-row module boundary). You should have **96 sts** on the needle for all sizes.
Break yarn leaving a 15 cm (6 in) tail. Leave sleeve sts on the needle or transfer to a long piece of waste yarn. Make second sleeve identically.
---
## SECTION 3: THE YOKE JOIN
This is the pivotal moment where the three separate pieces are united onto one long circular needle for the flat-worked raglan yoke.
### 3a. Stitch Counts at Join
At this point you have:
- Left Front: S = 50 sts | M = 58 sts | L = 66 sts (on holder)
- Back: S = 96 sts | M = 112 sts | L = 128 sts (on needle)
- Right Front: S = 50 sts | M = 58 sts | L = 66 sts (on holder)
- Each Sleeve: 96 sts (all sizes)
**Total sts on yoke needle:**
- **S:** 50 + 96 + 96 + 96 + 50 = **388 sts**
- **M:** 58 + 96 + 112 + 96 + 58 = **420 sts**
- **L:** 66 + 96 + 128 + 96 + 66 = **452 sts**
### 3b. Joining Row (RS)
Using the **4 mm** long circular needle (80–100 cm), work across the yoke pieces in the following order, placing **raglan markers (PM-R)** at each join point. The raglan marker sits *within* (or immediately beside) a purl column — this is the decrease zone.
Work as follows on the RS:
1. **Right Front:** Transfer from holder; work all Right Front sts in cable pattern as established, ending with the right selvedge st.
2. **PM-R** (Raglan Marker 1 — Right Front / Right Sleeve join). This marker sits in the P2 column at the right edge of the right sleeve / right edge of the right front.
3. **Right Sleeve:** Work all 96 sleeve sts in cable pattern as established.
4. **PM-R** (Raglan Marker 2 — Right Sleeve / Back join). Sits in P2 column.
5. **Back:** Work all Back sts in cable pattern as established.
6. **PM-R** (Raglan Marker 3 — Back / Left Sleeve join). Sits in P2 column.
7. **Left Sleeve:** Work all 96 sleeve sts in cable pattern as established.
8. **PM-R** (Raglan Marker 4 — Left Sleeve / Left Front join). Sits in P2 column.
9. **Left Front:** Transfer from holder; work all Left Front sts in cable pattern as established, beginning with left selvedge st.
> **Marker placement precision:** Each PM-R is placed so that it has exactly **one purl stitch on each side** of it (i.e., the marker nestles between the p...p2...pm-R...p2...p sequence). This ensures that every raglan decrease is a P2tog or ssp worked within the purl columns, leaving the cable ropes entirely intact.
---
## SECTION 4: THE RAGLAN YOKE (Worked Flat)
The yoke is now worked **back and forth in rows** (flat) on the long circular needle, with the RS facing toward you on RS rows. The front opening remains open throughout (this is the cardigan front).
### 4a. Raglan Decrease Logic
**The Golden Rule:** All decreases occur within the **P2 columns adjacent to each raglan marker**. On a RS row, you will work **P2tog** (right-leaning) on one side of the marker and **ssp** (left-leaning) on the other side. This consumes one purl stitch on each side of each raglan line per decrease row, effectively narrowing the purl channel from P2 to P1 to 0 as the yoke progresses.
Once the P2 columns are consumed, decreases move one stitch inward (into the outermost knit stitches of the cable), working **ssk** and **k2tog** at the cable edge. This is noted in the instructions below.
**Decrease Row (RS):** Work to 1 st before PM-R, **ssp** (or **p2tog** as directed), sm, **p2tog** (or **ssk** as directed); repeat at each of the 4 raglan markers; work to end. *(8 sts decreased per decrease row.)*
**WS Rows:** Work all stitches as they present. No decreases on WS rows.
### 4b. Phase 1 Decreases — Working Within Purl Columns (Rows 1–16)
Work **decrease rows every RS row** for 8 RS rows (= 16 total rows including WS rows):
**RS Decrease Row:** K2 (selvedge), work cable pattern to 1 st before PM-R 1, **ssp**, sm, **p2tog**, work cable pattern to 1 st before PM-R 2, **ssp**, sm, **p2tog**, work cable pattern to 1 st before PM-R 3, **ssp**, sm, **p2tog**, work cable pattern to 1 st before PM-R 4, **ssp**, sm, **p2tog**, work cable pattern to end, k2 (selvedge).
*(8 sts decreased per RS row × 8 RS rows = 64 sts decreased in Phase 1.)*
**Stitch counts after Phase 1:**
- **S:** 388 − 64 = **324 sts**
- **M:** 420 − 64 = **356 sts**
- **L:** 452 − 64 = **388 sts**
> After 8 decrease rows, each P2 raglan column has been reduced to zero purl stitches. The cable ropes now sit directly adjacent to each other at the raglan line — which creates a dramatic braided visual effect at the shoulder diagonal.
### 4c. Phase 2 Decreases — Into Cable Edges (Rows 17 onward)
Once the purl columns at the raglan lines are consumed, work decreases into the outermost knit sts of the adjacent cable sections. Use **ssk** on the left-leaning side and **k2tog** on the right-leaning side of each marker.
**RS Decrease Row:** Work to 1 st before PM-R, **ssk**, sm, **k2tog**; repeat at each of the 4 markers; work to end.
Continue working decrease rows every RS row until the yoke reaches the required depth.
**Target stitch counts at neckline (before neckband):**
- **S:** approximately **124 sts**
- **M:** approximately **140 sts**
- **L:** approximately **156 sts**
*(These counts allow for a snug crew neckline and are adjusted by working additional decrease-free RS rows if the neckline depth is reached before the stitch target, or omitting a final RS row of decreases if needed.)*
> **Cable management note:** As decreases eat into the cable columns, you will periodically lose a C4F or C4B column. When you have fewer than 4 sts remaining in a cable cross, simply work those stitches as plain knit sts — do not cable them. The visual effect is of the braided rope "unravelling" neatly toward the collar, which is an attractive and technically clean design detail.
### 4d. Yoke Depth Targets
Work the raglan yoke until it measures:
- **S:** 18 cm (7 in) from join row
- **M:** 19 cm (7.5 in) from join row
- **L:** 20 cm (8 in) from join row
End after a WS row. Do not cast off.
---
## SECTION 5: THE NECKBAND
With RS facing, using **3.5 mm** circular needle (80 cm), begin at the **Right Front neck edge**.
**Pick up and knit** sts around the neckline at a rate of approximately **3 sts for every 4 rows** along the front and back neck edges, and **1 st for every bound-off st** across any straight neck sections.
You will pick up approximately:
- **S:** 96–100 sts
- **M:** 108–112 sts
- **L:** 116–120 sts
Adjust to the nearest **even number** of stitches for 1×1 rib.
**Work in 1×1 rib (k1, p1)** for 3 cm (1.25 in).
Cast off in rib using a **stretchy cast-off** (e.g., cast off as k1, p1 but knitting through the back loop on the k sts for elasticity, or use an Italian cast-off).
---
## SECTION 6: BUTTON BANDS
> **Pick-up note:** Button bands enclose the 2-st selvedge of each front and sit entirely outside the cable field.
### 6a. Button Band (Left Front — for buttons)
With RS facing, using **3.5 mm** circular needle, pick up and knit sts along the **Left Front** edge from cast-on edge to top of neckband at a rate of **3 sts for every 4 rows**.
**All sizes:** Approximately 120–132 sts (adjust to an even number).
Work in 1×1 rib for **3 cm (1.25 in)**.
Cast off in rib.
### 6b. Buttonhole Band (Right Front — for buttonholes)
With RS facing, using **3.5 mm** circular needle, pick up and knit the same number of sts along the **Right Front** edge from top of neckband down to cast-on edge.
Work **1 cm (0.5 in)** in 1×1 rib.
**Buttonhole Row (RS):** Work 4 sts in rib, \*cast off 2 sts, work 18 sts in rib; rep from \* 4 more times, cast off 2 sts, work to end. (6 buttonholes made.)
**Next row (WS):** Work in rib, casting on 2 sts over each cast-off gap (use backward loop cast-on).
Continue in rib until band measures **3 cm (1.25 in)** from pick-up row.
Cast off in rib.
> **Button spacing:** With 6 buttons, the lowest button sits 2 cm (¾ in) up from the hem cast-on and the highest button sits at the base of the neckband. Space the remaining 4 buttons evenly between.
---
## SECTION 7: FINISHING
1. **Weave in all ends** on the WS, taking care to thread cable-crossing yarn tails through the backs of the cross-over stitches to anchor them invisibly.
2. **Sew on buttons** on the Left Front band, aligning with the buttonholes.
3. **Wet block** the finished cardigan: soak in cool water with a small amount of wool wash for 20 minutes, press out gently (do not wring), lay flat on a blocking board, and pin to the finished measurements. Allow to dry completely before wearing (approximately 24–48 hours).
> **Blocking note:** Wet blocking will open up the cables beautifully and set the purl columns that define the raglan lines. The finished garment will grow approximately 5–8% in width and may shorten slightly in length — account for this when measuring during construction.
---
## QUICK REFERENCE — STITCH COUNT CHECKPOINTS
| Stage | Size S | Size M | Size L |
|---|---|---|---|
| Body cast-on | 196 | 228 | 260 |
| Body at underarm | 196 | 228 | 260 |
| Each sleeve cast-on | 64 | 64 | 64 |
| Each sleeve at underarm | 96 | 96 | 96 |
| Total sts at yoke join | 388 | 420 | 452 |
| After Phase 1 decreases (−64) | 324 | 356 | 388 |
| At neckline (target) | ~124 | ~140 | ~156 |
---
## SCHEMATIC
```
←— Neckline Width —→
___________
Raglan / YOKE \ Raglan
Line / (flat, RS) \ Line
/___________________\
|Left| |Right|
|Frnt| B A C K |Frnt |
| | | |
←————— Body Width —————→
← Cast-on: 196/228/260 sts →
← 7.75 cm →← 7.75 cm →← 7.75 cm → [← each = 1 × 32-st module]
S L E E V E (in the round)
64 sts CO → increase → 96 sts
[2 × 32-st modules → 3 × 32-st modules]
```
---
## DESIGNER'S NOTES
**On the mathematics:** Every stitch in this garment is accountable to the 32-stitch cable module. There are no filler stitches, no plain reverse stockinette panels at the sides, and no padding at the underarms or raglan lines. The seamless bottom-up construction means the cable ropes run continuously from the hem ribbing to the neckband, interrupted only by the organic decrease action within the purl channels at the raglan diagonals.
**On the raglan aesthetic:** The traditional raglan shaping line — that long diagonal from underarm to neck — here becomes a column of decreasing purl stitches surrounded by cable ropes. As the purl channel narrows and disappears, the cables draw together, creating a sculptural shoulder that is unique to this construction method.
**On sizing:** If you wish to add a size XL (112 cm / 44 in finished bust), cast on 292 sts for the body (Left Front 74 sts + Back 144 sts + Right Front 74 sts), with the back as 4.5 × 32-st modules. Sleeve cast-on and underarm counts remain the same (96 sts at underarm). The 32-stitch module scales cleanly.
---
*Pattern © [Designer Name]. For personal use only. Please do not reproduce or distribute commercially.*
Disclaimer: This pattern was generated by AI and should be reviewed for accuracy before use. While we strive for quality, AI-generated content may contain errors. Please verify measurements, stitch counts, and instructions before beginning your project. Generated by purlJam.uk
Access your pattern anytime
Bookmark this page to access your pattern anytime