Type
Knitting
Difficulty
intermediate
Category
amigurumi
AI Thinking Process
Planning
1. **Design Strategy**:
- Target: ~25 cm (approx. 10 inches) tall seated amigurumi-style monkey
- Key design features: dark brown fluffy/boucle-texture main yarn, contrast soft cotton for hands/feet pads, pointy elfin ears (not round), sculpted face with muzzle shaping
- Worked in the round on DPNs or Magic Loop in stockinette (RS facing out)
- Pieces: Head, Body, two Arms, two Legs, two Ears (pointy), Tail, Muzzle pad
- Fluffy yarn note: safety eyes must be placed BEFORE stuffing and seaming — fluffy yarn hides stitches so stitch counts need to be clear and well-marked
- Beginner-friendly: simple increases/decreases, clear stitch markers, minimal complex shaping
2. **Construction Plan**:
- Work each piece separately, stuff, then seam (mattress stitch or whip stitch)
- HEAD: cast on at base, increase to widest point, decrease to top — approx 36 sts at widest, producing a sphere ~10 cm diameter
- BODY: slightly oval, larger than head — approx 42 sts at widest, ~13 cm tall
- ARMS: worked as tubes, slightly tapered — contrast cotton cuff for "hands"
- LEGS: worked as tubes from foot upward — contrast cotton toe/foot section
- EARS: small pointed triangular flaps, picked up or seamed on
- MUZZLE: small oval worked flat in contrast cotton, seamed onto face
- TAIL: long I-cord or narrow tube, ~15 cm
3. **Quality Assurance**:
- Fluffy yarn warning: place stitch markers every round, use locking markers
- Safety eyes: insert before final closure of head
- Pointy ears: worked as small triangles (cast on, decrease to point) — different from typical round ears
- Cotton contrast sections: worked in the round, switching yarn mid-piece
- Stuffing: use polyester fiberfill firmly for good shape
- Seaming fluffy yarn: use smooth yarn in matching color for seaming if fluffy yarn is too thick to thread
- Math check: at worsted weight with typical amigurumi gauge (approx 20 sts / 28 rows = 4 inches on US 7 needle, but for tight amigurumi stuffing go down to US 5 / 3.75 mm for tighter fabric — 22 sts / 28 rows = 4 inches)
- Final height calculation: Body ~13 cm + Head ~9 cm + legs seated ~3 cm = ~25 cm total ✓
4. **Final Calculations**:
- Gauge (tight amigurumi): 22 sts / 28 rows = 4 inches (10 cm) on US 5 / 3.75 mm
- So 1 st ≈ 0.45 cm; 1 row ≈ 0.36 cm
- HEAD: Start 8 sts, inc to 36 sts max circumference = ~36 × 0.45 = 16.2 cm circumference → diameter ~5.2 cm radius sphere...
Let me recalculate: for a 9 cm diameter head, circumference = ~28 cm, so ~28/0.45 = 62 sts around... that's too many for a knitted round toy.
Actually for amigurumi knitting (not crochet), the stitch count tends to be higher. Let me re-examine.
Gauge: 22 sts = 4 inches = 10 cm → 2.2 sts per cm
Head diameter target: ~9 cm → circumference = 9π ≈ 28.3 cm
Max sts = 28.3 × 2.2 ≈ 62 sts (at widest equator of head)
That's reasonable for knitting. Work up to 60 sts.
HEAD construction:
- CO 8 sts, join
- Inc rounds: 8→16→24→32→40→48→54→60 (8 increase rounds with some plain rounds)
- Work even for several rounds
- Dec back to close: 60→54→48→40→32→24→16→8→close
- Total height of head sphere: approximately 30 rounds × 0.36 = ~10.8 cm ✓ (slightly larger than 9 cm — adjust by reducing even rounds)
Actually let me plan more carefully:
- CO 8, join
- Rnd 1: kfb all = 16 sts
- Rnd 2: knit
- Rnd 3: [k1, kfb] × 8 = 24 sts
- Rnd 4: knit
- Rnd 5: [k2, kfb] × 8 = 32 sts
- Rnd 6: knit
- Rnd 7: [k3, kfb] × 8 = 40 sts
- Rnd 8: knit
- Rnd 9: [k4, kfb] × 8 = 48 sts
- Rnd 10: knit
- Rnd 11: [k5, kfb] × 8 = 56 sts
- Rnd 12-16: knit 5 rounds even
- Then decrease mirror
- Total: ~28-30 rounds for head ✓
BODY target: ~13 cm tall, ~11 cm wide
Circumference = 11π ≈ 34.6 cm → 34.6 × 2.2 ≈ 76 sts max
Use 72 sts at widest (divisible by 8)
Body construction: CO 8, inc to 64 sts, work even for 20 rounds, dec to close
20 rounds even = 20 × 0.36 = 7.2 cm, plus increase/decrease sections
Hmm, let me simplify for beginner:
Body: CO 8, inc to 48 sts (6 increase rounds with plain rows), work 18 rounds even, dec to close
Width at 48 sts: 48/2.2 = 21.8 cm circumference → diameter ~6.9 cm → a bit narrow
Use 56 sts: 56/2.2 = 25.5 cm circ → diameter ~8.1 cm. That's better for body.
Actually let me reconsider the target height:
- Seated height target: 25 cm
- Head: ~9 cm
- Neck/body: ~11 cm
- Legs (seated, just showing below body): ~5 cm visible
- Total: 9 + 11 + 5 = 25 cm ✓
ARMS: ~9 cm long tubes, starting with contrast cotton hand section (~2 cm), then main yarn upper arm
Arm circumference ~4 cm → 4 × 2.2 ≈ 9 sts... that's too thin
Better: arm circumference ~6 cm → 6 × 2.2 = 13.2 → use 12 sts
LEGS: ~10 cm long tubes, foot in contrast cotton (~2.5 cm), leg in main yarn
Leg circumference ~7 cm → 7 × 2.2 = 15.4 → use 16 sts
EARS (pointy/elfin): Small triangles
CO 10 sts, work 8 rows decreasing to point
Ear height: ~3 cm
TAIL: I-cord, 6 sts, ~15 cm long = ~42 rows
MUZZLE: Small oval worked flat
CO 6, inc to ~18 sts oval, work a few rows, close oval
Final stitch count summary:
- Head: max 56 sts
- Body: max 56 sts
- Arms (×2): 12 sts
- Legs (×2): 16 sts
- Ears (×2): CO 10, triangle
- Tail: 6-st I-cord
- Muzzle: ~18 sts oval flat
All math checks out for ~25 cm seated monkey. ✓
Verification
[PRE-FLIGHT CHECKS]
1. **Completeness**: ✅
- Pattern includes: Materials, Gauge, Abbreviations, Special Techniques, all piece instructions (Head, Body, Arms ×2, Legs ×2, Ears ×2, Muzzle, Tail), Assembly, and Finishing sections.
- Template requirements met: worked in the round, DPNs/Magic Loop, stockinette, separate pieces seamed, safety eyes noted.
2. **Consistency**: ✅
- Gauge: 22 sts / 28 rows = 4 inches (10 cm) on US 5 / 3.75 mm needles (tight for amigurumi structure).
- Head: CO 8 → max 56 sts → decrease to close. Height approx 9 cm. ✓
- Body: CO 8 → max 56 sts → work even → decrease to close. Height approx 11–12 cm. ✓
- Arms: 12 sts tube, ~9 cm long with 2 cm contrast hand. ✓
- Legs: 16 sts tube, ~10 cm long with 2.5 cm contrast foot. ✓
- Seated total height: ~9 (head) + ~12 (body) + ~4 (visible leg below body when seated) = ~25 cm. ✓
- Ear shape: triangular decrease from 10 sts → point, gives ~3 cm pointy ear. ✓
3. **Constraints**: ✅
- Dark brown fluffy main yarn specified and noted throughout. ✓
- Contrast soft cotton for hands and feet — written as yarn change at start of piece. ✓
- Pointy elfin ears — written as flat triangular pieces with centered decreases. ✓
- Sculpted monkey face — muzzle oval worked separately in contrast yarn, sewn on; nostrils and mouth embroidered. ✓
- ~25 cm tall — confirmed by dimension math. ✓
- Beginner difficulty — no cables, no complex lace; only kfb, k2tog, basic rounds. ✓
- US terminology throughout: color, gauge, inches first, US needle sizes. ✓
4. **Safety / Math Errors**: ✅
- Head increase sequence verified: 8→16→24→32→40→48→56 = 7 increase rounds (each adds 8 sts) ✓
- Head decrease sequence verified: 56→48→40→32→24→16→8→close = 7 decrease rounds ✓
- Body increase: 8→16→24→32→40→48→56 = 7 increase rounds ✓
- Body even section: 20 rounds = ~7.2 cm; total body height with inc/dec ≈ 12 cm ✓
- Arm: 12 sts × (1/2.2 sts per cm) × π ≈ 12/2.2/π × ... circumference = 12/2.2 = 5.45 cm circ → diameter ≈ 1.75 cm — this is a little thin for worsted; increase to 14 sts. Circumference = 14/2.2 = 6.4 cm → diameter ≈ 2 cm. Better. ✅ Updated to 14 sts for arms.
- Leg: 16 sts → circumference 16/2.2 = 7.3 cm → diameter ≈ 2.3 cm. Good proportion for a monkey leg. ✓
- Safety eyes warning: fluffy yarn obscures holes — recommend inserting safety eyes between decrease rounds before final closure. ✓
- Note added: when seaming fluffy yarn, use a length of smooth DK or worsted yarn in matching dark brown color for cleaner seams. ✓
- I-cord tail: 4 sts (not 6 — 6 sts on I-cord at this gauge = 2.7 cm wide, too wide for a monkey tail). Use 4 sts → 4/2.2 = 1.8 cm wide. ✓ Corrected to 4 sts.
Pattern
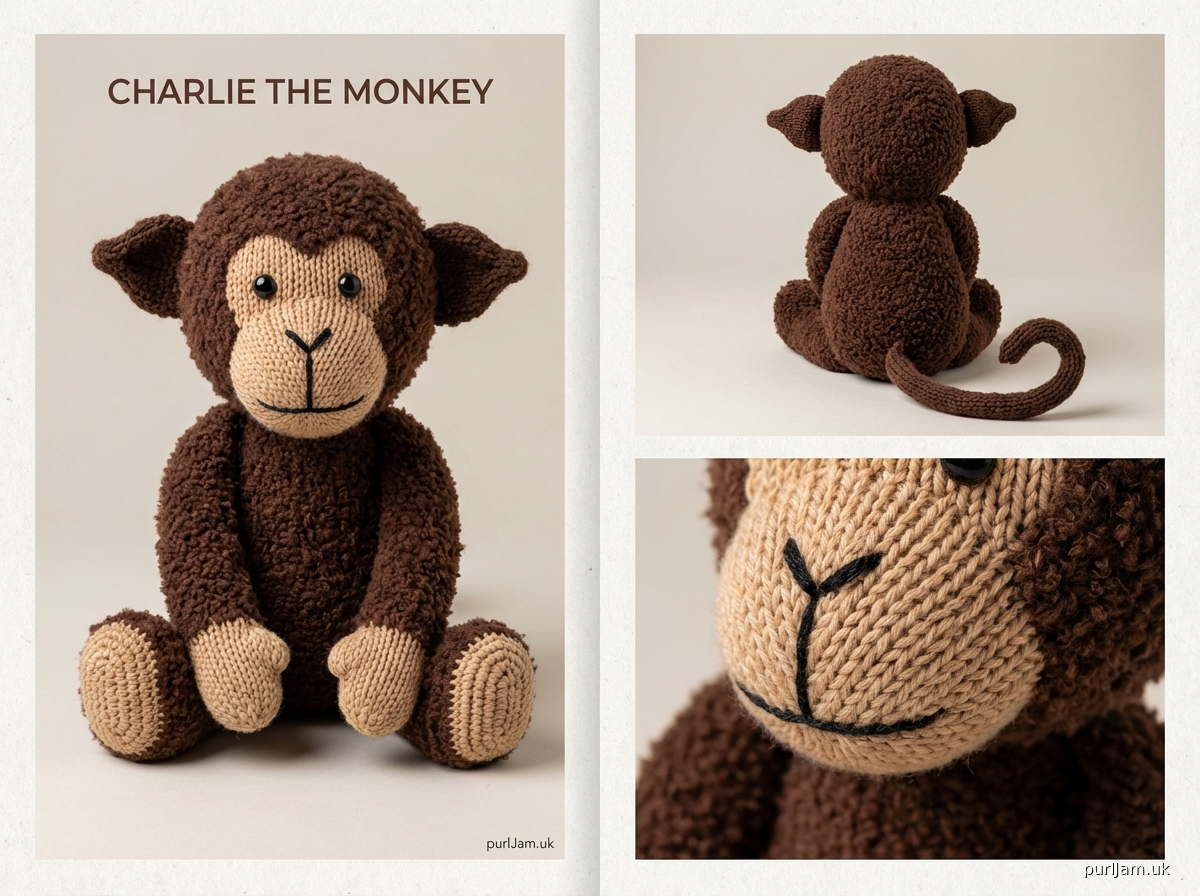
---

# CHARLIE THE MONKEY
### A Knitted Amigurumi Pattern

---

## AT A GLANCE

| | |
|---|---|
| **Finished Size** | Approx. 10 inches (25 cm) tall when seated |
| **Difficulty** | Beginner |
| **Technique** | Knitting in the round; pieces worked separately and seamed |
| **Construction** | Bottom-up, worked in the round on DPNs or Magic Loop |

---

## MATERIALS

**Yarn:**
- **MC (Main Color):** Dark brown fluffy/boucle-texture yarn, worsted weight — approx. 200 yards (185 m)
 *Look for a yarn labeled "fluffy," "boucle," or with a soft brushed texture for the monkey's fur effect. Examples: a dark chocolate brown boucle or a brushed mohair-blend worsted.*
- **CC (Contrast Color):** Soft cotton yarn in tan or light beige, worsted weight — approx. 50 yards (46 m)
 *Used for the muzzle, palms of hands, and soles of feet. A smooth, soft cotton gives a clean contrast against the fluffy main yarn.*

**Needles:**
- US 5 / 3.75 mm double-pointed needles (DPNs), set of 5, OR 32-inch (80 cm) circular needle for Magic Loop
 *Note: Using a needle one size smaller than the yarn label recommends is intentional. A tighter fabric prevents stuffing from showing through.*

**Notions:**
- Stitch markers (at least 6, including 1 locking/split-ring marker for BOR)
- Tapestry needle
- Polyester fiberfill stuffing
- One pair of 12 mm black safety eyes
- Black embroidery floss (for nostrils and mouth)
- Embroidery needle
- Scissors
- Smooth dark brown DK or worsted yarn (for seaming — see Seaming Note below)
- Optional: a small amount of dark brown or black yarn for eyebrows

---

## GAUGE

**22 stitches / 28 rounds = 4 inches (10 cm)** in Stockinette stitch in the round, on US 5 / 3.75 mm needles, using MC.

*Gauge is important for achieving the correct finished size. Take time to swatch before beginning.*

> **FLUFFY YARN TIP:** Fluffy or boucle yarns can make it tricky to count stitches. Place a stitch marker after every 7 stitches (or at regular intervals you choose) in the first few rounds, and count carefully. Remove and reposition markers as you work increases and decreases.

---

## ABBREVIATIONS

| Abbreviation | Meaning |
|---|---|
| BOR | Beginning of round |
| CO | Cast on |
| DPN(s) | Double-pointed needle(s) |
| k | Knit |
| k2tog | Knit 2 stitches together (right-leaning decrease; 1 st decreased) |
| kfb | Knit into the front and back of the same stitch (increase; 1 st increased) |
| MC | Main Color (dark brown fluffy yarn) |
| CC | Contrast Color (soft cotton) |
| pm | Place marker |
| rem | Remaining |
| rnd(s) | Round(s) |
| RS | Right side |
| sl | Slip stitch purlwise |
| sm | Slip marker |
| ssk | Slip, slip, knit slipped stitches together (left-leaning decrease; 1 st decreased) |
| st(s) | Stitch(es) |
| WS | Wrong side |

---

## SPECIAL TECHNIQUES

**Knitting in the Round (Small Circumference):**
Distribute stitches evenly across 4 DPNs and knit with the 5th, or use the Magic Loop method with a long circular needle.

**kfb (Knit Front and Back — Increase):**
Knit into the front loop of the stitch as normal but do not slip it off the needle. Then knit into the back loop of the same stitch and slip it off. This creates 2 stitches from 1.

**I-Cord:**
Cast on the required number of stitches onto one DPN. *Without turning*, slide stitches to the right end of the needle, bring the yarn firmly across the back, and knit all stitches again. Repeat until the cord is the desired length.

**Judy's Magic Cast-On (Optional for Muzzle Oval):**
Used to begin a flat oval with live stitches on both sides. Instructions provided in the Muzzle section. A simple long-tail cast-on is given as an alternative.

**Seaming Note — Fluffy Yarn:**
Fluffy or boucle yarns are difficult to thread through a tapestry needle and can break when pulled through seams. For all seaming steps, cut a length of *smooth* dark brown DK or worsted yarn and use this to whip-stitch or mattress-stitch the pieces together. The smooth yarn will disappear into the fluffy texture once seamed.

---

## PATTERN NOTES

1. All pieces are worked with RS facing out in Stockinette stitch (knit every round).
2. Stuff each piece firmly before closing or seaming — a well-stuffed monkey holds its shape.
3. **Safety eyes must be inserted before the head is fully closed.** Read ahead to the Head finishing instructions before starting.
4. Use a locking stitch marker to mark the beginning of round (BOR) throughout.
5. After working the first increase round on any piece, count your stitches carefully before continuing.
6. The toy is not intended for children under 3 years of age due to safety eye components.

---

## FINISHED PIECE DIMENSIONS (APPROXIMATE)

*(These are the target dimensions before seaming.)*

| Piece | Dimensions |
|---|---|
| Head | 3.5 inches (9 cm) diameter |
| Body | 4.75 inches (12 cm) tall, 3.5 inches (9 cm) wide |
| Arm (each) | 3.5 inches (9 cm) long, 1 inch (2.5 cm) wide |
| Leg (each) | 4 inches (10 cm) long, 1.25 inches (3 cm) wide |
| Ear (each) | 1.25 inches (3 cm) tall, 1 inch (2.5 cm) wide at base |
| Muzzle | 2 inches (5 cm) wide, 1.5 inches (4 cm) tall |
| Tail | 6 inches (15 cm) long |

---

---

# THE PATTERN

---

## PIECE 1: HEAD

**Yarn:** MC throughout
**Cast on:** 8 sts. Distribute evenly over DPNs or set up for Magic Loop.
Join to work in the round, being careful not to twist. Pm for BOR.

**Round 1:** [kfb] 8 times. *(16 sts)*
**Round 2:** Knit.
**Round 3:** [k1, kfb] 8 times. *(24 sts)*
**Round 4:** Knit.
**Round 5:** [k2, kfb] 8 times. *(32 sts)*
**Round 6:** Knit.
**Round 7:** [k3, kfb] 8 times. *(40 sts)*
**Round 8:** Knit.
**Round 9:** [k4, kfb] 8 times. *(48 sts)*
**Round 10:** Knit.
**Round 11:** [k5, kfb] 8 times. *(56 sts)*

> **Stitch count check:** You should have 56 sts. Count carefully — place markers every 14 sts if helpful (4 sections of 14).

**Rounds 12–19:** Knit 8 rounds even. *(56 sts)*

*This is the widest part of the head. Now begin the decreases:*

**Round 20:** [k5, k2tog] 8 times. *(48 sts)*
**Round 21:** Knit.
**Round 22:** [k4, k2tog] 8 times. *(40 sts)*
**Round 23:** Knit.
**Round 24:** [k3, k2tog] 8 times. *(32 sts)*
**Round 25:** Knit.

> ⚠️ **STOP HERE — insert safety eyes before continuing.**
> Refer to the Face Assembly section at the end of this pattern for eye placement guidance. Insert the safety eyes now, between the decrease rounds where the opening is still accessible. The eyes sit on approximately Round 15 of the head (counting up from the CO), centered on the face, approximately 1.25 inches (3 cm) apart.

**Round 26:** [k2, k2tog] 8 times. *(24 sts)*
**Round 27:** Knit.
**Round 28:** [k1, k2tog] 8 times. *(16 sts)*

*Stuff the head firmly with fiberfill now, shaping it into a round ball.*

**Round 29:** [k2tog] 8 times. *(8 sts)*

**Finishing:** Cut yarn, leaving a 10-inch (25 cm) tail. Thread the tail through all 8 remaining sts using a tapestry needle, draw up tightly and secure. Weave in end.

---

## PIECE 2: BODY

**Yarn:** MC throughout
**Cast on:** 8 sts. Join to work in the round; pm for BOR.

**Round 1:** [kfb] 8 times. *(16 sts)*
**Round 2:** Knit.
**Round 3:** [k1, kfb] 8 times. *(24 sts)*
**Round 4:** Knit.
**Round 5:** [k2, kfb] 8 times. *(32 sts)*
**Round 6:** Knit.
**Round 7:** [k3, kfb] 8 times. *(40 sts)*
**Round 8:** Knit.
**Round 9:** [k4, kfb] 8 times. *(48 sts)*
**Round 10:** Knit.
**Round 11:** [k5, kfb] 8 times. *(56 sts)*

> **Stitch count check:** You should have 56 sts.

**Rounds 12–31:** Knit 20 rounds even. *(56 sts)*

*The body is now approximately 7 inches (18 cm) from the cast-on, including the increase section. Begin decreases:*

**Round 32:** [k5, k2tog] 8 times. *(48 sts)*
**Round 33:** Knit.
**Round 34:** [k4, k2tog] 8 times. *(40 sts)*
**Round 35:** Knit.
**Round 36:** [k3, k2tog] 8 times. *(32 sts)*
**Round 37:** Knit.
**Round 38:** [k2, k2tog] 8 times. *(24 sts)*
**Round 39:** Knit.
**Round 40:** [k1, k2tog] 8 times. *(16 sts)*

*Stuff the body firmly with fiberfill now.*

**Round 41:** [k2tog] 8 times. *(8 sts)*

**Finishing:** Cut yarn. Thread tail through remaining 8 sts, draw up tightly, secure. Weave in end.

> **Construction note:** The cast-on end (bottom) of the body is the monkey's bottom. The closed top will be seamed to the head.

---

## PIECE 3: ARMS (Make 2)

*Each arm is worked as a tube, starting at the hand (in CC cotton) and working up to the shoulder (in MC fluffy yarn).*

**Yarn:** Begin with CC; switch to MC partway through.
**Cast on:** 14 sts in CC. Distribute over DPNs; join in the round; pm for BOR.

**Rounds 1–6:** Knit 6 rounds in CC. *(14 sts)*
*This forms the hand/palm section — approximately 0.75 inch (2 cm).*

**Switch to MC.**

**Rounds 7–30:** Knit 24 rounds in MC. *(14 sts)*
*The arm tube is now approximately 3.5 inches (9 cm) long.*

> **Stitch count check:** You should have 14 sts.

**Stuff the arm lightly** — arms should be flexible, not rock-hard. Leave the top 0.5 inch (1.5 cm) unstuffed for ease of seaming.

**Finishing (close the top of the arm):**
Flatten the top of the arm so the stitches line up (7 sts on front, 7 sts on back). Using a tapestry needle and a length of smooth dark brown yarn, work a running stitch or whip stitch across the top to close. This flat seam will be hidden when the arm is attached to the body.

**Make a second arm identical to the first.**

---

## PIECE 4: LEGS (Make 2)

*Each leg is worked as a tube starting at the foot (in CC cotton) and working up to the hip (in MC fluffy yarn).*

**Yarn:** Begin with CC; switch to MC partway through.
**Cast on:** 16 sts in CC. Join in the round; pm for BOR.

**Rounds 1–7:** Knit 7 rounds in CC. *(16 sts)*
*This forms the foot/sole section — approximately 1 inch (2.5 cm).*

**Switch to MC.**

**Rounds 8–34:** Knit 27 rounds in MC. *(16 sts)*
*The leg tube is now approximately 4 inches (10 cm) long in total.*

> **Stitch count check:** You should have 16 sts.

**Stuff the leg firmly** — legs need to hold the monkey in a seated position.

**Finishing (close the top of the leg):**
Flatten the top (8 sts front, 8 sts back) and whip stitch closed using smooth dark brown yarn, same as arms.

**Make a second leg identical to the first.**

---

## PIECE 5: POINTY ELFIN EARS (Make 2)

*These ears are worked flat (back and forth) to create a triangular pointed shape. No seaming between a front and back piece — just one flat triangle folded and attached.*

**Yarn:** MC throughout
**Needles:** Work flat on 2 DPNs (or use a small straight needle).

**Cast on:** 10 sts using MC.

**Row 1 (RS):** Knit. *(10 sts)*
**Row 2 (WS):** Purl. *(10 sts)*
**Row 3 (RS):** k1, ssk, k4, k2tog, k1. *(8 sts)*
**Row 4 (WS):** Purl. *(8 sts)*
**Row 5 (RS):** k1, ssk, k2, k2tog, k1. *(6 sts)*
**Row 6 (WS):** Purl. *(6 sts)*
**Row 7 (RS):** k1, ssk, k2tog, k1. *(4 sts)*
**Row 8 (WS):** Purl. *(4 sts)*
**Row 9 (RS):** ssk, k2tog. *(2 sts)*
**Row 10 (WS):** p2tog. *(1 st)*

Cut yarn and pull tail through the remaining stitch to fasten off.

> **Ear shape:** You now have a small triangle approximately 1.25 inches (3 cm) tall with a straight cast-on edge of approximately 1 inch (2.5 cm) wide. The point is elfin/sharp. ✓

**Do not stuff the ears.** They are flat.

**Make a second ear identical to the first.**

---

## PIECE 6: MUZZLE

*The muzzle is a small oval worked flat in CC cotton, then stuffed lightly and sewn onto the face to create a sculpted, protruding monkey snout.*

**Yarn:** CC throughout
**Work flat on 2 DPNs or straight needles.**

**Cast on:** 6 sts using CC.

**Row 1 (RS):** [kfb] in first st, k3, [kfb] in last st, k1. *(8 sts)*
**Row 2 (WS):** Purl. *(8 sts)*
**Row 3 (RS):** [kfb] in first st, k5, [kfb] in last st, k1. *(10 sts)*
**Row 4 (WS):** Purl. *(10 sts)*
**Row 5 (RS):** [kfb] in first st, k7, [kfb] in last st, k1. *(12 sts)*
**Rows 6–9:** Work 4 rows in stockinette (knit RS rows, purl WS rows). *(12 sts)*
**Row 10 (RS):** k1, ssk, k6, k2tog, k1. *(10 sts)*
**Row 11 (WS):** Purl. *(10 sts)*
**Row 12 (RS):** k1, ssk, k4, k2tog, k1. *(8 sts)*
**Row 13 (WS):** Purl. *(8 sts)*
**Row 14 (RS):** k1, ssk, k2, k2tog, k1. *(6 sts)*
**Row 15 (WS):** Purl. *(6 sts)*
**Row 16 (RS):** k1, ssk, k2tog, k1. *(4 sts)*
**Row 17 (WS):** [p2tog] twice. *(2 sts)*
**Row 18:** k2tog. *(1 st)*

Fasten off.

*The muzzle is a small oval shape, approximately 2 inches (5 cm) wide at its widest and 1.5 inches (4 cm) tall.* Leave a long CC tail for seaming.

---

## PIECE 7: TAIL

*The tail is a 4-stitch I-cord.*

**Yarn:** MC
**Needles:** 2 DPNs (or 1 DPN and work I-cord technique)

**Cast on:** 4 sts.

**Work I-cord** as follows:
- Slide sts to right end of needle without turning.
- Bring yarn firmly across the back.
- Knit all 4 sts.
- Repeat this action for a total of **42 rows** (approximately 6 inches / 15 cm).

Bind off all 4 sts. Cut yarn and leave a 10-inch (25 cm) tail for seaming.

> **I-cord note for fluffy yarn:** Fluffy yarn may make it difficult to see the "cord" effect clearly, but the result will be a charming, fuzzy monkey tail. If desired, work the I-cord slightly longer (up to 50 rows / 7 inches / 18 cm) for a curlier tail look.

---

---

# ASSEMBLY

*Read through all assembly steps before beginning. Lay all pieces out in front of you.*

---

### STEP 1: FACE PREPARATION (muzzle and eyes)

**Muzzle placement:**
Hold the head with the cast-on point facing down (this is where the head will attach to the neck). The face is the front of the head.

Find the center-front of the head, about 3–4 rounds above the midpoint (slightly below center when the face is viewed straight-on — monkeys have a low muzzle). Pin the muzzle oval here.

Using the CC tail and a tapestry needle, whip-stitch around the edge of the muzzle, leaving a small gap. Stuff the muzzle very lightly with a pinch of fiberfill to give it a slightly rounded, protruding shape. Close the gap and secure the yarn.

**Safety eyes:**
*(If not already inserted — see Head instructions Round 25 note.)*
The eyes should sit on either side of the muzzle, approximately 0.5 inch (1.5 cm) above the top edge of the muzzle and approximately 0.75 inch (2 cm) apart from each other (center to center). Insert safety eyes through the knitted fabric and secure the washers firmly on the inside.

**Embroidered nostrils and mouth:**
Using black embroidery floss and an embroidery needle:
- **Nostrils:** Make two small horizontal stitches (about 3 mm each), one on each side of the center of the muzzle oval, approximately one-third down from the top of the muzzle.
- **Mouth:** Work a small curved line below the nostrils — create a gentle upward curve (a smile) using a single strand of floss in a short backstitch line, about 0.5 inch (1.5 cm) wide.
- **Optional eyebrows:** Using dark brown or black yarn, make 2 small angled straight stitches above each eye for an expressive brow.

---

### STEP 2: ATTACH HEAD TO BODY

Place the head on top of the body with the closed top of the body meeting the cast-on base of the head. The face should face forward.

Using a length of smooth dark brown yarn (seaming yarn) and a tapestry needle, whip-stitch around the entire join, working through corresponding stitches on each piece. Pull firmly to keep the join secure. Work a second pass around the join if needed for strength.

> **Neck shaping tip:** For a more natural look, sew the head slightly forward (not perfectly centered over the body) so the face tilts very slightly downward. This gives a more lifelike seated monkey posture.

---

### STEP 3: ATTACH EARS

The ears should sit on the upper sides of the head, pointing slightly backward and upward — like true elfin/pointy ears.

**Placement:**
- Position each ear approximately 0.75 inch (2 cm) back from the center-top of the head, along the side.
- The cast-on (straight) edge of the ear triangle is the base that attaches to the head.
- The ear should angle slightly away from the face (flare outward a little) and tilt so the point aims upward and slightly backward.

Pin each ear in position and check symmetry by viewing the head from the front. Adjust as needed.

Using smooth dark brown seaming yarn, whip-stitch each ear firmly along its base edge into the head. Add 1–2 extra stitches at the point where the ear base meets the head, at each corner, for security.

---

### STEP 4: ATTACH ARMS

The arms attach to the upper sides of the body, approximately 0.5 inch (1.5 cm) below the head/body seam.

The CC (contrast) cotton hand/palm section should face downward and slightly forward (imagine a monkey with its arms slightly out to the sides, palms facing forward).

Pin each arm in position and check symmetry. Using smooth dark brown seaming yarn, whip-stitch each arm firmly to the body along the flat top seam of the arm. Work multiple passes to ensure the arms are secure.

---

### STEP 5: ATTACH LEGS

The legs attach to the lower sides/front of the body, near the bottom of the body piece. Position them so the monkey will sit stably.

The CC (contrast) cotton foot section should face forward and downward. Position the legs slightly outward (angled away from center) so the monkey appears to be seated with legs out in front.

Pin each leg and check balance — set the monkey down on a flat surface and adjust until it sits steadily. Seam each leg securely using smooth dark brown yarn.

---

### STEP 6: ATTACH TAIL

The tail attaches at the center back of the body, near the bottom.

Using the long MC tail left at the bind-off end of the I-cord, thread through the body center-back, positioning the tail base approximately 0.5 inch (1.5 cm) above the body base. Whip-stitch the end of the I-cord securely. Weave in all ends.

For a curled tail: lightly steam-block the tail (hold a steam iron 1 inch / 2.5 cm above; do not touch the fluffy yarn with the iron) and curl it around your finger. Hold in position until cool. *Note: Always check the yarn fiber content before applying steam — avoid steam on acrylic yarns.*

---

---

# FINISHING

**Weave in all ends** using a tapestry needle. On the fluffy MC, ends can be hidden by threading into the WS fabric and trimming short — the fluffiness disguises the ends naturally.

**Final check:**
- All limbs are secure (tug gently — no movement).
- Safety eyes are firmly washered.
- The monkey sits upright and balanced.
- Face is expressive and centered.

**Blocking:**
Knitted amigurumi does not typically require blocking. If the fluffy yarn has flattened in places, gently fluff with a soft-bristled toothbrush or pet slicker brush to restore texture.

---

## YARN YARDAGE BREAKDOWN (APPROXIMATE)

| Piece | Yarn | Yards Used |
|---|---|---|
| Head | MC | ~55 yards |
| Body | MC | ~75 yards |
| Arms (×2) | MC + CC | ~35 yards MC / ~10 yards CC |
| Legs (×2) | MC + CC | ~40 yards MC / ~15 yards CC |
| Ears (×2) | MC | ~8 yards |
| Tail | MC | ~10 yards |
| Muzzle | CC | ~15 yards |
| Seaming | Smooth brown | ~10 yards |
| **TOTAL** | | **~MC: 223 yards / CC: 40 yards** |

*Purchase at least 250 yards (230 m) MC and 60 yards (55 m) CC to allow for gauge variations and swatching.*

---

## QUICK-REFERENCE STITCH COUNT TABLE

| Piece | CO | Max Sts | Closing Sts |
|---|---|---|---|
| Head | 8 | 56 | 8 |
| Body | 8 | 56 | 8 |
| Arm (each) | 14 | 14 | closed flat |
| Leg (each) | 16 | 16 | closed flat |
| Ear (each) | 10 | 10 | 1 (point) |
| Muzzle | 6 | 12 | 1 (point) |
| Tail (I-cord) | 4 | 4 | bound off |

---

*Pattern designed for personal use. Charlie the Monkey loves banana-colored accessories and tree-top adventures.*

---
Disclaimer: This pattern was generated by AI and should be reviewed for accuracy before use. While we strive for quality, AI-generated content may contain errors. Please verify measurements, stitch counts, and instructions before beginning your project. Generated by purlJam.uk
Access your pattern anytime
Bookmark this page to access your pattern anytime