Type
Crochet
Difficulty
beginner
Category
amigurumi
AI Thinking Process
Planning
Verification
Pattern
Chunky Beginner Fox (Amigurumi)
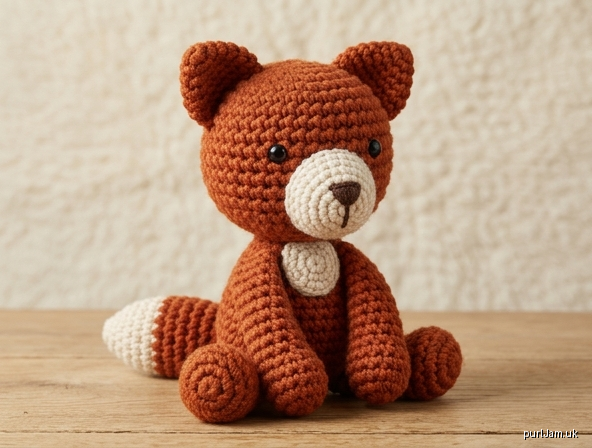
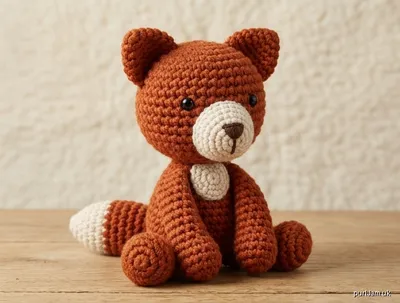
A sitting fox worked in bulky yarn with simple spheres, an oval body and small cone ears. UK crochet terms throughout.
Skill level: Beginner
Finished size: Approximately 16–18 cm (6¼–7 in) tall sitting, depending on stuffing and tension.
Materials
- Yarn: Bulky / chunky (category 5), about 80 g main colour (MC, orange or rust), 20 g contrast (CC, cream or white), small amount dark brown or black for nose and embroidery.
- Hook: 5.5 mm (US I-9), or 1–2 sizes smaller than the ball-band suggestion so the fabric is dense.
- Notions: Polyester fibre filling; yarn needle; stitch marker; 9–10 mm safety eyes (or embroider eyes); optional black embroidery thread.
Safety: Do not use safety eyes on toys for children under 3 years — embroider the eyes instead.
Tension (gauge)
14 dc and 16 rounds = 10 cm (4 in) in the round, unstretched.
Tension is not critical for fit, but a firm fabric is essential so stuffing does not show. Change hook size if the fabric is loose.
Abbreviations (UK)
| Abb. | Meaning |
|---|---|
| ch | chain |
| dc | double crochet (US single crochet) |
| inc | 2 dc in next stitch |
| inv dec | invisible decrease (insert hook in front loops of next 2 sts, yarn over, pull through both, yarn over, pull through 2) |
| MR | magic ring |
| rnd | round |
| sl st | slip stitch |
| st(s) | stitch(es) |
| FO | fasten off |
Work in continuous spirals unless stated. Use a stitch marker in the first stitch of each round.
Head (MC)
Rnd 1: 6 dc in MR. [6]
Rnd 2: inc in each st. [12] (6 increases → 6 + 6 = 12 ✓)
Rnd 3: (1 dc, inc) 6 times. [18] (6 increases → 12 + 6 = 18 ✓)
Rnd 4: (2 dc, inc) 6 times. [24] (6 increases → 18 + 6 = 24 ✓)
Rnds 5–9: dc around. [24] (5 rounds even)
Insert safety eyes between rnds 6 and 7, about 5 sts apart, centred on the face.
Rnd 10: (2 dc, inv dec) 6 times. [18] (6 decreases → 24 − 6 = 18 ✓)
Stuff firmly.
Rnd 11: (1 dc, inv dec) 6 times. [12] (6 decreases → 18 − 6 = 12 ✓)
Rnd 12: inv dec 6 times. [6] (6 decreases → 12 − 6 = 6 ✓)
FO, leaving a long tail. Thread tail through remaining 6 front loops, pull closed, weave in.
Muzzle (CC)
Rnd 1: 6 dc in MR. [6]
Rnd 2: (1 dc, inc) 3 times. [9] (3 increases → 6 + 3 = 9 ✓)
Rnd 3: dc around. [9]
FO, leaving a long tail for sewing. Stuff lightly. Embroider a small triangular nose in dark yarn over rnd 1, then a short vertical line down.
Ears (make 2, MC)
Rnd 1: 4 dc in MR. [4]
Rnd 2: (1 dc, inc) 2 times. [6] (2 increases → 4 + 2 = 6 ✓)
Rnd 3: (2 dc, inc) 2 times. [8] (2 increases → 6 + 2 = 8 ✓)
Rnd 4: dc around. [8]
FO, leaving a long tail. Do not stuff; flatten into a triangle.
Optional inner ear: with CC, embroider or surface-dc a small triangle on the inner face before sewing.
Body (MC, oval)
Work around a foundation chain.
Rnd 1: Ch 6. 2 dc in 2nd ch from hook, 1 dc in next 3 ch, 3 dc in last ch; continue on opposite side of chain: 1 dc in next 3 ch, 1 dc in same ch as first 2 dc. [12]
Rnd 2: inc, 1 dc in next 4 sts, inc 3 times, 1 dc in next 4 sts, inc 2 times. [18]
Count check: 12 + 6 increases = 18 ✓
Rnd 3: 1 dc, inc, 5 dc, inc, 1 dc, inc, 1 dc, inc, 5 dc, inc, 1 dc. [24]
Count check: 18 + 6 increases = 24 ✓
Rnd 4: (3 dc, inc) 6 times. [30] (6 increases → 24 + 6 = 30 ✓)
Rnds 5–10: dc around. [30] (6 rounds even)
Rnd 11: (3 dc, inv dec) 6 times. [24] (6 decreases → 30 − 6 = 24 ✓)
Rnd 12: (2 dc, inv dec) 6 times. [18] (6 decreases → 24 − 6 = 18 ✓)
Stuff firmly, shaping an oval (slightly longer front-to-back).
Rnd 13: (1 dc, inv dec) 6 times. [12] (6 decreases → 18 − 6 = 12 ✓)
Rnd 14: inv dec 6 times. [6]
FO, close hole as for head.
Legs (make 4, MC)
Rnd 1: 6 dc in MR. [6]
Rnd 2: (1 dc, inc) 3 times. [9] (3 increases → 6 + 3 = 9 ✓)
Rnds 3–5: dc around. [9]
Stuff lightly. FO, leaving a long tail. Flatten the open edge slightly for sewing.
Tail (MC, with CC tip)
With CC:
Rnd 1: 6 dc in MR. [6]
Rnd 2: dc around. [6]
Change to MC.
Rnd 3: (1 dc, inc) 3 times. [9] (3 increases → 6 + 3 = 9 ✓)
Rnds 4–8: dc around. [9]
Stuff lightly as you go. FO, leaving a long tail.
Chest patch (CC, optional)
Work a small oval: ch 5, 2 dc in 2nd ch, 2 dc, 3 dc in last ch; opposite side 2 dc, 1 dc in same st as start. [10]
Next rnd: inc, 3 dc, inc × 3, 3 dc, inc × 2. [16]
FO. Sew to front of body before attaching head if desired.
Assembly
- Pin muzzle to the lower front of the head (covering rnds 7–10). Sew with CC tail, adding a little stuffing if needed.
- Pin ears to the top of the head, slightly angled outward, spanning about rnds 3–6. Sew firmly through both layers.
- Sew head to the top/front of the body, centred, with a slight downward tilt.
- Sew two legs to the front underside (sitting pose) and two to the back, so the fox sits stably.
- Sew tail to the lower back, pointing slightly up.
- Weave in all ends. Add a few embroidered whiskers if you like.
Finishing notes
- Work tightly; chunky yarn should still look solid.
- Stuff as you go — it is hard to fill closed pieces later.
- Pin every piece before sewing.
- To enlarge: add one even round on head and body, and one extra round on limbs. To shrink: use a 5 mm hook and slightly less stuffing.
Enjoy your fox.
Disclaimer: This pattern was generated by AI and should be reviewed for accuracy before use. While we strive for quality, AI-generated content may contain errors. Please verify measurements, stitch counts, charts, and instructions before beginning your project. Generated by purlJam.uk
Love this pattern?
Save this pattern to your free PurlJam libraryAccess your pattern anytime
Bookmark this page to access your pattern anytime