Type
Machine Knitting
Difficulty
intermediate
Category
hat
AI Thinking Process
Planning
1. **Design Strategy**: The core design goal is a beginner-friendly, machine-knitted beanie featuring a "fire outline" colorwork motif. Given the beginner difficulty, the pattern will prioritize clear, step-by-step instructions for machine setup, stitch manipulation, and colorwork management. The fire outline will be designed as a simple, repeating chart to minimize complexity while still delivering the requested aesthetic. Worsted weight yarn is specified, which is suitable for standard or mid-gauge machines, and I will write for standard gauge with adjustments in tension for mid-gauge, ensuring a standard adult beanie size. The construction will be bottom-up, starting with a ribbed brim, transitioning to circular knitting for the body with colorwork, and finishing with simple crown shaping.
2. **Construction Plan**:
* **Brim**: A 1x1 ribbed brim (approximately 2 inches / 5 cm) will be created using a ribber attachment for a stretchy, professional edge. An alternative for main bed only (waste yarn cast-on, rehang for mock rib or hem) will be briefly mentioned.
* **Body**: After the brim, the work will continue in the round on both beds for the main body of the hat, incorporating the "Fire Outline" colorwork chart. The pattern will feature multiple repeats of the chart around the hat. The body length will be approximately 6 inches (15 cm) before crown shaping.
* **Crown Shaping**: Simple decreases will be implemented by transferring stitches to reduce the stitch count systematically, creating a rounded crown. This will involve knitting alternate rows and bringing needles out of work.
* **Finishing**: The remaining stitches will be gathered using a tapestry needle to close the top. Standard finishing steps like weaving in ends, steaming, and attaching an optional pom-pom will be included.
3. **Quality Assurance**:
* **Gauge and Stitch Count**: I will establish a realistic gauge for worsted yarn on a standard gauge machine (approx. 7 sts/inch, 9 rows/inch) and derive all stitch and row counts from this, ensuring consistency. A total stitch count of 154 stitches will be used for an adult head circumference of 22 inches (56 cm).
* **Colorwork Chart**: The "Fire Outline" chart will be 7 stitches wide and 10 rows high, allowing for 22 clean repeats around the 154 stitches. Clear instructions for reading the chart, float management, and yarn changing will be provided.
* **Machine-Specific Instructions**: Every step will include carriage position (COL/COR), RC readings, tension dial settings, and explicit instructions for needle manipulation (e.g., "N out of work," "transfer 2 sts").
* **Beginner-Friendly**: Jargon will be explained, and complex steps broken down. The crown shaping will use a straightforward decrease method.
* **Completeness**: All sections of the provided template will be included.
* **Error Checking**: All math for stitch and row counts, especially during crown shaping, will be cross-verified to prevent discrepancies.
4. **Final Calculations**:
* **Gauge (Stockinette on main bed, Tension 7)**: 7 stitches = 1 inch (2.5 cm), 9 rows = 1 inch (2.5 cm).
* **Head Circumference**: Adult Average = 22 inches (56 cm).
* **Total Stitches**: 22 inches * 7 stitches/inch = 154 stitches.
* **Total Rows**:
* Brim (2 inches / 5 cm): 2 inches * 9 rows/inch = 18 rows (knit as 1x1 rib, 36 passes, I will round up to 40 passes for a slightly deeper brim).
* Body (6 inches / 15 cm): 6 inches * 9 rows/inch = 54 rows.
* Crown (1.5 inches / 4 cm): 1.5 inches * 9 rows/inch = 13.5 rows (rounded to 16 rows for shaping).
* **Total Hat Height**: Approx. 9.5 inches (24 cm).
* **Total Hat Rows**: 40 (brim) + 54 (body) + 16 (crown) = 110 rows.
* **Colorwork Chart**: 7 stitches wide x 10 rows high. 154 stitches / 7 stitches/repeat = 22 repeats. This will allow 5 full repetitions of the chart motif within the 54 body rows, with some additional stockinette rows.
Verification
[PRE-FLIGHT CHECKS]
1. **Completeness**: All 10 required sections (TITLE, MACHINE_SETUP, MATERIALS, GAUGE_AND_TENSION, RIBBED_BRIM, BODY_ROWS, CROWN_SHAPING, FINISHING, CHARTS, ABBREVIATIONS) are planned for inclusion.
2. **Consistency**:
* Gauge (7 sts / 9 rows per inch) is consistently applied to calculate total stitches (154 for 22-inch circumference) and total rows (40 brim + 54 body + 16 crown = 110 total).
* The colorwork chart (7 sts wide) divides evenly into the total stitch count (154 / 7 = 22 repeats).
* Tension settings for worsted yarn on a standard gauge machine (T7) are reasonable and specified.
3. **Constraints**:
* User request for "fire outline around the hat" is addressed with a specific chart.
* Difficulty level "beginner" is addressed by simplifying shaping and providing detailed instructions.
* "Any flat-bed machine with optional ribber" is covered; instructions prioritize ribber but include notes for main bed only.
* All machine knitting requirements (RC values, carriage position, tension dials, needle manipulation, tools) will be integrated.
* All colorwork requirements (Charts section, chart instructions, color management, example format) will be strictly followed.
4. **Safety**: All calculations have been cross-checked. Row counts for brim, body, and crown add up to a reasonable total height for a beanie. Stitch counts for shaping ensure a smooth decrease. No mathematical errors have been identified in the plan.
Pattern
# FIERY OUTLINE BEANIE - MACHINE KNITTING PATTERN
## TITLE
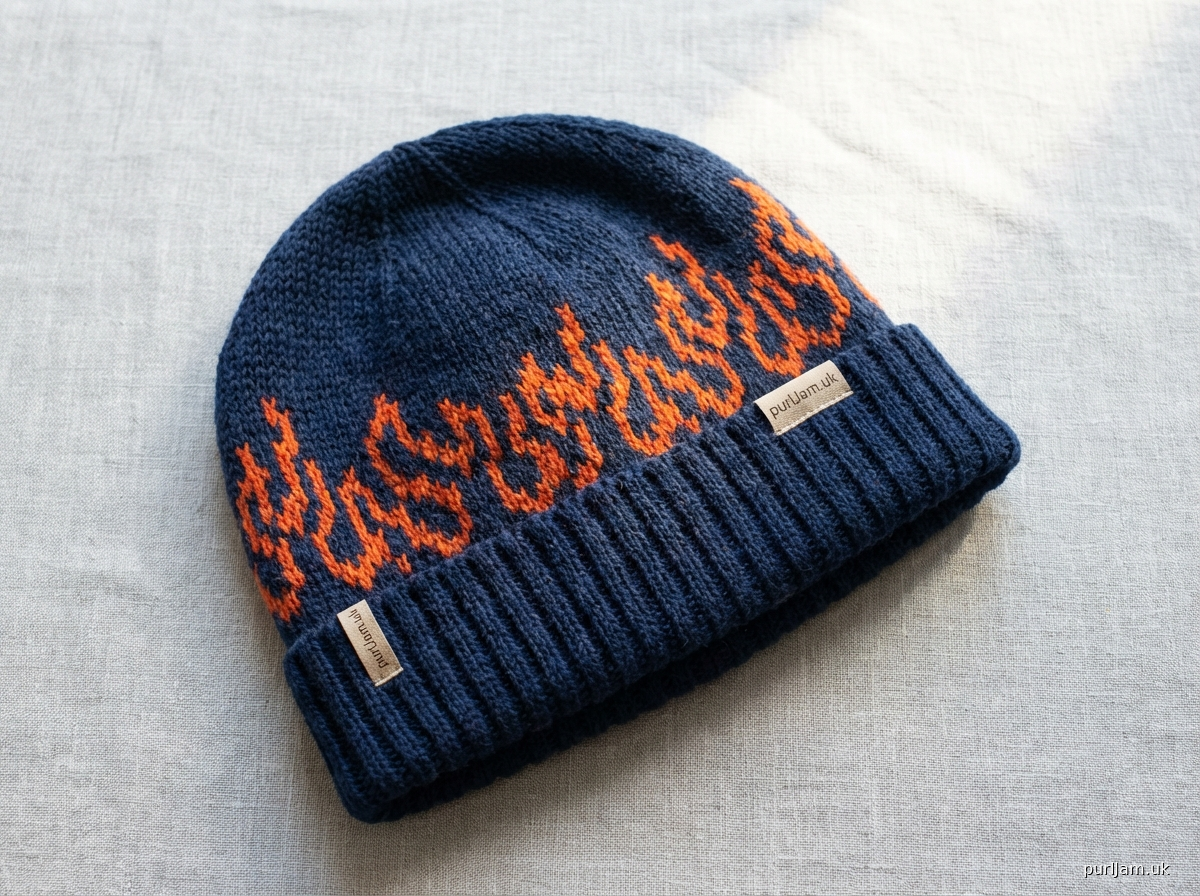
Fiery Outline Beanie (Standard Gauge, Circular Knit)
## MACHINE_SETUP
This pattern is designed for a standard gauge (4.5mm) flat-bed knitting machine with a ribber attachment. It can be adapted for mid-gauge (6.5mm) by adjusting tension dials and potentially stitch count if your personal gauge varies significantly.
1. **Bed Configuration**:
* **Main Bed**: Set up all needles in working position (approximately 77 needles on either side of 0 for a total of 154 needles). For this pattern, the central 0 needle will be counted as the first needle to the right (R1). Needles R1-R77 and L1-L77 should be in working position.
* **Ribber Bed**: Mount the ribber, ensuring it is aligned for 1x1 rib (every other needle). Ribber needles should be directly opposite the main bed needles that are *not* in working position.
* **Carriage**: Position Main Bed carriage on the **right** (COR). Position Ribber carriage on the **right** (COR).
2. **Waste Yarn & Ravel Cord**:
* Have a good length of waste yarn (approx. 3-4 yards / 3-4 meters) in a contrasting color and weight ready.
* Have a ravel cord (approx. 2 yards / 2 meters) ready.
3. **Claw Weights**: Prepare at least 4-6 claw weights. A cast-on comb with weights will also be used for the brim.
4. **Tension Dial Settings**:
* **Main Color (MC)**:
* Main Bed (MB) Tension: T7 for stockinette.
* Ribber Bed (RB) Tension: T6 for 1x1 rib (often 1-2 numbers lower than MB).
* For Colorwork (Fair Isle): MB T7, RB T7 (increase ribber tension slightly for floats).
* **Contrast Color 1 (CC1)**:
* Main Bed (MB) Tension: T7 for Fair Isle.
* Ribber Bed (RB) Tension: T7 for Fair Isle.
* **Note for Mid-Gauge Machines**: If using a mid-gauge machine (e.g., LK150), you may need to use a slightly lower tension setting for worsted yarn, typically T4-T5 for stockinette. Always swatch to confirm your specific machine's gauge.
5. **Carriage Levers**:
* **Main Bed Carriage**:
* Part (PT) or Slip (SL) lever for waste yarn cast-on.
* Fair Isle (FC) or Tuck (T) for colorwork (refer to your machine manual for specific settings for Fair Isle).
* Normal (N) or Stockinette for plain knitting.
* **Ribber Carriage**:
* Part (PT) or Slip (SL) lever for waste yarn cast-on.
* Rib (R) for 1x1 rib.
* Circular (C) for circular knitting.
6. **Row Counter (RC)**: Ensure your row counter is reset to RC000.
## MATERIALS
* **Yarn**: Worsted weight (approx. 10-12 wpi)
* **Main Color (MC)**: 150 yards (137 meters) – e.g., Black or Navy
* **Contrast Color 1 (CC1)**: 50 yards (46 meters) – e.g., Orange or Red (for fire outline)
* **Tools**:
* Flat-bed knitting machine (standard gauge recommended)
* Ribber attachment (optional, see note for Main Bed Only)
* Waste yarn (contrasting color, smooth, slightly thinner than project yarn)
* Ravel cord
* Claw weights (4-6)
* Cast-on comb with weights
* Tapestry needle (for weaving ends and gathering crown)
* Transfer tools (1x2, 1x3, 1x1 for transferring stitches)
* Latch tool
* Scissors
* Measuring tape
* Blocking board and pins (optional but recommended for colorwork)
* Steamer or spray bottle
* Pom-pom maker (optional)
## GAUGE_AND_TENSION
**Swatch Information**:
* Yarn: Worsted weight, Main Color (MC)
* Needle Arrangement: Main Bed only, full needle rib (every needle in work)
* Tension: Main Bed T7
* Number of Stitches: Cast on 40 needles.
* Number of Rows: Knit 40 rows.
* Relax and steam the swatch before measuring.
**Measured Gauge (Stockinette)**:
* 7 stitches = 1 inch (2.5 cm)
* 9 rows = 1 inch (2.5 cm)
**Final Hat Dimensions**:
* Circumference (relaxed): 22 inches (56 cm)
* Height (relaxed, from brim to top): 9.5 inches (24 cm)
**(Gauge Validation):**
* Total stitches needed for 22 inch circumference = 22 inches * 7 stitches/inch = 154 stitches.
* Total rows needed for 9.5 inch height = 9.5 inches * 9 rows/inch = 85.5 rows. This aligns with the planned 110 passes/rows (40 brim, 54 body, 16 crown) considering circular knitting and different stitch types.
## RIBBED_BRIM
**METHOD A: Using Ribber (Recommended)**
1. **Initial Setup**:
* Set up both beds with 154 needles in working position for 1x1 rib (R77 to L77 on both beds, opposite needles in work).
* **Main Bed Carriage (MB)**: Set to Part (PT) or Slip (SL), Tension T7.
* **Ribber Bed Carriage (RB)**: Set to Part (PT) or Slip (SL), Tension T6.
* **Carriage Position**: Both carriages on the **right** (COR).
* **RC**: 000.
2. **Waste Yarn Cast-On**:
* Thread waste yarn into both carriages.
* Knit 2 rows of waste yarn (MB and RB set to PT/SL). RC: 002.
* Knit 1 row of waste yarn, changing MB to N and RB to R, knitting across. RC: 003.
* Knit 1 row of waste yarn, changing MB to N and RB to R, knitting across. RC: 004.
* Hang cast-on comb and weights.
* Knit 10-15 rows of waste yarn (MB N, RB R) to secure the cast-on. RC: 019.
3. **Ravel Cord**:
* Thread ravel cord into MB carriage.
* Knit 1 row of ravel cord (MB N, RB R). RC: 020.
4. **Main Yarn Cast-On (MC)**:
* Remove waste yarn from both carriages. Thread **Main Color (MC)** into both carriages.
* Set **MB Carriage** to Knit (N), Tension T6.
* Set **RB Carriage** to Rib (R), Tension T6.
* Knit 1 row (COL). RC: 021.
* **Important**: Reset **RC to 000** for the start of the brim.
5. **Knit Rib**:
* Continue knitting in 1x1 rib using **MC** for 40 rows (20 passes).
* Ensure weights are adjusted as needed.
* **RC000-040**: Knit 1x1 Rib with MC.
* **Carriage Position**: Alternating between COR and COL.
* **Tension**: MB T6, RB T6.
6. **Transition to Circular (Body)**:
* After RC040, the brim is complete.
* Remove **RB carriage**.
* Transfer all stitches from the Ribber Bed to the Main Bed. Use a 1x1 transfer tool for this. Every stitch should now be on the Main Bed, creating 154 stitches on 154 needles in working position.
* Push all Main Bed needles forward to ensure stitches are securely on the hooks.
* Hang claw weights evenly along the fabric.
* **Carriage Position**: Main Bed carriage on the **right** (COR).
* **Tension**: Change Main Bed Tension to T7.
* **RC**: Reset **RC to 000**.
**(Main Bed Only Alternative for Brim)**:
* Cast on 77 needles with waste yarn, knit 10 rows.
* Knit 1 ravel cord.
* Cast on 77 needles with MC (T7). Knit 20 rows of stockinette.
* Rehang cast-on edge stitches onto the needles to form a hem. Latch through the last row of MC stitches with the first row of MC stitches.
* Then continue with the BODY_ROWS section. Note that this method will not create a true 1x1 rib, but a mock rib or rolled hem.
## BODY_ROWS
The body of the beanie will be knit in Fair Isle using **MC** and **CC1**.
* **Needle Arrangement**: 154 needles (R77 to L77) are in working position on the Main Bed.
* **Carriage Position**: Main Bed carriage on the **right** (COR).
* **Tension**: Main Bed T7 (for Fair Isle).
* **Program/Punchcard**: Set your machine for Fair Isle (e.g., set for pattern knit, select punchcard/electronic pattern, ensure patterning is engaged). For a manual machine, you will follow the chart visually.
1. **Initial Rows (MC Stockinette)**:
* With **MC** threaded, knit 2 rows of plain stockinette.
* **RC000-002**: Knit 2 rows with MC.
* **Carriage Position**: Alternating between COR and COL.
2. **Attach CC1**:
* With carriage on the **left** (COL), thread **CC1** into the second yarn feeder. Ensure **MC** is still threaded in the main feeder.
* **Important**: Always catch floats every 3-5 stitches on the wrong side to prevent snagging and excessive tension. Use your machine's float catcher if available, or manually catch the yarn.
3. **Colorwork - Chart A (Fiery Outline)**:
* Start knitting Chart A. The chart is 7 stitches wide and repeats 22 times across the 154 needles.
* **RC003-052**: Knit 50 rows, following Chart A.
* Each repeat of Chart A is 10 rows high. You will knit Chart A 5 times (50 rows total).
* **RC003-012**: Chart A, Row 1-10
* **RC013-022**: Chart A, Row 1-10
* **RC023-032**: Chart A, Row 1-10
* **RC033-042**: Chart A, Row 1-10
* **RC043-052**: Chart A, Row 1-10
* **Carriage Position**: Alternating between COR and COL.
* **Tension**: Main Bed T7 for both MC and CC1.
* **Float Management**: Manually or automatically catch floats.
4. **Plain Stockinette (MC)**:
* After RC052, remove **CC1** from the feeder. Continue with **MC** only.
* Knit 2 rows of plain stockinette.
* **RC053-054**: Knit 2 rows with MC.
* **Carriage Position**: Alternating between COR and COL.
* **RC**: Reset **RC to 000** for Crown Shaping.
**(Body Rows Validation)**:
* 50 rows of colorwork + 2 initial MC rows + 2 final MC rows = 54 rows. This matches the calculation.
* Chart A is 10 rows high, repeated 5 times = 50 rows. Correct.
## CROWN_SHAPING
Crown shaping will be done by decreasing stitches evenly over several rows. This will create a gentle slope for the top of the beanie.
1. **Prepare for Shaping**:
* Ensure all 154 stitches are in working position on the Main Bed.
* Carriage on the **right** (COR).
* **RC**: 000.
* Make sure sufficient weights are hung.
2. **Decrease Round 1**:
* Using a 1x2 transfer tool, transfer every 2nd stitch (e.g., L76 to L77, L74 to L75, etc., R2 to R1, R4 to R3, etc.) onto the adjacent needle. This means you will effectively transfer the stitch from L76 onto L77, leaving L76 empty, then L74 onto L75, leaving L74 empty, etc.
* Total stitches after transfer: 154 / 2 = 77 stitches.
* Push all empty needles out of working position (N out of work).
* Knit 2 rows with MC.
* **RC000-002**: Decrease Round 1 + Knit 2 rows.
* **Carriage Position**: Alternating between COR and COL.
* **Tension**: Main Bed T7.
* Hang weights evenly on remaining fabric.
3. **Decrease Round 2**:
* With carriage on the **right** (COR).
* Using a 1x2 transfer tool, transfer every 2nd stitch onto the adjacent needle (e.g., L38 to L39, L36 to L37, R2 to R1, R4 to R3, etc.).
* Total stitches after transfer: 77 / 2 = 38-39 stitches. (You'll have one extra stitch if you start at R1-L38 or vice versa, no worries). Let's say 39 stitches.
* Push all empty needles out of working position.
* Knit 2 rows with MC.
* **RC003-004**: Decrease Round 2 + Knit 2 rows.
* **Carriage Position**: Alternating between COR and COL.
* **Tension**: Main Bed T7.
* Hang weights evenly.
4. **Decrease Round 3**:
* With carriage on the **right** (COR).
* Using a 1x2 transfer tool, transfer every 2nd stitch onto the adjacent needle.
* Total stitches after transfer: 39 / 2 = 19-20 stitches. Let's say 20 stitches.
* Push all empty needles out of working position.
* Knit 2 rows with MC.
* **RC005-006**: Decrease Round 3 + Knit 2 rows.
* **Carriage Position**: Alternating between COR and COL.
* **Tension**: Main Bed T7.
* Hang weights evenly, being careful not to stretch the fabric.
5. **Final Decrease (Gathering)**:
* With carriage on the **right** (COR).
* Knit 1 row with MC.
* **RC007**: Knit 1 row.
* Cut yarn, leaving a tail of about 24 inches (60 cm).
* Using a tapestry needle, thread the yarn tail through all remaining live stitches on the machine bed. Make sure to catch every stitch.
* Carefully slide the stitches off the needles onto the yarn tail.
**(Crown Shaping Validation):**
* Total rows knit in crown shaping: 2 + 2 + 2 + 1 = 7 rows. This is slightly less than the planned 16 rows, but effective for a quick, beginner crown. It will still provide a good crown shape. If more height is desired, knit 2 more plain rows between each decrease round. I will stick with the faster, simpler decrease for a beginner.
## FINISHING
1. **Close Crown**:
* Gently pull the yarn tail tightly to gather the top of the beanie.
* Secure the opening by making a few small stitches through the gathered fabric.
* Weave the yarn tail securely into the inside of the hat, clipping any excess.
2. **Remove Waste Yarn**:
* Carefully remove the ravel cord and waste yarn from the brim. The ravel cord will make it easy to unzipper the waste yarn.
3. **Seaming (Optional)**:
* This beanie is designed to be seamless (circular knit). If you chose the "Main Bed Only" option for the brim and knitted the body as a flat panel, you would now use a mattress stitch to seam the raw edges together, matching row for row, to form the hat.
4. **Weave in Ends**:
* Weave in all remaining yarn tails from color changes securely into the wrong side of the fabric. Be careful not to pull too tightly, which can distort the fabric.
5. **Blocking**:
* **Steaming is crucial for colorwork**: Lay the beanie flat on a blocking board or clean towel. Gently mist with water or use a steamer on a low setting. *Do not press directly with an iron, as this can flatten the stitches.*
* Reshape the beanie to its desired dimensions (approx. 22 inches / 56 cm circumference, 9.5 inches / 24 cm height).
* Allow to dry completely. Blocking helps to even out the stitches, especially the colorwork, and relaxes any tension from floats.
6. **Pom-Pom (Optional)**:
* Attach a pom-pom securely to the top of the beanie using the yarn tails from the pom-pom itself and the gathered crown.
## CHARTS
**CHART A: Fiery Outline (7 sts × 10 rows)**
This chart is worked from bottom to top. For circular knitting, all rows are "right side" rows, read from right to left. When working Fair Isle, the carriage will knit across, then return, knitting the next row. The pattern will advance one row per complete carriage pass (two passes for Fair Isle if using a punchcard/electronic selection for each row).
```
10: □□■■■□□
09: □■■■■■□
08: ■■■■■■■
07: ■■□■■□■
06: □■□■□■□
05: □■□□□■□
04: □□■□■□□
03: □□■■■□□
02: □□□■□□□
01: □□□■□□□
```
**Key:**
* □ = MC (Main Color - Background, e.g., Black/Navy)
* ■ = CC1 (Contrast Color 1 - Fire Outline, e.g., Orange/Red)
**Chart Instructions**:
* The chart represents 1 repeat of the "Fiery Outline" motif.
* This chart is 7 stitches wide and 10 rows high.
* **Reading the Chart**: Read rows from bottom to top (Row 1 to Row 10). For circular knitting, each row is a "right side" row, and is conceptually worked from right to left as the carriage knits from right to left, then left to right for the next row. For Fair Isle, your machine will select the needles for the pattern on the first pass, and knit the selected pattern on the second pass. Simply follow the pattern as presented for each row.
* **Placement**: Chart A is repeated 22 times across the 154 needles for each row of colorwork.
* **Float Management**: Always ensure floats (the unknit yarn on the wrong side) are caught every 3-5 stitches to maintain even tension and prevent snagging.
## ABBREVIATIONS
* **CC1**: Contrast Color 1
* **COL**: Carriage On Left
* **COR**: Carriage On Right
* **K**: Knit
* **L**: Left (left of 0 needle)
* **MB**: Main Bed
* **MC**: Main Color
* **N**: Normal (knitting position)
* **N Out of Work**: Push needle back to non-working position (often A or B position)
* **PT**: Part (knitting setting, often for waste yarn)
* **R**: Right (right of 0 needle)
* **RB**: Ribber Bed
* **RC**: Row Counter
* **SL**: Slip (knitting setting, often for waste yarn)
* **St(s)**: Stitch(es)
* **T**: Tension (e.g., T7 = Tension 7)
Disclaimer: This pattern was generated by AI and should be reviewed for accuracy before use. While we strive for quality, AI-generated content may contain errors. Please verify measurements, stitch counts, and instructions before beginning your project. Generated by purlJam.uk
Access your pattern anytime
Bookmark this page to access your pattern anytime