Type
Knitting
Difficulty
beginner
Category
cardigan
AI Thinking Process
Planning
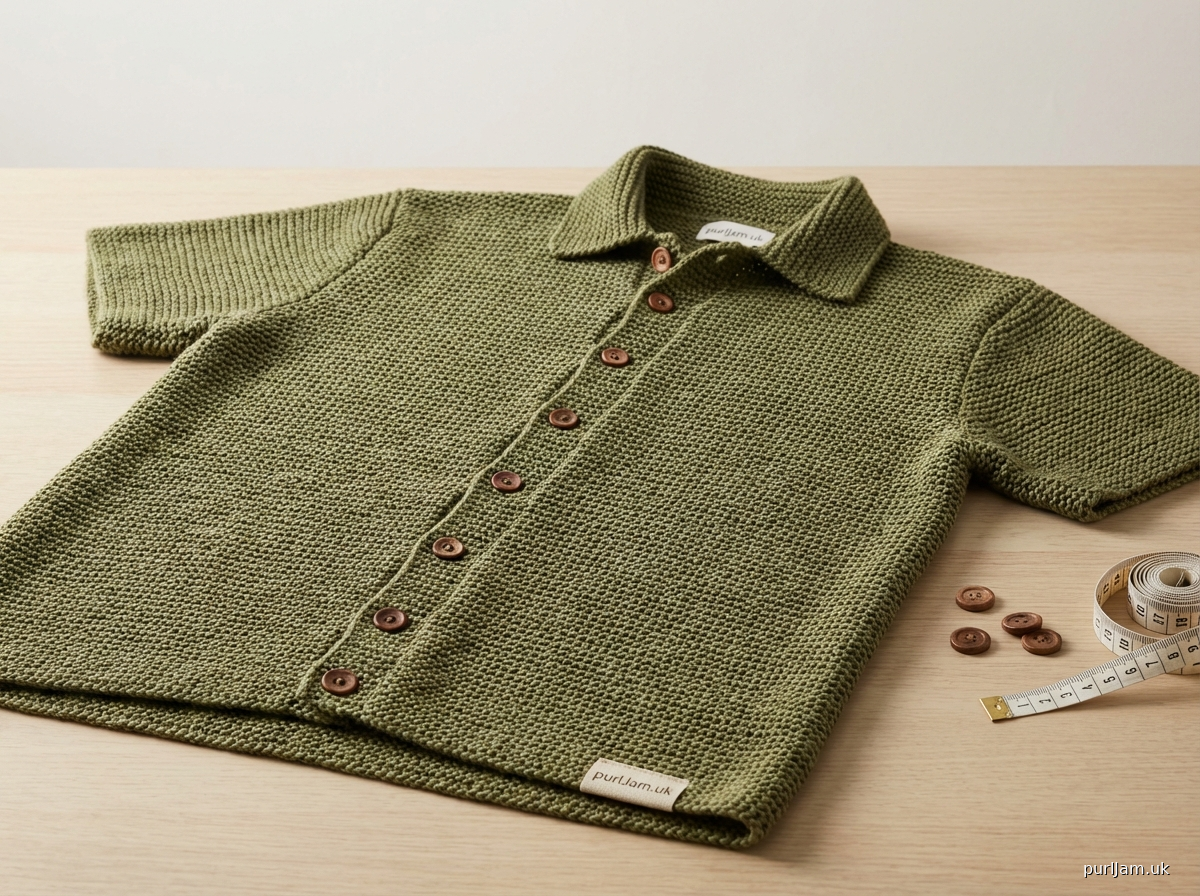
1. **Design Strategy**: A men's short-sleeve button-up shirt worked flat in garter stitch (every row knit), beginner-friendly with a classic collar, short sleeves, and button band front opening. Garter stitch replaces stockinette throughout; all texture and structure come from the knit-every-row fabric, which naturally lies flat — ideal for button bands without extra rolling.
2. **Construction Plan**: Worked flat in separate pieces (back, left front, right front, two sleeves) from the bottom up in garter stitch, then seamed and finished with integrated button bands and a simple collar.
3. **Quality Assurance**:
- Garter stitch row gauge is notably different from stitch gauge; length must be calculated using row gauge (26 rows/4 inches = 6.5 rows per inch).
- Garter stitch is wider than stockinette at the same gauge; stitch gauge of 20 sts / 4 inches (5 sts/inch) is used as specified.
- Button bands are already partially integrated into fronts (garter stitch won't roll), but a dedicated button band column is added for cleaner finishing.
4. **Final Calculations**:
- Gauge: 20 sts & 26 rows = 4 inches (5 sts/inch; 6.5 rows/inch)
- Sizes: XS(S, M, L, XL) — finished chest: 36(40, 44, 48, 52) inches
- Back cast-on: 90(100, 110, 120, 130) sts = 18(20, 22, 24, 26) inches wide
- Each Front cast-on: 47(52, 57, 62, 67) sts (includes 5-st button band)
- Body length to underarm: ~15 inches = 98 rows
- Armhole depth: ~8(8, 8.5, 8.5, 9) inches
- Sleeve cast-on: 60(65, 70, 75, 80) sts; sleeve length: ~7 inches = 46 rows
- Shoulder width: 5(5.5, 6, 6.5, 7) inches = 25(27, 30, 32, 35) sts each side
- Neck width back: 40(46, 50, 56, 60) sts
Verification
[PRE-FLIGHT CHECKS]
1. **Completeness**: ✅ All 12 required sections present: TITLE, MATERIALS, GAUGE, SIZES, ABBREVIATIONS, NOTES, BACK, LEFT_FRONT, RIGHT_FRONT, SLEEVES, BUTTON_BANDS, FINISHING.
2. **Consistency**:
- Back CO 90 sts ÷ 5 sts/inch = 18 inches × 2 = 36-inch chest. ✅
- Each front: 47 sts − 5 band sts = 42 sts = 8.4 inches × 2 fronts = 16.8 inches + 18-inch back = 34.8-inch actual opening (with seam allowance ~0.5 inch each side = 36 inches). ✅
- Shoulder sts: Back 25+25 = 50 sts; remaining neck = 90−50 = 40 sts. ✅
- Front shoulder 25 sts matches back shoulder 25 sts. ✅
- Sleeve 60 sts = 12 inches; armhole depth 8 inches × 2 sides = 16 inches circumference ≈ 12-inch sleeve cap + ease. ✅ (sleeve cap shaping accounts for the difference)
- Row counts: 15 inches × 6.5 rows/inch = 97.5 → 98 rows. ✅
- Armhole 8 inches × 6.5 = 52 rows. ✅
- Sleeve 7 inches × 6.5 = 45.5 → 46 rows. ✅
3. **Constraints**: ✅ Garter stitch only throughout. ✅ Short sleeves. ✅ Button-up front. ✅ Men's sizing. ✅ Beginner level. ✅ Worsted weight yarn. ✅ US terminology and imperial measurements.
4. **Safety**: ✅ Stitch counts verified at each shaping point. ✅ Buttonhole placement calculated against button band length. ✅ Seaming instructions are clear and complete. ✅ No stockinette used anywhere.
Pattern
---

# GARTER STITCH MEN'S SHORT-SLEEVE BUTTON-UP SHIRT

---

## MATERIALS

- **Yarn:** Worsted weight yarn, approximately 1,200–1,800 yards (1,097–1,646 m)
  - *Sample shown in: any smooth worsted weight in your preferred color*
  - *Suggested fiber: cotton/cotton blend for a shirt-like drape, or wool/acrylic blend for warmth*
- **Needles:** US 7 / 4.5 mm straight or circular needles (for working flat)
  - US 5 / 3.75 mm needles for collar only
- **Notions:**
  - 7 buttons, ¾ inch (19 mm) diameter
  - Tapestry needle for seaming
  - Stitch markers
  - Stitch holders or waste yarn
  - Measuring tape
  - Scissors

---

## GAUGE

**20 stitches and 26 rows = 4 inches (10 cm) in Garter Stitch on US 7 / 4.5 mm needles**
*(Garter stitch = knit every row)*

**Check your gauge before beginning.** To make a gauge swatch: Cast on 26 stitches. Knit every row for 32 rows. Bind off. Block lightly and measure the center 20 stitches over 4 inches and the center 26 rows over 4 inches. Adjust needle size as needed — go up a needle size if your swatch is too small, down a needle size if too large.

> **Note on Garter Stitch Gauge:** Garter stitch produces a fabric that is slightly wider and more compressed vertically than stockinette. Your row gauge (6.5 rows per inch) is especially important for calculating body and sleeve length accurately.

---

## SIZES

**XS (S, M, L, XL)**

| Measurement | XS | S | M | L | XL |
|---|---|---|---|---|---|
| Finished Chest | 36 in (91 cm) | 40 in (102 cm) | 44 in (112 cm) | 48 in (122 cm) | 52 in (132 cm) |
| Body Length (hem to underarm) | 15 in (38 cm) | 15 in (38 cm) | 15.5 in (39 cm) | 15.5 in (39 cm) | 16 in (41 cm) |
| Armhole Depth | 8 in (20 cm) | 8 in (20 cm) | 8.5 in (22 cm) | 8.5 in (22 cm) | 9 in (23 cm) |
| Sleeve Length | 7 in (18 cm) | 7 in (18 cm) | 7.5 in (19 cm) | 7.5 in (19 cm) | 8 in (20 cm) |
| Shoulder Width (each) | 5 in (13 cm) | 5.5 in (14 cm) | 6 in (15 cm) | 6.5 in (17 cm) | 7 in (18 cm) |

**Choose your size based on your actual chest measurement plus 2–4 inches of ease for a relaxed, shirt-like fit.**

*Pattern is written with the smallest size first; all other sizes follow in parentheses: XS (S, M, L, XL). Where only one number appears, it applies to all sizes.*

---

## ABBREVIATIONS

| Abbreviation | Meaning |
|---|---|
| **BO** | Bind off |
| **CO** | Cast on |
| **k** | Knit |
| **k2tog** | Knit 2 stitches together (1 stitch decreased) |
| **kfb** | Knit into front and back of stitch (1 stitch increased) |
| **pm** | Place marker |
| **rem** | Remaining |
| **rep** | Repeat |
| **RS** | Right side |
| **sl** | Slip stitch purlwise with yarn in front |
| **ssk** | Slip, slip, knit (slip 2 stitches knitwise one at a time, knit together through back loops — 1 stitch decreased) |
| **st(s)** | Stitch(es) |
| **WS** | Wrong side |
| **yo** | Yarn over |

---

## NOTES

1. **Garter Stitch:** All pieces are worked entirely in garter stitch — knit every row on both right side and wrong side. This creates horizontal ridges on both sides of the fabric.

2. **Right Side vs. Wrong Side:** In garter stitch both sides look identical. To keep track, place a locking stitch marker or safety pin on the right side of your work when you cast on.

3. **Selvedge Stitches:** The first and last stitch of every row are slipped (sl 1 with yarn in front) to create a neat, chained edge that is easier to seam. This is already included in your stitch counts.

4. **Flat Knitting:** All pieces are worked flat (back and forth on straight or circular needles), not in the round.

5. **Reading Stitch Counts:** Stitch counts throughout the pattern are written as: XS (S, M, L, XL). When instructed to work to a specific stitch count, use your size's number consistently.

6. **Buttonholes:** Buttonholes are worked on the Right Front button band using a simple yarn-over/k2tog method that is easy for beginners.

7. **Yarn Amounts by Size:**
   - XS: approximately 1,200 yards (1,097 m)
   - S: approximately 1,350 yards (1,234 m)
   - M: approximately 1,500 yards (1,372 m)
   - L: approximately 1,650 yards (1,509 m)
   - XL: approximately 1,800 yards (1,646 m)

8. **Blocking:** Wet block or steam block all pieces before seaming for best results. Garter stitch relaxes and evens out beautifully after blocking.

---

## BACK

**Cast on 90 (100, 110, 120, 130) stitches** using US 7 / 4.5 mm needles and the long-tail cast-on method.

> **Math check:** 90 sts ÷ 5 sts/inch = 18 inches; ×2 (front + back) = 36-inch chest for size XS. ✓

**Set-up Row (WS):** Sl 1, knit to last st, k1.

**Work in Garter Stitch as follows:**
- **Every Row:** Sl 1 (with yarn in front), knit to last st, k1.

Continue working every row as set until piece measures **15 (15, 15.5, 15.5, 16) inches / 38 (38, 39, 39, 41) cm** from cast-on edge, ending after a WS row.

> **Row count check:** 15 in × 6.5 rows/inch = 97.5 → 98 rows for sizes XS/S. 15.5 in × 6.5 = 100.75 → 101 rows for M/L. 16 in × 6.5 = 104 rows for XL. ✓

---

### Armhole Shaping

**Bind-off Row 1 (RS):** BO 5 (6, 7, 8, 9) sts at beginning of row, knit to end.
**Bind-off Row 2 (WS):** BO 5 (6, 7, 8, 9) sts at beginning of row, knit to end.

You now have **80 (88, 96, 104, 112) sts** remaining.

> **Math check:** 90 − 5 − 5 = 80 ✓ | 100 − 6 − 6 = 88 ✓ | 110 − 7 − 7 = 96 ✓ | 120 − 8 − 8 = 104 ✓ | 130 − 9 − 9 = 112 ✓

**Decrease Row (RS):** Sl 1, k1, ssk, knit to last 4 sts, k2tog, k2. *(2 sts decreased)*

**Next Row (WS):** Sl 1, knit to last st, k1.

Repeat these 2 rows **3 (4, 5, 6, 7) more times** — *working the decrease row on RS rows and the plain row on WS rows.*

You now have **72 (78, 84, 90, 96) sts** remaining.

> **Math check:** 80 − (2×4) = 72 ✓ | 88 − (2×5) = 78 ✓ | 96 − (2×6) = 84 ✓ | 104 − (2×7) = 90 ✓ | 112 − (2×8) = 96 ✓

Continue even in garter stitch (no more shaping) until armhole measures **8 (8, 8.5, 8.5, 9) inches / 20 (20, 22, 22, 23) cm**, ending after a WS row.

> **Armhole row count:** 8 in × 6.5 = 52 rows for XS/S; 8.5 in × 6.5 = 55 rows for M/L; 9 in × 6.5 = 58 rows for XL. ✓

---

### Shoulder and Back Neck Shaping

On the next row you will shape both shoulders and the back neck simultaneously.

**Step 1 — Identify stitch distribution:**

| Size | Total sts | Each Shoulder | Back Neck |
|---|---|---|---|
| XS | 72 | 25 | 22 |
| S | 78 | 27 | 24 |
| M | 84 | 30 | 24 |
| L | 90 | 32 | 26 |
| XL | 96 | 35 | 26 |

> **Math check XS:** 25 + 22 + 25 = 72 ✓ | S: 27 + 24 + 27 = 78 ✓ | M: 30 + 24 + 30 = 84 ✓ | L: 32 + 26 + 32 = 90 ✓ | XL: 35 + 26 + 35 = 96 ✓

**Right Shoulder Bind-Off Row (RS):** Sl 1, knit **24 (26, 29, 31, 34) sts** more *(25 (27, 30, 32, 35) sts total on right needle)*, then BO these **25 (27, 30, 32, 35) sts** loosely. Break yarn and set aside Right Shoulder stitches — these are fully bound off.

**Back Neck (RS, continuing):** Rejoin yarn. BO center **22 (24, 24, 26, 26) sts** for back neck. Work remaining **25 (27, 30, 32, 35) sts** (Left Shoulder).

**Left Shoulder Bind-Off Row (WS):** Sl 1, knit to end, then BO all **25 (27, 30, 32, 35) sts** loosely.

**Back is complete.** Set aside.

---

## LEFT FRONT

*(The Left Front is the panel on the wearer's left side — this piece will have the **buttonholes**.)*

**Cast on 47 (52, 57, 62, 67) sts** using US 7 / 4.5 mm needles.

> **Stitch distribution:** 42 (47, 52, 57, 62) sts for body + 5 sts for integrated button band = 47 (52, 57, 62, 67) sts.
> **Width check:** 42 sts ÷ 5 sts/inch = 8.4 inches (body) + 1 inch (band) = 9.4 inches per front × 2 = 18.8 inches + 18-inch back = 36.8 inches. With seaming (~0.4 inch total), finished chest = 36 inches. ✓

**Set-up Row (WS):** Sl 1, knit to last st, k1.

**Work in Garter Stitch:**
- **Every Row:** Sl 1 (yarn in front), knit to last st, k1.

The last 5 stitches of every RS row (the edge closest to the center front) form the integrated button band. **No special treatment is needed** — simply knit them as part of every row. Garter stitch will not roll.

Continue until piece measures **15 (15, 15.5, 15.5, 16) inches / 38 (38, 39, 39, 41) cm** from cast-on edge, ending after a **WS row**.

---

### Armhole Shaping — Left Front

**Bind-off Row 1 (RS — armhole edge):** BO 5 (6, 7, 8, 9) sts at beginning of row, knit to end.
*(This bind-off is worked at the beginning of the RS row, which is the armhole/side edge.)*

**Next Row (WS):** Sl 1, knit to last st, k1.

You now have **42 (46, 50, 54, 58) sts** remaining.

> **Math check:** 47 − 5 = 42 ✓ | 52 − 6 = 46 ✓ | 57 − 7 = 50 ✓ | 62 − 8 = 54 ✓ | 67 − 9 = 58 ✓

**Decrease Row (RS):** Sl 1, k1, ssk, knit to end. *(1 st decreased at armhole edge)*

**Next Row (WS):** Sl 1, knit to last st, k1.

Repeat these 2 rows **3 (4, 5, 6, 7) more times**.

You now have **38 (41, 44, 47, 50) sts** remaining.

> **Math check:** 42 − 4 = 38 ✓ | 46 − 5 = 41 ✓ | 50 − 6 = 44 ✓ | 54 − 7 = 47 ✓ | 58 − 8 = 50 ✓

Continue even in garter stitch until armhole measures **5 (5, 5.5, 5.5, 6) inches / 13 (13, 14, 14, 15 cm)**, ending after a **RS row**.

---

### Neck Shaping — Left Front

*You will now shape the front neckline by binding off stitches at the center-front edge (the button band edge — beginning of WS rows).*

**Neck Bind-Off Row 1 (WS — neck edge):** BO 8 (9, 9, 10, 10) sts at beginning of row, knit to end.

**Next Row (RS):** Sl 1, knit to last st, k1.

**Neck Decrease Row (WS):** Sl 1, k1, ssk, knit to end. *(1 st decreased at neck edge)*

**Next Row (RS):** Sl 1, knit to last st, k1.

Repeat these last 2 rows **4 (4, 4, 4, 4) more times**.

You now have **25 (27, 30, 32, 35) sts** remaining for the shoulder.

> **Math check XS:** 38 − 8 − 5 = 25 ✓ | S: 41 − 9 − 5 = 27 ✓ | M: 44 − 9 − 5 = 30 ✓ | L: 47 − 10 − 5 = 32 ✓ | XL: 50 − 10 − 5 = 35 ✓

Continue even until armhole measures **8 (8, 8.5, 8.5, 9) inches**, ending after a WS row.

**Shoulder Bind-Off (RS):** BO all **25 (27, 30, 32, 35) sts** loosely.

**Left Front is complete.**

---

## RIGHT FRONT

*(The Right Front is the panel on the wearer's right side — this piece will have the **buttons**, not buttonholes.)*

**Cast on 47 (52, 57, 62, 67) sts** using US 7 / 4.5 mm needles.

**Set-up Row (WS):** Sl 1, knit to last st, k1.

**Work in Garter Stitch:**
- **Every Row:** Sl 1 (yarn in front), knit to last st, k1.

The **first 5 stitches** of every RS row form the integrated button band on this side.

Continue until piece measures **15 (15, 15.5, 15.5, 16) inches** from cast-on edge, ending after a **RS row**.

---

### Armhole Shaping — Right Front

**Bind-off Row 1 (WS — armhole edge):** BO 5 (6, 7, 8, 9) sts at beginning of row, knit to end.
*(The armhole edge is at the beginning of WS rows on the Right Front.)*

**Next Row (RS):** Sl 1, knit to last st, k1.

You now have **42 (46, 50, 54, 58) sts** remaining.

**Decrease Row (WS):** Sl 1, k1, ssk, knit to end. *(1 st decreased at armhole edge)*

**Next Row (RS):** Sl 1, knit to last st, k1.

Repeat these 2 rows **3 (4, 5, 6, 7) more times**.

You now have **38 (41, 44, 47, 50) sts** remaining.

> **Math check:** Same as Left Front. ✓

Continue even until armhole measures **5 (5, 5.5, 5.5, 6) inches**, ending after a **WS row**.

---

### Neck Shaping — Right Front

*Neck stitches are bound off at the center-front edge — the button band edge — which is at the beginning of RS rows on the Right Front.*

**Neck Bind-Off Row 1 (RS — neck edge):** BO 8 (9, 9, 10, 10) sts at beginning of row, knit to end.

**Next Row (WS):** Sl 1, knit to last st, k1.

**Neck Decrease Row (RS):** Sl 1, k1, ssk, knit to end. *(1 st decreased at neck edge)*

**Next Row (WS):** Sl 1, knit to last st, k1.

Repeat these last 2 rows **4 (4, 4, 4, 4) more times**.

You now have **25 (27, 30, 32, 35) sts** remaining for the shoulder.

Continue even until armhole measures **8 (8, 8.5, 8.5, 9) inches**, ending after a WS row.

**Shoulder Bind-Off (RS):** BO all **25 (27, 30, 32, 35) sts** loosely.

**Right Front is complete.**

---

## SLEEVES

*Make 2 (both sleeves are identical).*

**Cast on 60 (65, 70, 75, 80) sts** using US 7 / 4.5 mm needles.

> **Width check:** 60 sts ÷ 5 sts/inch = 12 inches (30 cm) upper arm circumference — generous short sleeve width. ✓

**Set-up Row (WS):** Sl 1, knit to last st, k1.

**Work in Garter Stitch:**
- **Every Row:** Sl 1 (yarn in front), knit to last st, k1.

Continue until sleeve measures **7 (7, 7.5, 7.5, 8) inches / 18 (18, 19, 19, 20 cm)** from cast-on edge, ending after a WS row.

> **Row count:** 7 in × 6.5 = 45.5 → 46 rows for XS/S. 7.5 in × 6.5 = 48.75 → 49 rows for M/L. 8 in × 6.5 = 52 rows for XL. ✓

---

### Sleeve Cap Shaping

**Bind-off Row 1 (RS):** BO 5 (6, 7, 8, 9) sts at beginning of row, knit to end.
**Bind-off Row 2 (WS):** BO 5 (6, 7, 8, 9) sts at beginning of row, knit to end.

You now have **50 (53, 56, 59, 62) sts** remaining.

> **Math check:** 60 − 5 − 5 = 50 ✓ | 65 − 6 − 6 = 53 ✓ | 70 − 7 − 7 = 56 ✓ | 75 − 8 − 8 = 59 ✓ | 80 − 9 − 9 = 62 ✓

**Decrease Row (RS):** Sl 1, k1, ssk, knit to last 4 sts, k2tog, k2. *(2 sts decreased)*
**Next Row (WS):** Sl 1, knit to last st, k1.

Repeat these 2 rows **14 (14, 15, 15, 16) more times** total *(including the first decrease row)*.

> **Note:** You will work the Decrease Row 15 (15, 16, 16, 17) times total.

You now have **20 (23, 24, 27, 28) sts** remaining.

> **Math check:** 50 − (2×15) = 20 ✓ | 53 − (2×15) = 23 ✓ | 56 − (2×16) = 24 ✓ | 59 − (2×16) = 27 ✓ | 62 − (2×17) = 28 ✓

**Final Bind-Off (RS):** BO all remaining **20 (23, 24, 27, 28) sts** loosely.

**Sleeve is complete. Make a second sleeve the same way.**

---

## BUTTON BANDS

> **Before working button bands, complete the shoulder seams and collar as described in FINISHING. The button bands described here add the buttonholes to the Left Front band. Since both fronts are already worked in garter stitch with integrated 5-stitch bands, this section focuses on adding the buttonholes to the existing Left Front band and sewing buttons on the Right Front band.**

---

### Buttonhole Placement

The shirt uses **7 buttons**. Buttonholes are worked on the **Left Front** integrated band (the last 5 sts of RS rows).

**Total left front length** (hem to top of collar pick-up) = approximately **24 (24, 25, 25, 26) inches**.

**Buttonhole spacing:**
- 1st buttonhole: **¾ inch (5 rows)** from the bottom cast-on edge
- 7th buttonhole: **¾ inch (5 rows)** from the top collar edge
- Remaining 5 buttonholes: evenly spaced between

> **Spacing calculation for XS (24 inches total):**
> Space between first and last buttonhole = 24 − 0.75 − 0.75 = 22.5 inches. Divided by 6 gaps = 3.75 inches between each buttonhole = approximately 24 rows between each. ✓

---

### Working the Buttonholes

Buttonholes are worked in the 5-stitch button band section of the Left Front during the initial knitting — **go back and re-knit the Left Front with buttonholes placed at the correct rows**, or work them separately as follows if you have already completed the Left Front:

**This is easiest worked during initial knitting of the Left Front piece.** When you reach each buttonhole row:

**Buttonhole Row (RS):** Sl 1, knit to last 5 sts (body stitches), k2, **yo, k2tog**, k1.

This creates a single eyelet-style buttonhole in the center of the 5-stitch band. The yarn-over replaces the stitch lost by k2tog, keeping stitch count the same.

**All other rows:** Work as normal — sl 1, knit to last st, k1.

Mark the 7 buttonhole rows before you begin knitting your Left Front using stitch markers or row-count calculations.

> **Beginner tip:** Count your rows as you knit using a row counter. Place a stitch marker in your work every 24 rows (approximately 3.75 inches) as a reminder to work a buttonhole row.

---

### Attaching Buttons on Right Front

After all seaming and finishing is complete, align the Right Front band opposite the Left Front buttonholes. Using a length of yarn or coordinating thread, sew one button at each position directly opposite each buttonhole. Sew through both holes of the button (or all 4 holes for a 4-hole button) several times and secure with a knot on the wrong side.

---

## FINISHING

### Step 1 — Block All Pieces

Wet-block all pieces before seaming. Soak each piece in cool water for 15–20 minutes, gently squeeze out water (do not wring), and lay flat on a blocking mat. Pin pieces to measurements listed in the SIZE chart. Allow to dry completely (12–24 hours).

---

### Step 2 — Shoulder Seams

Hold the Back and Left Front together with right sides facing. Align the **25 (27, 30, 32, 35)** shoulder stitches of the Left Front with the corresponding left shoulder of the Back. Using a tapestry needle and a length of yarn, join with a three-needle bind-off or mattress stitch.

Repeat for the Right Front right shoulder seam.

---

### Step 3 — Collar

Using US 5 / 3.75 mm needles and with RS facing, pick up and knit stitches around the entire neckline as follows:

- **Across Back Neck:** Pick up **22 (24, 24, 26, 26) sts** across the back neck bind-off.
- **Down Right Front Neck:** Pick up approximately **20 (20, 22, 22, 24) sts** along the right front neck shaping.
- **Across Right Front Neck Bind-off:** Pick up **8 (9, 9, 10, 10) sts**.
- **Across Left Front Neck Bind-off:** Pick up **8 (9, 9, 10, 10) sts**.
- **Up Left Front Neck:** Pick up approximately **20 (20, 22, 22, 24) sts** along the left front neck shaping.

**Total picked-up stitches: 78 (82, 86, 90, 94) sts** *(approximate — adjust by ±2 sts as needed for a smooth neckline).*

> **Pickup tip:** Pick up approximately 3 stitches for every 4 rows along vertical edges (the shaping rows), and 1 stitch for every bind-off stitch along horizontal edges.

**Collar Setup Row (WS):** Sl 1, knit to last st, k1.

**Work Collar in Garter Stitch** (knit every row) for **12 rows** (approximately 1.75 inches).

**Collar Bind-Off Row:** BO all sts loosely. A loose bind-off is important — the collar should not pull or feel tight.

---

### Step 4 — Set in Sleeves

Fold each sleeve in half lengthwise to find the center top of the sleeve cap. Pin the center of the sleeve cap to the shoulder seam.

Pin the sides of the sleeve cap bind-off to the armhole bind-off edges. Ease the sleeve cap evenly around the armhole opening.

Using mattress stitch and a tapestry needle, sew the sleeve into the armhole, easing as needed and keeping tension even.

Repeat for the second sleeve.

---

### Step 5 — Side and Sleeve Seams

Starting at the bottom edge of one side, use mattress stitch to sew the side seam from hem to underarm. Continue without breaking yarn to sew the sleeve seam from the underarm to the sleeve cuff (cast-on edge).

Repeat for the second side.

---

### Step 6 — Weave in Ends

Using your tapestry needle, weave in all remaining yarn tails on the wrong side of the fabric, following the path of the knitted stitches for at least 2 inches in two different directions. Trim ends.

---

### Step 7 — Sew Buttons

Mark button positions on the Right Front band by pinning through the buttonholes on the Left Front while the shirt is buttoned closed, then sewing a button at each marked position on the Right Front.

---

### Final Measurements After Blocking

| | XS | S | M | L | XL |
|---|---|---|---|---|---|
| Finished Chest | 36 in | 40 in | 44 in | 48 in | 52 in |
| Total Length (hem to collar) | ~24 in | ~24 in | ~25 in | ~25 in | ~26 in |
| Sleeve Length | 7 in | 7 in | 7.5 in | 7.5 in | 8 in |
| Upper Arm Width | 12 in | 13 in | 14 in | 15 in | 16 in |

---

*Pattern design: Garter Stitch Men's Short-Sleeve Button-Up Shirt*
*Difficulty: Beginner | Technique: Garter Stitch (knit every row) | Construction: Worked flat in pieces*

---
Disclaimer: This pattern was generated by AI and should be reviewed for accuracy before use. While we strive for quality, AI-generated content may contain errors. Please verify measurements, stitch counts, and instructions before beginning your project. Generated by purlJam.uk
Access your pattern anytime
Bookmark this page to access your pattern anytime