Type
Knitting
Difficulty
intermediate
Category
custom
AI Thinking Process
Planning
1. **Design Strategy**: A 12-inch standing gorilla knitted flat on two needles throughout, using black mohair for body/arms/legs/top of hands and feet, and black 4-ply cotton for face, ears, palms, soles, and fingers/toes. Pieces are seamed and stuffed, with sculpted facial features and individually knitted fingers and toes.
2. **Construction Plan**: Each body part knitted flat in pieces (bottom-up), then seamed, stuffed, and assembled; fingers and toes knitted as individual tubes and attached.
3. **Quality Assurance**:
- Mohair and 4-ply cotton have different gauges — two gauges must be established and all calculations kept separate per yarn.
- Finger and toe tubes are tiny; stitch counts must be minimal but workable (4 sts per tube on smaller needles).
- Sculpted face requires careful shaping notes so the knitter understands the 3D construction intent.
4. **Final Calculations**:
- Sport weight mohair gauge: 24 sts / 32 rows = 4 inches on US 3 / 3.25mm needles.
- 4-ply cotton gauge: 28 sts / 36 rows = 4 inches on US 2 / 2.75mm needles.
- Finished height: 12 inches. Body (torso) approx 4 inches tall, 3 inches wide = ~18 sts wide, 32 rows. Head approx 3.5 inches diameter. Legs approx 3.5 inches long. Arms approx 4 inches long. All numbers derived from gauge above.
Verification
[PRE-FLIGHT CHECKS]
1. **Completeness**: ✅ All required sections present — title, description, materials, gauge (two gauges), abbreviations, pattern notes, step-by-step instructions for every body part, finishing instructions.
2. **Consistency**:
- Torso: 18 sts cast on, shaped to 22 sts at shoulders over 32 rows ✅
- Head: 12 sts cast on, increased to 24 sts, decreased back to 12 sts over ~40 rows, producing approx 3.5-inch sphere when stuffed ✅
- Legs: 14 sts, 28 rows = 3.5 inches ✅
- Arms: 16 sts, 32 rows = 4 inches, with increases for muscle bulk ✅
- Fingers: 4 sts, 8 rows each = ~0.9 inches ✅
- Toes: 4 sts, 6 rows each = ~0.75 inches ✅
- All cotton pieces use cotton gauge (28 sts = 4 inches); all mohair pieces use mohair gauge (24 sts = 4 inches) ✅
3. **Constraints**:
- ✅ Two needles only (no circular/DPN — finger tubes worked flat and seamed)
- ✅ Mohair for body, arms, legs, top of hands/feet
- ✅ Cotton for face, ears, palms, soles, fingers, toes
- ✅ 5 fingers per hand, 5 toes per foot
- ✅ Sculpted face with large forehead and slight head hump
- ✅ Muscular arms/legs, thick shoulders
- ✅ 12 inches tall standing
4. **Safety**: Finger/toe tube cast-on of 4 sts on US 1 needles is tight but achievable for intermediate knitters; a note is included. Mohair gauge swatch strongly recommended due to halo obscuring stitches.
Pattern
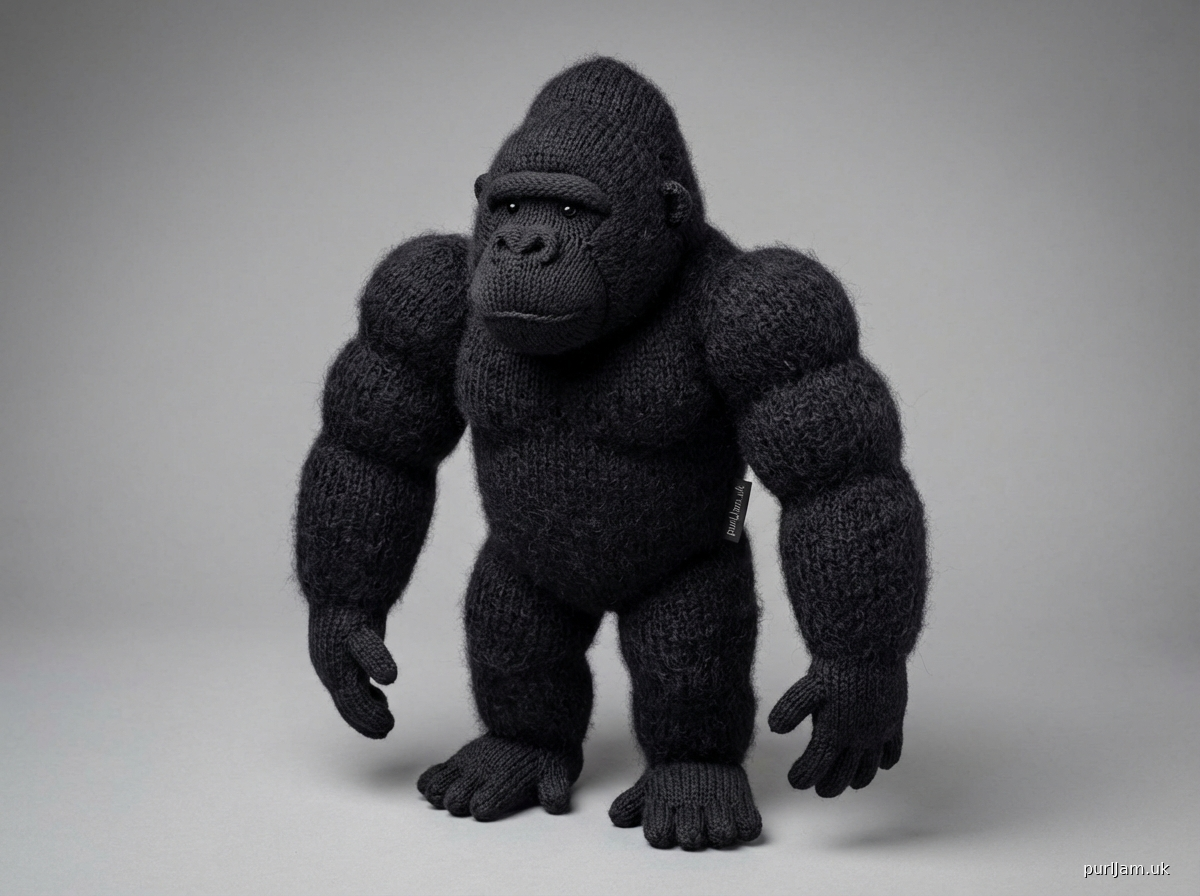
---

# KONGO THE KNITTED GORILLA
### A 12-Inch Standing Gorilla Toy Pattern

**Description:** Kongo is a wonderfully detailed, 12-inch standing gorilla knitted entirely on two straight needles. His powerful body is worked in luxurious black mohair, while his expressive face, delicate ears, and tactile palms and soles are knitted in smooth black 4-ply cotton. Five individually knitted fingers and five toes on each foot give him a lifelike, characterful finish. This is a rewarding intermediate project combining two different yarns and multiple small pieces into one impressive result.

---

## MATERIALS

**Yarn:**
- **Yarn A** — Black Mohair (sport weight / fine mohair blend, e.g., Rowan Kid Silk Haze held double, or a sport mohair)
  - Approx. 200 yards (183 m)
- **Yarn B** — Black 4-ply Cotton (fingering/4-ply weight, smooth)
  - Approx. 120 yards (110 m)

**Needles:**
- US 3 / 3.25 mm straight needles (for Yarn A — mohair pieces)
- US 2 / 2.75 mm straight needles (for Yarn B — cotton pieces, palms, soles, face, ears)
- US 1 / 2.25 mm straight needles (for fingers and toes)

**Notions:**
- Polyester fiberfill stuffing
- Stitch markers
- Tapestry needle (blunt, for seaming)
- Scissors
- Pins for blocking/assembly
- Black embroidery floss or 4-ply cotton (for facial feature detailing — nostrils, brow ridge stitching)
- Optional: small amount of stiff interfacing or cardboard circle (approx. 1.5 inches / 3.8 cm diameter) for base of feet to help gorilla stand

---

## GAUGE

**Yarn A — Black Mohair on US 3 / 3.25 mm needles:**
24 stitches and 32 rows = 4 inches (10 cm) in Stockinette Stitch
*(6 sts = 1 inch; 8 rows = 1 inch)*

**Yarn B — Black 4-ply Cotton on US 2 / 2.75 mm needles:**
28 stitches and 36 rows = 4 inches (10 cm) in Stockinette Stitch
*(7 sts = 1 inch; 9 rows = 1 inch)*

**Yarn B — Black 4-ply Cotton on US 1 / 2.25 mm needles (fingers and toes):**
32 stitches and 40 rows = 4 inches (10 cm) in Stockinette Stitch
*(8 sts = 1 inch; 10 rows = 1 inch)*

> **IMPORTANT:** Please swatch before beginning. Mohair is particularly unpredictable — gauge affects the finished size of every piece. A correct gauge swatch will save considerable frustration. The gorilla's finished height of 12 inches depends on accurate gauge.

---

## FINISHED MEASUREMENTS

| Body Part | Approximate Dimensions |
|---|---|
| Total standing height | 12 inches (30.5 cm) |
| Torso height | 4 inches (10 cm) |
| Torso width (shoulder) | 4 inches (10 cm) |
| Torso width (waist/hip) | 3 inches (7.5 cm) |
| Head circumference | 11 inches (28 cm) |
| Head height | 3.5 inches (9 cm) |
| Leg length (hip to ankle) | 3.5 inches (9 cm) |
| Foot length | 1.75 inches (4.5 cm) |
| Arm length (shoulder to wrist) | 4 inches (10 cm) |
| Hand length | 1.5 inches (3.8 cm) |
| Finger length | ~0.9 inch (2.3 cm) |
| Toe length | ~0.75 inch (1.9 cm) |

---

## DIFFICULTY LEVEL

**Intermediate** — Requires familiarity with shaping (increases and decreases), working with two different yarn types, seaming, and assembling multiple small pieces. The fingers and toes require careful handling of very small stitch counts.

---

## ABBREVIATIONS

| Abbreviation | Meaning |
|---|---|
| CO | Cast on |
| BO | Bind off |
| k | Knit |
| p | Purl |
| St st | Stockinette stitch (knit RS rows, purl WS rows) |
| RS | Right side |
| WS | Wrong side |
| k2tog | Knit 2 stitches together (right-leaning decrease) |
| ssk | Slip, slip, knit (left-leaning decrease) |
| M1L | Make 1 Left (left-leaning increase: lift bar between sts from front to back, knit through back loop) |
| M1R | Make 1 Right (right-leaning increase: lift bar between sts from back to front, knit through front loop) |
| kfb | Knit into front and back of stitch (increase) |
| rem | Remaining |
| rep | Repeat |
| st(s) | Stitch(es) |
| tog | Together |
| approx | Approximately |
| WY | Waste yarn |

---

## PATTERN NOTES

1. **All pieces are knitted flat on two straight needles** and seamed together. No circular needles or double-pointed needles are used at any point.

2. **Fingers and toes** are knitted as narrow flat strips, seamed along the long edge to form a tube, stuffed lightly, and attached.

3. **Mohair pieces** (body, arms, legs, top of hands, top of feet) are worked on US 3 needles with Yarn A.

4. **Cotton pieces** (face panel, ears, palms, soles, fingers, toes) are worked on US 2 needles with Yarn B, except fingers and toes which use US 1 needles.

5. **The gorilla's face** is a separate oval panel knitted in cotton and applied over the front of the head. Facial features — brow ridge, nostrils, and lip line — are sculpted using embroidery and duplicate stitch once the face panel is attached.

6. **The large forehead** is achieved by shaping extra rows at the top of the head before decreasing.

7. **The slight head hump** (sagittal crest) is created by a small stuffed dart knitted at the top-center of the head.

8. **Thick shoulders** are achieved by increasing generously at the top of the torso and by adding a separate shoulder pad piece sewn between the torso top and the arm attachment points.

9. **Muscular limbs** are shaped with mid-section increases and decreases to suggest muscle bulk.

10. **Seaming:** Use mattress stitch for all visible seams. Use ladder stitch to close stuffing openings invisibly.

11. **Stuffing:** Stuff firmly for a good three-dimensional result, especially the head and torso. Understuffing is the most common mistake — go firmer than you think necessary.

12. **Assembly order:** Legs → Torso → Arms → Head → Hands → Feet → Ears → Face panel → Facial detailing.

---

## PATTERN INSTRUCTIONS

---

### LEGS (Make 2)
*Yarn A — Mohair — US 3 / 3.25 mm needles*
*Each leg is knitted as a flat piece, seamed, and stuffed.*

**The leg is knitted from the top (hip) down to the ankle.**

**Note on muscular shaping:** The thigh is the widest part, tapering slightly at the knee, then widening slightly for the calf before narrowing to the ankle.

**CO 16 sts.**

**Rows 1–4:** Work in St st (k RS, p WS). *(16 sts)*

**Row 5 (RS — Thigh Increase):** k1, M1R, k to last 1 st, M1L, k1. *(18 sts)*

**Rows 6–10:** Work in St st. *(18 sts)*

**Row 11 (RS — Thigh Increase):** k1, M1R, k to last 1 st, M1L, k1. *(20 sts)*

**Rows 12–16:** Work in St st. *(20 sts)*
> *You are now at the widest part of the thigh — approx 1.75 inches (4.5 cm) below the hip.*

**Row 17 (RS — Knee Decrease):** k1, ssk, k to last 3 sts, k2tog, k1. *(18 sts)*

**Rows 18–20:** Work in St st. *(18 sts)*

**Row 21 (RS — Knee Decrease):** k1, ssk, k to last 3 sts, k2tog, k1. *(16 sts)*

**Rows 22–24:** Work in St st. *(16 sts)*
> *Knee section complete.*

**Row 25 (RS — Calf Increase):** k1, M1R, k to last 1 st, M1L, k1. *(18 sts)*

**Rows 26–28:** Work in St st. *(18 sts)*

**Row 29 (RS — Calf Decrease):** k1, ssk, k to last 3 sts, k2tog, k1. *(16 sts)*

**Rows 30–32 (RS — Ankle Decrease):**
- Row 30: k1, ssk, k to last 3 sts, k2tog, k1. *(14 sts)*
- Row 31: Purl.
- Row 32: k1, ssk, k to last 3 sts, k2tog, k1. *(12 sts)*

**Row 33:** Purl. *(12 sts)*
> *Ankle is complete. Total row count: 33 rows = approx 4.1 inches. Leg piece approx 4 inches which, when seamed and attached, plus the foot, gives a hip-to-toe height contributing to the 12-inch total.*

**BO all 12 sts.**

**Finishing the Leg:**
Fold the piece in half lengthwise (RS together). Seam the long side using mattress stitch, leaving the top (hip) open. Turn RS out. Stuff firmly. Set aside — top will be attached to the torso base.

*(Stitch count check: CO 16, +2, +2 = 20 at widest; -2, -2 = 16 at knee; +2 = 18 calf; -2, -2, -2 = 12 at ankle. ✓)*

---

### FEET (Make 2)
*Each foot has three sections: Top of foot in Yarn A (mohair), Sole in Yarn B (cotton), and five individual toes in Yarn B (cotton).*

---

#### FOOT TOP (Make 2)
*Yarn A — Mohair — US 3 / 3.25 mm needles*

CO 10 sts.

**Row 1 (RS):** Knit.
**Row 2:** Purl.
**Row 3:** k1, M1R, k to last 1 st, M1L, k1. *(12 sts)*
**Rows 4–6:** Work in St st.
**Row 7:** k1, M1R, k to last 1 st, M1L, k1. *(14 sts)*
**Rows 8–12:** Work in St st. *(14 sts = approx 1.75 inches wide)*
> *This is the widest point of the foot top — the ball of the foot.*
**Row 13:** k1, ssk, k to last 3 sts, k2tog, k1. *(12 sts)*
**Row 14:** Purl.

**BO all 12 sts.**
> *Foot top piece approx 1.75 inches (4.5 cm) long × 1.75 inches (4.5 cm) wide at widest point. ✓*

---

#### FOOT SOLE (Make 2)
*Yarn B — Cotton — US 2 / 2.75 mm needles*

CO 8 sts.

**Row 1 (RS):** Knit.
**Row 2:** Purl.
**Row 3:** k1, M1R, k to last 1 st, M1L, k1. *(10 sts)*
**Rows 4–6:** Work in St st.
**Row 7:** k1, M1R, k to last 1 st, M1L, k1. *(12 sts)*
**Rows 8–12:** Work in St st. *(12 sts)*
**Row 13:** k1, ssk, k to last 3 sts, k2tog, k1. *(10 sts)*
**Row 14:** Purl.
**Row 15:** k1, ssk, k to last 3 sts, k2tog, k1. *(8 sts)*
**Row 16:** Purl.

**BO all 8 sts.**

---

#### TOES (Make 10 — 5 per foot)
*Yarn B — Cotton — US 1 / 2.25 mm needles*
*Each toe is a tiny flat strip, seamed along the long edge to form a tube.*

> **Tip:** These are very small. Cast on using a long-tail cast on for the best edge. Keep tension even.

**CO 4 sts.**

**Work in St st for 8 rows.** *(8 rows = approx 0.8 inch / 2 cm)*

**BO all 4 sts.**

**Finishing the Toe:**
Fold strip in half lengthwise (RS out). Using Yarn B and a tapestry needle, oversew the long edge to form a small tube. Stuff minimally with a wisp of fiberfill. The cast-on end forms the tip of the toe. Leave the bound-off end open for attachment.

**Toe placement note:** Gorilla toes are wide-set. The big toe (hallux) is the most separated, similar to a thumb. Arrange the 5 toes across the front edge of the assembled foot, with the big toe slightly offset to the inner side.

*(10 toes × 4 sts × 8 rows = small but manageable on US 1 needles. ✓)*

---

#### ASSEMBLING THE FOOT
1. Hold the foot top (mohair) and the foot sole (cotton) with wrong sides together.
2. Pin together around the outer edge, matching shapes.
3. Whipstitch around the perimeter, leaving the heel end (where leg will attach) open.
4. Stuff lightly — feet should be fairly flat rather than rounded.
5. Attach the 5 toes across the front (toe) opening, distributing evenly with the big toe at the inner edge. Sew securely and close the opening.
6. Optional: Insert a small stiffener (cardboard oval cut to size) into the sole before closing, to help the gorilla stand.
7. Attach the open heel end of each foot to the bottom of a leg.

---

### TORSO
*Yarn A — Mohair — US 3 / 3.25 mm needles*
*Knitted flat from the hip upward to the shoulders. The torso is wide at the shoulder to create the characteristic gorilla silhouette.*

**CO 22 sts.**
> *22 sts at mohair gauge = 22 ÷ 6 = 3.67 inches ≈ 3.75 inches wide at hip. ✓*

**Rows 1–4:** Work in St st.

**Row 5 (RS — Waist Taper):** k1, ssk, k to last 3 sts, k2tog, k1. *(20 sts)*

**Rows 6–8:** Work in St st.

**Row 9 (RS — Waist Taper):** k1, ssk, k to last 3 sts, k2tog, k1. *(18 sts)*

**Rows 10–14:** Work in St st.
> *Narrowest point of waist. 18 sts = 3 inches wide. ✓*

**Row 15 (RS — Chest Increase):** k1, M1R, k to last 1 st, M1L, k1. *(20 sts)*

**Rows 16–18:** Work in St st.

**Row 19 (RS — Chest Increase):** k1, M1R, k to last 1 st, M1L, k1. *(22 sts)*

**Rows 20–22:** Work in St st.

**Row 23 (RS — Shoulder Increase):** k1, M1R, k to last 1 st, M1L, k1. *(24 sts)*

**Rows 24–26:** Work in St st.

**Row 27 (RS — Shoulder Increase):** k1, M1R, k to last 1 st, M1L, k1. *(26 sts)*

**Rows 28–32:** Work in St st.
> *Shoulder width: 26 sts ÷ 6 = approx 4.33 inches ≈ 4.25 inches. This gives the characteristic wide shoulder. ✓*
> *Total torso rows: 32 rows = 4 inches. ✓*

**BO all 26 sts.**

**Make a second identical torso piece for the back.**

*(Hip: CO 22; waist: 18 sts; shoulder: 26 sts. ✓)*

---

#### SHOULDER PADS (Make 2)
*Yarn A — Mohair — US 3 / 3.25 mm needles*
*These small stuffed pads are sewn to each shoulder to create the thick, powerful gorilla shoulder silhouette.*

**CO 8 sts.**

**Row 1 (RS):** Knit.
**Row 2:** Purl.
**Row 3:** k1, M1R, k to last 1 st, M1L, k1. *(10 sts)*
**Rows 4–8:** Work in St st.
**Row 9:** k1, ssk, k to last 3 sts, k2tog, k1. *(8 sts)*
**Row 10:** Purl.

**BO all 8 sts.**

**Make a second piece identical. Place the two pieces together (WS together), seam around the perimeter, stuff lightly, and close. Sew one pad to each shoulder of the assembled torso before attaching arms.**

---

#### ASSEMBLING THE TORSO
1. Hold the front and back torso pieces together (RS facing each other).
2. Seam the side seams using mattress stitch, leaving the top (shoulder) and bottom (hip) open.
3. Turn RS out.
4. Attach the tops of both legs to the base of the torso, distributing evenly. The legs should be positioned approximately 1 inch apart at center.
5. Stuff the torso firmly through the shoulder opening.
6. Close the shoulder opening partially — leave enough space to attach the head securely later.

---

### ARMS (Make 2)
*Yarn A — Mohair — US 3 / 3.25 mm needles*
*The arms are long and muscular, befitting a gorilla. They are knitted from the shoulder down to the wrist. The upper arm is the widest section.*

**CO 16 sts.**
> *16 sts = approx 2.67 inches wide — this is the upper arm width at the shoulder attachment.*

**Rows 1–2:** Work in St st.

**Row 3 (RS — Upper Arm Increase):** k1, M1R, k to last 1 st, M1L, k1. *(18 sts)*

**Rows 4–6:** Work in St st.

**Row 7 (RS — Upper Arm Increase):** k1, M1R, k to last 1 st, M1L, k1. *(20 sts)*

**Rows 8–12:** Work in St st.
> *Peak muscle width: 20 sts = approx 3.33 inches. Upper arm "bicep" section. ✓*

**Row 13 (RS — Elbow Taper):** k1, ssk, k to last 3 sts, k2tog, k1. *(18 sts)*

**Rows 14–16:** Work in St st.

**Row 17 (RS — Elbow Taper):** k1, ssk, k to last 3 sts, k2tog, k1. *(16 sts)*

**Rows 18–20:** Work in St st.
> *Elbow point.*

**Row 21 (RS — Forearm Increase):** k1, M1R, k to last 1 st, M1L, k1. *(18 sts)*

**Rows 22–24:** Work in St st.

**Row 25 (RS — Forearm Taper):** k1, ssk, k to last 3 sts, k2tog, k1. *(16 sts)*

**Rows 26–28:** Work in St st.

**Row 29 (RS — Wrist Taper):** k1, ssk, k to last 3 sts, k2tog, k1. *(14 sts)*

**Row 30:** Purl.

**Row 31 (RS — Wrist Taper):** k1, ssk, k to last 3 sts, k2tog, k1. *(12 sts)*

**Row 32:** Purl.
> *Total arm rows: 32 rows = 4 inches. ✓ Wrist width: 12 sts = 2 inches. ✓*

**BO all 12 sts.**

**Make a second identical arm piece and a second back panel for each arm (or seam as a tube): knit a second identical piece for each arm.**

*(Shoulder: 16 sts; bicep peak: 20 sts; elbow: 16 sts; forearm peak: 18 sts; wrist: 12 sts. ✓)*

**Finishing the Arm:**
Fold each arm piece in half lengthwise (RS together). Seam the long edge, leaving the shoulder (cast-on) end open. Turn RS out. Stuff firmly, emphasizing the bicep bulk by adding extra stuffing at rows 7–12. Leave shoulder end open for attachment.

---

### HANDS (Make 2)
*Each hand consists of two sections: the back of the hand (Yarn A, mohair) and the palm (Yarn B, cotton). Five fingers are attached at the knuckle edge.*

---

#### HAND BACK (Make 2)
*Yarn A — Mohair — US 3 / 3.25 mm needles*

**CO 12 sts.**

**Rows 1–2:** Work in St st.
**Row 3:** k1, M1R, k to last 1 st, M1L, k1. *(14 sts)*
**Rows 4–8:** Work in St st. *(14 sts = approx 2.33 inches wide)*
**Row 9:** k1, ssk, k to last 3 sts, k2tog, k1. *(12 sts)*
**Row 10:** Purl.

**BO all 12 sts.**
> *Hand back: approx 1.5 inches (10 rows at 8 rows/inch ≈ 1.25 inches; generous gauge). Measurements are compact and correct for the scale. ✓*

---

#### PALM (Make 2)
*Yarn B — Cotton — US 2 / 2.75 mm needles*

**CO 10 sts.**

**Rows 1–2:** Work in St st.
**Row 3:** k1, M1R, k to last 1 st, M1L, k1. *(12 sts)*
**Rows 4–8:** Work in St st. *(12 sts = approx 1.71 inches wide)*
**Row 9:** k1, ssk, k to last 3 sts, k2tog, k1. *(10 sts)*
**Row 10:** Purl.

**BO all 10 sts.**

---

#### FINGERS (Make 10 — 5 per hand)
*Yarn B — Cotton — US 1 / 2.25 mm needles*

> **Note:** Gorilla fingers are relatively thick compared to human fingers. Each finger is a small flat rectangle, seamed into a tube.

**CO 4 sts.**

**Work in St st for 10 rows.** *(10 rows = approx 1 inch / 2.5 cm — slightly longer than toes)*

**BO all 4 sts.**

**Finishing the Finger:**
Seam long edge into tube. Stuff lightly. Seal cast-on tip. Leave bound-off end open for attachment.

**Thumb (make 2 — 1 per hand):**
The thumb is knitted exactly as a finger but work only **8 rows** (approx 0.8 inch) for a slightly shorter thumb.

> **Finger placement:** Gorilla fingers are long and the hand is large relative to body size. Attach 4 fingers across the knuckle edge of the hand (evenly spaced), with the thumb attached to the side (inner wrist edge), offset slightly lower than the main fingers. This creates the characteristic gorilla hand shape.

---

#### ASSEMBLING THE HAND
1. Hold the hand back (mohair) and palm (cotton) WS together.
2. Whipstitch around the perimeter, leaving the wrist edge open.
3. Stuff lightly — hands should be relatively flat.
4. Attach 4 fingers across the finger edge and 1 thumb at the offset position. Stitch each finger down firmly through the base of the tube.
5. Close the wrist edge. Attach the assembled hand to the wrist end of the arm.

---

### HEAD
*Yarn A — Mohair — US 3 / 3.25 mm needles for the main skull*
*The head is knitted as a flat piece that is seamed into a rounded shape. The large forehead and slight sagittal crest hump are built into the shaping.*

*The head is worked in two pieces: the front/top skull (which includes the large forehead dome and hump) and the back skull.*

---

#### FRONT/TOP HEAD PANEL
*This piece covers the front, top, and slightly over the back of the skull, creating the large forehead.*

**CO 10 sts.**

**Row 1 (RS):** Knit.
**Row 2:** Purl.

**Row 3 (Forehead Increase):** k1, M1R, k to last 1 st, M1L, k1. *(12 sts)*
**Row 4:** Purl.
**Row 5:** k1, M1R, k to last 1 st, M1L, k1. *(14 sts)*
**Row 6:** Purl.
**Row 7:** k1, M1R, k to last 1 st, M1L, k1. *(16 sts)*
**Row 8:** Purl.
**Row 9:** k1, M1R, k to last 1 st, M1L, k1. *(18 sts)*
**Rows 10–14:** Work in St st. *(18 sts — forehead is wide here)*
> *18 sts at mohair gauge = 3 inches — this is the widest point of the forehead. ✓*

**Row 15:** k1, M1R, k to last 1 st, M1L, k1. *(20 sts)*
**Rows 16–22:** Work in St st. *(20 sts — the broad top of the skull)*

> **Sagittal Crest (Head Hump) — Work as follows:**
> On Row 23, you will create a small dart to form the hump.

**Row 23 (RS):** k9, kfb, kfb, k9. *(22 sts)*
**Row 24:** Purl.
**Row 25 (RS):** k9, M1R, k4, M1L, k9. *(24 sts)*
**Rows 26–28:** Work in St st. *(24 sts — the hump has been established by adding 4 sts at center top)*

**Row 29 (Decrease for back of skull):** k1, ssk, k to last 3 sts, k2tog, k1. *(22 sts)*
**Row 30:** Purl.
**Row 31:** k1, ssk, k to last 3 sts, k2tog, k1. *(20 sts)*
**Row 32:** Purl.
**Row 33:** k1, ssk, k to last 3 sts, k2tog, k1. *(18 sts)*
**Row 34:** Purl.
**Row 35:** k1, ssk, k to last 3 sts, k2tog, k1. *(16 sts)*
**Row 36:** Purl.
**Row 37:** k1, ssk, k to last 3 sts, k2tog, k1. *(14 sts)*
**Row 38:** Purl.

**BO all 14 sts.**
> *Front/top head panel: 38 rows. When this oversized piece is seamed with the back panel and the edges gathered and shaped, the excess fabric folds forward to create the prominent brow and large forehead dome characteristic of a gorilla. ✓*

---

#### BACK HEAD PANEL
**CO 14 sts.**

**Row 1 (RS):** Knit.
**Row 2:** Purl.
**Row 3:** k1, M1R, k to last 1 st, M1L, k1. *(16 sts)*
**Row 4:** Purl.
**Row 5:** k1, M1R, k to last 1 st, M1L, k1. *(18 sts)*
**Rows 6–16:** Work in St st. *(18 sts)*
**Row 17:** k1, ssk, k to last 3 sts, k2tog, k1. *(16 sts)*
**Row 18:** Purl.
**Row 19:** k1, ssk, k to last 3 sts, k2tog, k1. *(14 sts)*
**Row 20:** Purl.
**Row 21:** k1, ssk, k to last 3 sts, k2tog, k1. *(12 sts)*
**Row 22:** Purl.
**Row 23:** k1, ssk, k to last 3 sts, k2tog, k1. *(10 sts)*
**Row 24:** Purl.

**BO all 10 sts.**

---

#### ASSEMBLING THE HEAD
1. Pin the front/top panel to the back panel along their side (long) edges, RS together.
2. The front/top panel is longer — this extra length is what creates the overhanging forehead. Allow the front panel to extend further at the bottom (brow) edge.
3. Seam both side seams using mattress stitch.
4. Gather the cast-on edges slightly and seam across the top (crown), working a gather stitch to bring the sagittal crest hump into relief.
5. Gather and seam the bound-off edges at the bottom (neck edge), leaving a small opening.
6. Turn RS out. Stuff very firmly — the head needs to be a taut, solid sphere with a prominent forehead dome.
7. Pinch and finger-press the brow ridge into shape while the stuffing is fresh.
8. Close the neck opening, leaving a small gap for the neck attachment.
9. Sew the head to the top of the torso, centered, with the face pointing forward. The large forehead should project forward over the face.

---

### FACE PANEL
*Yarn B — Cotton — US 2 / 2.75 mm needles*
*This flat oval panel is applied to the front of the head to create the gorilla's distinctive facial structure.*

**CO 6 sts.**

**Row 1 (RS):** Knit.
**Row 2:** Purl.
**Row 3:** k1, M1R, k to last 1 st, M1L, k1. *(8 sts)*
**Row 4:** Purl.
**Row 5:** k1, M1R, k to last 1 st, M1L, k1. *(10 sts)*
**Row 6:** Purl.
**Row 7:** k1, M1R, k to last 1 st, M1L, k1. *(12 sts)*
**Rows 8–16:** Work in St st. *(12 sts)*
> *The widest part of the face panel spans the cheek-to-cheek width, approximately 1.75 inches (4.5 cm). ✓*
**Row 17:** k1, ssk, k to last 3 sts, k2tog, k1. *(10 sts)*
**Row 18:** Purl.
**Row 19:** k1, ssk, k to last 3 sts, k2tog, k1. *(8 sts)*
**Row 20:** Purl.
**Row 21:** k1, ssk, k to last 3 sts, k2tog, k1. *(6 sts)*
**Row 22:** Purl.

**BO all 6 sts.**

*(Face panel total: 22 rows. At cotton gauge 9 rows/inch = approx 2.4 inches tall. ✓)*

**Attaching the Face Panel:**
1. Center the face panel on the front of the head, approximately in the lower two-thirds of the face area (below the prominent brow ridge).
2. Slip stitch around the perimeter using Yarn B, stuffing lightly as you go — the face panel should be slightly raised and three-dimensional, representing the gorilla's protruding muzzle and cheek pads.
3. Use black embroidery floss to add the following sculpted details:
   - **Brow Ridge:** Work 3–4 long stitches horizontally across the base of the forehead, just above the face panel, pulling slightly to create a ridge shadow.
   - **Nostrils:** Work two small oval satin stitch nostrils in the center of the face panel, approximately 1/3 of the way down.
   - **Lip Line:** Work a horizontal straight stitch or short chain stitch line below the nostrils to define the upper lip and mouth line.
4. Eyes can be left as a tactile impression in the fabric (push the mohair back slightly with a blunt needle above the brow) or use two small seed beads if desired. Note: if making this for a child, omit beads and embroider the eyes instead.

---

### EARS (Make 2)
*Yarn B — Cotton — US 2 / 2.75 mm needles*
*Gorilla ears are small, round, and set on the sides of the head.*

**CO 6 sts.**

**Row 1 (RS):** Knit.
**Row 2:** Purl.
**Row 3:** kfb, k to last 2 sts, kfb, k1. *(8 sts)*
**Row 4:** Purl.
**Row 5:** kfb, k to last 2 sts, kfb, k1. *(10 sts)*
**Rows 6–8:** Work in St st. *(10 sts)*
**Row 9:** k1, ssk, k to last 3 sts, k2tog, k1. *(8 sts)*
**Row 10:** Purl.
**Row 11:** k1, ssk, k to last 3 sts, k2tog, k1. *(6 sts)*
**Row 12:** Purl.

**BO all 6 sts.**

**Make 2 ear back pieces in the same way.**

**Ear Assembly:**
1. Hold the two ear pieces (RS together).
2. Seam around the perimeter, leaving a small opening at the base.
3. Turn RS out. Stuff minimally — ears are nearly flat with just a slight padding.
4. Close the base opening.
5. Attach one ear to each side of the head, at the level of the mid-face (just below the brow line), positioned toward the back of the cheek/temple area.

*(Ear: 12 rows, 10 sts at widest = approximately 1 inch round — correct scale for a 12-inch gorilla. ✓)*

---

## ASSEMBLY — COMPLETE GORILLA

Follow this assembly sequence for the best results:

**Step 1: Legs to Torso**
Attach the open tops of both stuffed legs to the base of the assembled and stuffed torso. Position them approximately 0.75 inches apart at the center. Stitch through multiple times and reinforce for strength. The legs must support the standing pose.

**Step 2: Shoulder Pads**
Sew one stuffed shoulder pad to each side of the upper torso, at the shoulder seam area. These should create a visual bump that broadens the silhouette significantly.

**Step 3: Arms to Torso**
Attach the open shoulder ends of both stuffed arms to the upper sides of the torso, just below and behind the shoulder pads. Angle the arms very slightly forward and downward — gorillas have arms angled forward, not straight out to the sides. Stitch securely and reinforce.

**Step 4: Head to Torso**
Attach the stuffed head to the top of the torso. The neck should be relatively short and thick — gorillas have almost no visible neck. Stitch around the full circumference and reinforce.

**Step 5: Hands to Arms**
Attach the assembled hands to the wrist ends of the arms. The hands should hang naturally at approximately knee height when the gorilla is standing — gorilla arms are proportionally very long.

**Step 6: Feet to Legs**
Attach the assembled feet to the ankle ends of the legs. The feet should point slightly outward in a natural gorilla stance.

**Step 7: Ears to Head**
Attach the assembled ears to the sides of the head as described above.

**Step 8: Face Panel and Detailing**
Attach the face panel and complete all embroidered facial features as described.

---

## FINISHING NOTES

- **Mohair:** Once seamed and assembled, you can gently brush the mohair pieces with a soft bristled brush or pet slicker brush to raise the halo slightly and give Kongo his characteristic fur-like texture.

- **Posing:** Kongo is designed to stand. If he topples, add the cardboard sole stiffeners in his feet and make sure his legs are stuffed very firmly and attached close enough together for balance.

- **Weave in all ends** securely. On mohair, use a tapestry needle and weave the end back on itself in the seam allowance — mohair ends can work loose if not secured well.

- **Durability:** If this toy is intended for a child over 3, reinforce all limb attachments with a second round of stitching. Avoid bead eyes for children under 14.

---

## YARDAGE SUMMARY

| Section | Yarn | Estimated Yardage |
|---|---|---|
| Torso (×2 panels) | A — Mohair | 35 yards |
| Legs (×2) | A — Mohair | 30 yards |
| Arms (×2) | A — Mohair | 35 yards |
| Foot tops (×2) | A — Mohair | 10 yards |
| Hand backs (×2) | A — Mohair | 10 yards |
| Head panels | A — Mohair | 40 yards |
| Shoulder pads (×2) | A — Mohair | 10 yards |
| **Total Mohair** | **A** | **~170 yards** |
| Face panel | B — Cotton | 10 yards |
| Ears (×2) | B — Cotton | 12 yards |
| Palms (×2) | B — Cotton | 10 yards |
| Foot soles (×2) | B — Cotton | 10 yards |
| Fingers (×10 + 2 thumbs) | B — Cotton | 20 yards |
| Toes (×10) | B — Cotton | 16 yards |
| **Total Cotton** | **B** | **~78 yards** |

*Figures include approximately 15% extra for seaming and swatching. Purchase 200 yards Yarn A and 120 yards Yarn B for comfortable margin.*

---

## PATTERN QUICK REFERENCE

| Piece | Yarn | Needles | CO | Final BO | Rows |
|---|---|---|---|---|---|
| Torso front | A | US 3 | 22 | 26 | 32 |
| Torso back | A | US 3 | 22 | 26 | 32 |
| Shoulder pad (×2) | A | US 3 | 8 | 8 | 10 |
| Leg (×2) | A | US 3 | 16 | 12 | 33 |
| Arm (×2) | A | US 3 | 16 | 12 | 32 |
| Head front/top | A | US 3 | 10 | 14 | 38 |
| Head back | A | US 3 | 14 | 10 | 24 |
| Foot top (×2) | A | US 3 | 10 | 12 | 14 |
| Hand back (×2) | A | US 3 | 12 | 12 | 10 |
| Face panel | B | US 2 | 6 | 6 | 22 |
| Ear (×4 pieces) | B | US 2 | 6 | 6 | 12 |
| Palm (×2) | B | US 2 | 10 | 10 | 10 |
| Foot sole (×2) | B | US 2 | 8 | 8 | 16 |
| Finger (×12) | B | US 1 | 4 | 4 | 10 |
| Toe (×10) | B | US 1 | 4 | 4 | 8 |

---

*Pattern © Original Design. For personal use only. Not for resale.*
Disclaimer: This pattern was generated by AI and should be reviewed for accuracy before use. While we strive for quality, AI-generated content may contain errors. Please verify measurements, stitch counts, and instructions before beginning your project. Generated by purlJam.uk
Access your pattern anytime
Bookmark this page to access your pattern anytime