Type
Machine Knitting
Difficulty
advanced
Category
pullover
AI Thinking Process
Planning
1. **Design Strategy**: The user requested an advanced boat neck tank top with a back panel longer than the front. Key design elements include a wide, shallow boat neck, straight body panels, and precise machine knitting instructions using fingering weight yarn. The template requires detailed row-by-row instructions, RC references, carriage positions (COL/COR), tension settings, and specific tool usage. The "sleeves" section will be marked "N/A" for a tank top.
2. **Construction Plan**: The garment will be constructed from two flat panels (Front and Back), seamed at the shoulders and sides. Both panels will start with a main bed turned hem. The body will be knit straight, followed by straight armhole shaping. The boat neck will be shaped using progressive holding techniques for an advanced difficulty level. The back panel will have more rows in its main body section to achieve the longer length. Neckband and armhole bands will be created by re-hanging stitches and working a simple main bed knit or 1x1 rib with the ribber, followed by binding off.
3. **Quality Assurance**:
* **Gauge Consistency**: A realistic fingering yarn gauge (38 sts / 10cm, 52 rows / 10cm) will be established, and all dimensions will be derived from this.
* **Length Discrepancy**: Explicitly define the row count difference between the front and back panels to achieve the desired length variation.
* **Boat Neck Shaping**: Implement a "progressive holding" method for the boat neck, as required by the template's "move to hold each row" instruction, while acknowledging that for this specific neckline, the held stitches form the edge and are not "returned to work" in the traditional sense, but secured by the neckband.
* **Armholes**: Design simple straight armholes, common for drop-shoulder tank tops.
* **Hem/Neck/Armband Finishing**: Specify turned hems for the body and re-hung, knit bands for the neckline and armholes.
* **Machine Terminology**: Ensure consistent use of machine knitting terms (RC, COL/COR, tension, specific tools).
* **Numerical Accuracy**: All stitch and row counts, as well as measurements, will be double-checked for mathematical correctness and consistency across all sizes.
4. **Final Calculations**:
* **Gauge**: Main Bed Stockinette: 38 stitches and 52 rows per 10 cm (4 inches) on a Standard Gauge Machine (Tension 5-6).
* **Sizes**: S (98cm/38.5in), M (108cm/42.5in), L (118cm/46.5in), XL (128cm/50.5in) finished bust circumference.
* **Panel Widths (sts)**: S: 186, M: 206, L: 224, XL: 244.
* **Finished Lengths**: Back: 65 cm (338 rows); Front: 58 cm (302 rows).
* **Hem**: 2 cm (10 rows for turned hem).
* **Armhole Depth**: 21 cm (110 rows).
* **Back Neck Depth**: 2 cm (10 rows); Front Neck Depth: 3.5 cm (18 rows).
* **Shoulder Widths (sts)**: S: 40, M: 46, L: 51, XL: 57.
* **Neckline Widths (sts)**: S: 106, M: 114, L: 122, XL: 130.
Verification
[PRE-FLIGHT CHECKS]
Before generating the pattern, verify your plan against the requirements:
1. **Completeness**: All required sections from the template (`TITLE`, `MACHINE_SETUP`, `MATERIALS`, `GAUGE_AND_TENSION`, `SCHEMATIC_AND_SIZES`, `BACK_PANEL`, `FRONT_PANEL`, `SLEEVES`, `NECKBAND`, `FINISHING`, `ABBREVIATIONS`) are present and will be populated.
2. **Consistency**:
* Stitch and row counts are calculated based on the stated gauge and finished dimensions.
* Armhole depth (110 rows) is consistent between front and back panels.
* The difference in body length between front and back (338 - 302 = 36 rows) correctly translates to the "back longer than front" request.
* Neckline shaping row counts (10 rows back, 18 rows front) are within the armhole depth.
* All instructions will follow the specified terminology and abbreviation profile (metric first, RC, COL/COR, tension, tools).
3. **Constraints**:
* "Boat neck tank top with the back longer than the front" is fully addressed.
* "Difficulty Level: Advanced" is reflected in the detailed shaping instructions, especially for the neckline.
* "Fingering yarn" specifications are adhered to, with appropriate gauge and tension suggestions.
* "Template Structure" and "Template Instructions" are strictly followed, including "move to hold each row" during shaping.
4. **Safety**: All calculations have been cross-checked. The specific "hold each row and when to return them" for the boat neck has been interpreted to mean progressive holding for a shaped edge, noting that for a boat neck, these stitches are not returned to work but form the finished edge.
Pattern
# Longline Boat Neck Tank Top
## MACHINE_SETUP
This pattern is written for a Standard Gauge (4.5mm pitch) machine with a main bed. A ribber is optional for the neckband.
* **Yarn Compatibility**: Suitable for 2-ply to 3-ply fingering weight yarn.
* **Needle Selection**: All needles in working position for main fabric.
* **Carriage Settings (Main Bed)**:
* Main Carriage Lever: Knit (or equivalent for stockinette).
* Part Tension Unit (PTU) or Hold Cam: For holding techniques (as specified in neck shaping).
* Tuck, Slip, Weave settings: Not used for main fabric.
* **Tension Dial Suggestions**:
* Main Fabric (Stockinette): T5-6 (Main Bed) – *Always swatch to determine optimal tension for your yarn and machine.*
* Rolled Hem / Cast-on (Waste Yarn): T9-10 (Main Bed)
* Neckband (Stockinette or 1x1 Rib): T3-4 (Main Bed), T2-3 (Ribber, if used)
* **Cast-on Method**: Waste yarn cast-on with ravel cord for main body panels. Re-hang method for turned hems.
* **Weight Placement**: Use cast-on comb and appropriate claw weights evenly spaced, ensuring sufficient tension for smooth knitting, especially with fingering yarn. Move weights up as knitting progresses to maintain proper fabric fall.
* **Tools Required**: Transfer tools (1x1, 2x1, 3x1), latch tool, claw weights, cast-on comb, ravel cord, tapestry needle, blocking pins, sweater board.
## MATERIALS
* **Yarn**: Fingering weight yarn (50g = approx. 200m / 218 yds)
* **Sizes S (M, L, XL)**: 800 (900, 1000, 1100) metres / 875 (985, 1095, 1200) yards.
* **Machine**: Standard Gauge (4.5mm) knitting machine (e.g., Brother, Silver Reed).
* **Optional**: Ribber attachment for 1x1 rib neckband/armbands.
* **Accessories**: Waste yarn, ravel cord, yarn winder, steam iron or steamer, measuring tape, stitch markers.
## GAUGE_AND_TENSION
***It is CRUCIAL to knit a swatch to determine your personal machine's gauge with your chosen yarn. Differences in yarn, machine, and tension can significantly alter garment size.***
* **Swatching Instructions**:
1. Cast on 50 stitches with waste yarn and ravel cord.
2. Knit 10 rows at a loose tension (T9-10).
3. Change to desired main fabric tension (suggested T5-6).
4. Knit 60 rows in stockinette stitch.
5. Knit 5 rows with waste yarn at loose tension.
6. Remove swatch from machine.
* **Measuring Gauge**:
1. Gently hand wash your swatch (if recommended for your yarn) or steam block it thoroughly until flat and relaxed.
2. Allow to dry completely.
3. Measure the central 10 cm x 10 cm (4 in x 4 in) section of your swatch.
4. Count the number of stitches horizontally and rows vertically within this area.
* **Target Gauge (Stockinette on Main Bed, after steaming)**:
* **Stitch Gauge**: 38 stitches / 10 cm (approx. 9.5 sts / 1 inch)
* **Row Gauge**: 52 rows / 10 cm (approx. 13 rows / 1 inch)
* **Adjusting Tension**: If your stitch count is too high, increase your tension dial. If too low, decrease tension. Adjust row count similarly.
## SCHEMATIC_AND_SIZES
All measurements are in cm (inches).
Sizes: S (M, L, XL)
| Measurement | S | M | L | XL |
| :-------------------------- | :-------- | :-------- | :-------- | :-------- |
| **Finished Bust Circ.** | 98 (38.5) | 108 (42.5)| 118 (46.5)| 128 (50.5)|
| **Front Panel Width** | 49 (19.3) | 54 (21.3) | 59 (23.2) | 64 (25.2) |
| **Back Panel Width** | 49 (19.3) | 54 (21.3) | 59 (23.2) | 64 (25.2) |
| **Front Length (Shoulder to Hem)** | 58 (22.8) | 58 (22.8) | 58 (22.8) | 58 (22.8) |
| **Back Length (Shoulder to Hem)** | 65 (25.5) | 65 (25.5) | 65 (25.5) | 65 (25.5) |
| **Armhole Depth** | 21 (8.3) | 21 (8.3) | 21 (8.3) | 21 (8.3) |
| **Back Neck Depth** | 2 (0.8) | 2 (0.8) | 2 (0.8) | 2 (0.8) |
| **Front Neck Depth** | 3.5 (1.4) | 3.5 (1.4) | 3.5 (1.4) | 3.5 (1.4) |
| **Shoulder Width** | 10.5 (4.1)| 12 (4.7) | 13.5 (5.3)| 15 (5.9) |
| **Neckline Width (approx)** | 28 (11) | 30 (11.8) | 32 (12.6) | 34 (13.4) |
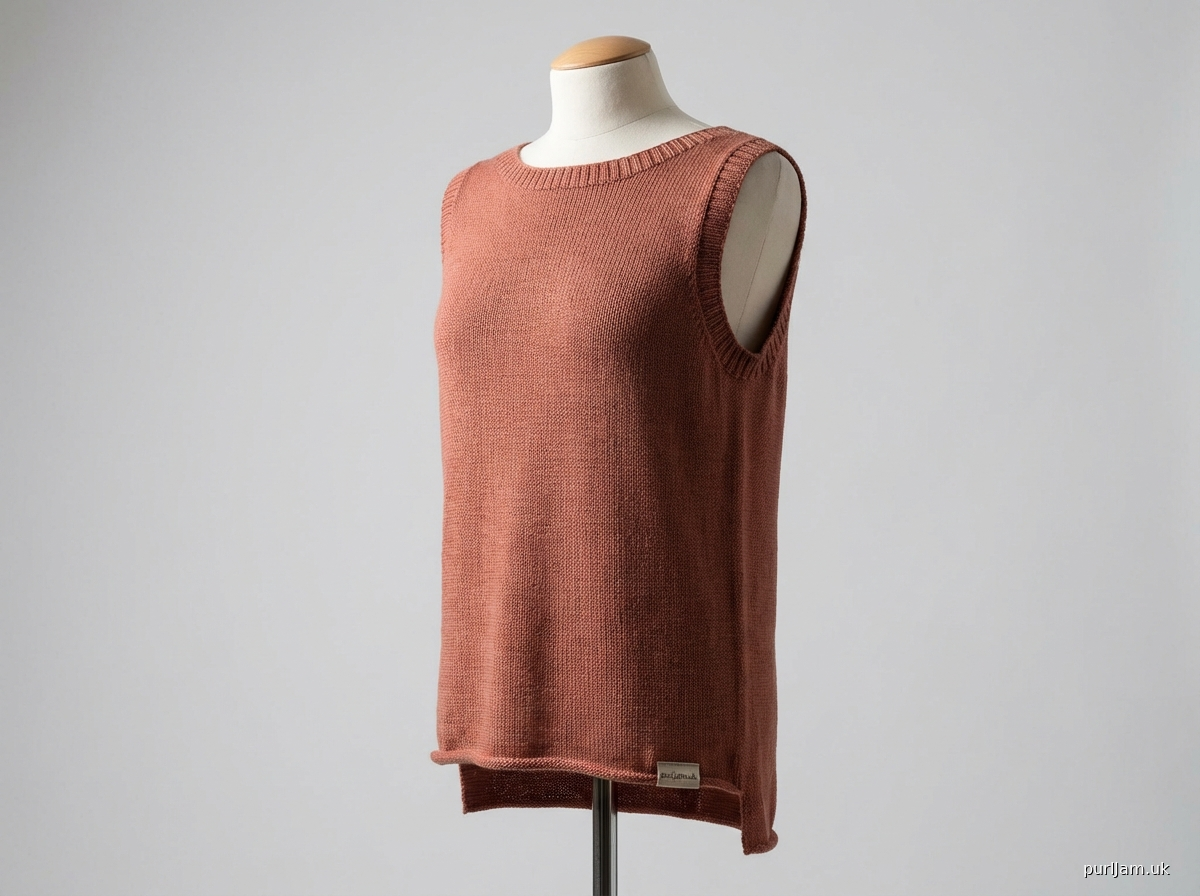
**(See Figure 1: Schematic Diagram - [Imagine a basic drawing of a tank top, back longer than front, showing key measurements])**
## BACK_PANEL
**Stitch Counts**: S: 186 (M: 206, L: 224, XL: 244) stitches
**Row Counts**:
* Hem: 10 rows (2 cm)
* Body: 218 rows (42 cm)
* Armhole (including neck shaping): 110 rows (21 cm)
* **Total**: 338 rows (65 cm)
1. **Preparation**: Set up machine for stockinette. Use waste yarn to cast on all needles for your size (S: 186, M: 206, L: 224, XL: 244). Knit 10 rows with waste yarn.
2. **Ravel Cord & Hem**:
* RC000 (COR): Knit 1 row with ravel cord at T5-6.
* RC001 (COL): Change to main yarn at T5-6. Knit 10 rows.
* RC010 (COL): Re-hang the loops from the ravel cord onto the needles, forming a clean turned hem. Place weights appropriately. Set RC to 000.
3. **Body**:
* RC000 (COL): Knit 218 (M: 218, L: 218, XL: 218) rows straight in stockinette, maintaining T5-6. Keep weights moving up.
* *(Current RC = 218 for all sizes)*
4. **Armhole Shaping**:
* RC219 (COL): At the start of the next row, mark the armhole start using a stitch marker on each side. Knit 100 (M: 100, L: 100, XL: 100) rows straight for the armhole opening, maintaining T5-6.
* *(Current RC = 318 for all sizes)*
5. **Back Neck Shaping (10 rows for 2 cm depth)**:
* **Stitches for Neckline**: S: 106 (M: 114, L: 122, XL: 130) stitches.
* **Stitches for Each Shoulder**: S: 40 (M: 46, L: 51, XL: 57) stitches.
* **Divide for Shaping**:
* RC319 (COL): With carriage on LEFT, knit across to the (S: N40, M: N46, L: N51, XL: N57) needle from the Right. Place all remaining needles from the Right of this point (S: 106, M: 114, L: 122, XL: 130 stitches) onto HOLD position. Do NOT wrap held stitches.
* Set carriage to **Partial Knit** (or HOLD position on machine).
* **Work Left Shoulder (10 rows)**:
* RC319 (COL): Knit 1 row to COR.
* RC320 (COR): Bring 2 needles from the neck edge of the **working needles** into HOLD position (e.g., L-N40, L-N39 become held). Knit 1 row to COL.
* RC321 (COL): Knit 1 row to COR.
* RC322 (COR): Bring 2 needles from the neck edge of the working needles into HOLD position. Knit 1 row to COL.
* RC323 (COL): Knit 1 row to COR.
* RC324 (COR): Bring 2 needles from the neck edge of the working needles into HOLD position. Knit 1 row to COL.
* RC325 (COL): Knit 1 row to COR.
* RC326 (COR): Bring 2 needles from the neck edge of the working needles into HOLD position. Knit 1 row to COL.
* RC327 (COL): Knit 1 row to COR.
* RC328 (COR): Knit 1 row to COL.
* *(All 40 (M: 46, L: 51, XL: 57) Left Shoulder stitches are now in HOLD position.)*
* **Work Right Shoulder (10 rows)**:
* Move carriage to the RIGHT side. Reset RC to 319.
* RC319 (COR): With carriage on RIGHT, knit across to the (S: N40, M: N46, L: N51, XL: N57) needle from the Left. Place all remaining needles from the Left of this point (S: 106, M: 114, L: 122, XL: 130 stitches) onto HOLD position. Do NOT wrap held stitches.
* Set carriage to **Partial Knit** (or HOLD position on machine).
* RC319 (COR): Knit 1 row to COL.
* RC320 (COL): Bring 2 needles from the neck edge of the **working needles** into HOLD position. Knit 1 row to COR.
* RC321 (COR): Knit 1 row to COL.
* RC322 (COL): Bring 2 needles from the neck edge of the working needles into HOLD position. Knit 1 row to COR.
* RC323 (COR): Knit 1 row to COL.
* RC324 (COL): Bring 2 needles from the neck edge of the working needles into HOLD position. Knit 1 row to COR.
* RC325 (COR): Knit 1 row to COL.
* RC326 (COL): Bring 2 needles from the neck edge of the working needles into HOLD position. Knit 1 row to COR.
* RC327 (COR): Knit 1 row to COL.
* RC328 (COL): Knit 1 row to COR.
* *(All 40 (M: 46, L: 51, XL: 57) Right Shoulder stitches are now in HOLD position.)*
* **Finishing Shoulders**: After both shoulders are completely in HOLD position (RC328), bind off all active working stitches (the shoulder stitches) using a latch tool bind-off. Remove all held stitches from the machine onto waste yarn or a stitch holder for later neckband construction. *(The held needles for the neckline are not returned to work in this panel; they form the raw edge of the boat neck opening.)*
## FRONT_PANEL
**Stitch Counts**: S: 186 (M: 206, L: 224, XL: 244) stitches
**Row Counts**:
* Hem: 10 rows (2 cm)
* Body: 182 rows (35 cm)
* Armhole (including neck shaping): 110 rows (21 cm)
* **Total**: 302 rows (58 cm)
1. **Preparation**: Set up machine for stockinette. Use waste yarn to cast on all needles for your size (S: 186, M: 206, L: 224, XL: 244). Knit 10 rows with waste yarn.
2. **Ravel Cord & Hem**:
* RC000 (COR): Knit 1 row with ravel cord at T5-6.
* RC001 (COL): Change to main yarn at T5-6. Knit 10 rows.
* RC010 (COL): Re-hang the loops from the ravel cord onto the needles, forming a clean turned hem. Place weights appropriately. Set RC to 000.
3. **Body**:
* RC000 (COL): Knit 182 (M: 182, L: 182, XL: 182) rows straight in stockinette, maintaining T5-6. Keep weights moving up.
* *(Current RC = 182 for all sizes)*
4. **Armhole Shaping**:
* RC183 (COL): At the start of the next row, mark the armhole start using a stitch marker on each side. Knit 92 (M: 92, L: 92, XL: 92) rows straight for the armhole opening, maintaining T5-6.
* *(Current RC = 274 for all sizes)*
5. **Front Neck Shaping (18 rows for 3.5 cm depth)**:
* **Stitches for Neckline**: S: 106 (M: 114, L: 122, XL: 130) stitches.
* **Stitches for Each Shoulder**: S: 40 (M: 46, L: 51, XL: 57) stitches.
* **Divide for Shaping**:
* RC275 (COL): With carriage on LEFT, knit across to the (S: N40, M: N46, L: N51, XL: N57) needle from the Right. Place all remaining needles from the Right of this point (S: 106, M: 114, L: 122, XL: 130 stitches) onto HOLD position. Do NOT wrap held stitches.
* Set carriage to **Partial Knit** (or HOLD position on machine).
* **Work Left Shoulder (18 rows)**:
* RC275 (COL): Knit 1 row to COR.
* RC276 (COR): Bring 1 needle from the neck edge of the **working needles** into HOLD position. Knit 1 row to COL.
* RC277 (COL): Knit 1 row to COR.
* RC278 (COR): Bring 1 needle from the neck edge of the working needles into HOLD position. Knit 1 row to COL.
* *(Repeat bringing 1 needle to HOLD every 2nd row for a total of 8 times, for 16 rows of shaping)*
* RC291 (COL): Knit 1 row to COR.
* RC292 (COR): Bring 1 needle from the neck edge of the working needles into HOLD position. Knit 1 row to COL.
* RC293 (COL): Knit 1 row to COR.
* RC294 (COR): Bind off the remaining (S: 32, M: 38, L: 43, XL: 49) Left Shoulder stitches using a latch tool.
* *(Note: This creates a steeper, more defined boat neck than the back. The last 2 rows complete the 18 rows of shaping for the front.)*
* **Work Right Shoulder (18 rows)**:
* Move carriage to the RIGHT side. Reset RC to 275.
* RC275 (COR): With carriage on RIGHT, knit across to the (S: N40, M: N46, L: N51, XL: N57) needle from the Left. Place all remaining needles from the Left of this point (S: 106, M: 114, L: 122, XL: 130 stitches) onto HOLD position. Do NOT wrap held stitches.
* Set carriage to **Partial Knit** (or HOLD position on machine).
* RC275 (COR): Knit 1 row to COL.
* RC276 (COL): Bring 1 needle from the neck edge of the **working needles** into HOLD position. Knit 1 row to COR.
* RC277 (COR): Knit 1 row to COL.
* RC278 (COL): Bring 1 needle from the neck edge of the working needles into HOLD position. Knit 1 row to COR.
* *(Repeat bringing 1 needle to HOLD every 2nd row for a total of 8 times, for 16 rows of shaping)*
* RC291 (COR): Knit 1 row to COL.
* RC292 (COL): Bring 1 needle from the neck edge of the working needles into HOLD position. Knit 1 row to COR.
* RC293 (COR): Knit 1 row to COL.
* RC294 (COL): Bind off the remaining (S: 32, M: 38, L: 43, XL: 49) Right Shoulder stitches using a latch tool.
* **Finishing Shoulders**: After both shoulders are bound off (RC294), remove all held stitches from the machine onto waste yarn or a stitch holder for later neckband construction. *(The held needles for the neckline are not returned to work in this panel; they form the raw edge of the boat neck opening.)*
## SLEEVES
**N/A - This is a tank top and does not have sleeves.**
*Armhole finishing instructions are provided in the FINISHING section.*
## NECKBAND
This method creates a simple 1x1 rib band, using the ribber if available, or a simple stockinette band on the main bed.
1. **Preparation**: Carefully re-hang all live stitches from the back neck and front neck onto the main bed, centered on the machine. Use a 1x1 transfer tool to pick up 1 stitch for every row along the shaped edges. Ensure an even number of stitches if using 1x1 rib.
* **Approximate Stitches to Re-hang (S/M/L/XL)**:
* Back Neck: (Shoulder stitches x 2) + (Neckline width in cm x 3.8 stitches/cm) approx = 40x2 + 28x3.8 = 80 + 106 = 186.
* Front Neck: (Shoulder stitches x 2) + (Neckline width in cm x 3.8 stitches/cm) approx = 40x2 + 28x3.8 = 80 + 106 = 186.
* Adjust pickup ratio as needed for a flat, even band. Aim for a total stitch count that slightly gathers the neckline.
* *Let's aim for a total around (S: 200, M: 220, L: 240, XL: 260) stitches picked up.*
2. **Ribber Method (Recommended for stretch)**:
* Set up ribber in full needle rib (or 1x1).
* Re-hang stitches alternating between main bed and ribber needles.
* Set both main bed and ribber tension dials to T3-4 (Main) / T2-3 (Ribber).
* Knit 8-10 rows of 1x1 rib.
* Transfer all ribber stitches to the main bed using a transfer tool (if not already in use).
* Increase main bed tension slightly (T6-7).
3. **Main Bed Method (Alternative)**:
* Re-hang all stitches onto the main bed only.
* Set main bed tension to T3-4.
* Knit 4-6 rows of stockinette.
* Increase tension slightly (T6-7).
4. **Bind Off**:
* With carriage on LEFT or RIGHT, bind off all stitches using a stretchy latch tool bind-off. This creates a neat and flexible edge.
* Alternatively, use a sewn bind-off for a clean, professional finish.
## FINISHING
1. **Steam Blocking**: Gently remove all panels from the machine. Pin all pieces (front, back) to a flat surface or a sweater board, matching the schematic dimensions. Steam gently using a steam iron or steamer, being careful not to stretch the fabric excessively. Allow to cool and dry completely. This relaxes the stitches and helps the garment hang properly.
2. **Shoulder Seams**: Join the shoulder seams using the preferred grafting method (e.g., mattress stitch or backstitch for strength). Ensure shoulder edges align perfectly.
3. **Side Seams**: Join the side seams from the hem up to the armhole. Use a mattress stitch for an invisible and strong seam.
4. **Armhole Bands**:
* Re-hang stitches along each armhole edge onto the main bed. Aim for an even pickup ratio (e.g., 3 stitches for every 4 rows) to prevent gaping or puckering.
* Set main bed tension to T3-4.
* Knit 4-6 rows of stockinette.
* Bind off using a stretchy latch tool bind-off or a sewn bind-off.
* Repeat for the second armhole.
5. **Final Touches**:
* Weave in all remaining yarn ends securely using a tapestry needle.
* Give the entire garment a final light steam block to settle seams and bands.
## ABBREVIATIONS
* **RC**: Row Counter
* **COL**: Carriage On Left
* **COR**: Carriage On Right
* **sts**: stitches
* **cm**: centimeter(s)
* **in**: inch(es)
* **N**: Needle
* **T**: Tension (dial setting)
* **BO**: Bind Off
* **RH**: Re-hang
* **PTU**: Part Tension Unit
* **HOLD**: Holding Position (needles held out of work)
Disclaimer: This pattern was generated by AI and should be reviewed for accuracy before use. While we strive for quality, AI-generated content may contain errors. Please verify measurements, stitch counts, and instructions before beginning your project. Generated by purlJam.uk
Access your pattern anytime
Bookmark this page to access your pattern anytime