Type
Machine Knitting
Difficulty
advanced
Category
pullover
AI Thinking Process
Planning
Verification
Pattern
Square-Drop Intarsia Sleeve Machine Pullover
Beginner single-bed drop-shoulder pullover with square body panels and sew-in sleeves featuring an intarsia motif.
MACHINE_SETUP
- Machine: Standard-gauge or mid-gauge single-bed knitting machine (4.5 mm or 6–7 mm needle pitch). Ribber is not required.
- Bed: Main bed only. All needles in working position (WP) unless instructed to hold (HP) or non-working (NWP).
- Cast-on: Waste-yarn cast-on + ravel cord. Hang cast-on comb and 2–4 claw weights evenly after first 4–6 rows of waste; move weights up every 20–30 rows.
- Carriage: Stockinette (both part buttons out / closed cam). Set row counter (RC) to 000 at start of each piece after waste/ravel.
- Tension dial (TD): For worsted, begin at TD 7–8. Knit a tension swatch; adjust so gauge matches after steaming. Use same TD for main color (MC) and contrast color (CC) unless CC is a different fiber—then re-swatch.
- Intarsia: Use intarsia carriage if available, or manual intarsia (knit by hand-feeding each color block, crossing yarns at joins). No punchcard/electronics required for body; follow attached chart for sleeves only.
- Tools: Transfer tool, latch tool, decker comb or garter bar (optional for hems), ravel cord, claw weights, tapestry needle, steam iron, blocking wires or sweater board.
MATERIALS
- Yarn: Worsted weight (approx. 100 m / 100 g).
- MC (main body): 700 (800, 900, 1000) g
- CC (intarsia motif + optional neck stripe): 80 (90, 100, 110) g
- Waste yarn and ravel cord.
- Matching sewing thread optional for shoulder reinforcement.
GAUGE_AND_TENSION
- Stitch gauge: 14 sts = 5 cm (28 sts = 10 cm / 4")
- Row gauge: 19 rows = 5 cm (38 rows = 10 cm / 4")
- Tension: TD 7–8 (confirm with your machine and yarn).
- Swatch: Cast on 40 sts over waste/ravel. Knit 60 rows MC at working TD. Remove on waste. Steam lightly on wrong side without pressing hard. Measure central 10 cm horizontally and vertically. Adjust TD up (looser/fewer sts) or down (tighter/more sts) until exact. Re-measure after 24 h rest if yarn relaxes.
SCHEMATIC_AND_SIZES
Sizes: S (M, L, XL)
To fit bust 34–36 (38–40, 42–44, 46–48)" / 86–91 (96–102, 107–112, 117–122) cm
Finished measurements:
- Bust circumference: 43¼ (47¼, 51¼, 55)" / 110 (120, 130, 140) cm
- Body length (hem to shoulder): 23¾ (24½, 25¼, 26)" / 60 (62, 64, 66) cm
- Armhole depth (square drop): 8¾ (9½, 10¼, 11)" / 22 (24, 26, 28) cm
- Sleeve length (cuff to underarm): 17¾ (18, 18½, 18½)" / 45 (46, 47, 47) cm
- Upper sleeve width: 17¾ (18½, 19¼, 20½)" / 45 (47, 49, 52) cm
- Cuff width: 8 (8½, 9, 9¾)" / 20 (22, 23, 25) cm
- Neck width: 7 (7½, 7¾, 8)" / 18 (19, 20, 20.5) cm
(Schematic: rectangle back & front; two tapered rectangles for sleeves; crew neck.)
BACK_PANEL
- Cast on 154 (168, 182, 196) sts with waste yarn. Hang comb + weights. Knit 8–10 rows waste. Knit 1 row ravel cord. COR.
- RC000. Change to MC at TD working. Knit 19 rows (hem depth ≈ 5 cm). COR.
Hem option (recommended): With transfer tool or garter bar, pick up the first MC row (the stitches above ravel) and hang them onto the corresponding needles in front of the current loops (2 sts per needle). Knit 1 row firmly to close hem. Reset RC000. (Beginner alternate: skip rehang and leave rolled edge.) - RC000–209 (217, 225, 233): Continue in stockinette straight. Move weights up every 25–30 rows. End COR at RC209 (217, 225, 233). Total main fabric after hem ≈ 55 (57, 59, 61) cm.
- Shoulder & neck finish (no shaping—square top):
- Place center 50 (52, 54, 56) sts on waste yarn or garter bar for back neck.
- Knit each shoulder 52 (58, 64, 70) sts separately for 2 rows, then scrap off on waste yarn (or bind off with latch tool around gate pegs for a firm edge).
Note carriage side and label piece “Back.”
Stitch check: 52 + 50 + 52 = 154 ✓ (same logic larger sizes).
FRONT_PANEL
- Work identical to Back through hem and body until RC181 (189, 197, 205). COR. (This leaves ≈ 28 rows / 7.5 cm for neck depth.)
- Neck shaping (hold method):
- COR. Set carriage to hold.
- Neck width 50 (52, 54, 56) sts total.
- Place right-hand 52 (58, 64, 70) shoulder sts into HP (or knit them onto waste and remove).
- Place center 50 (52, 54, 56) sts into HP.
- Remaining left shoulder 52 (58, 64, 70) sts in WP.
- Left neck/shoulder (begin COR):
- At neck edge, put 4 sts into HP on next 2 rows (carriage side toward neck), then 2 sts into HP every other row 3 (3, 4, 4) times, then 1 st into HP every other row 5 (6, 5, 6) times until all neck decreases are taken and only shoulder sts remain in WP.
- When shaping complete, knit straight on remaining shoulder sts to RC209 (217, 225, 233)—same total rows as Back. Scrap off shoulder on waste.
- Right neck/shoulder:
- Reattach yarn at neck edge with COL (or COR as needed). Return right shoulder needles from HP to WP. Mirror the same hold sequence (always decrease on neck edge). Knit to same final RC and scrap off.
- Front neck sts remain on waste or can be left in HP for later pick-up. Label “Front.”
Row check: Neck shaping occupies 28 rows; body before neck + 28 = total back length rows ✓.
SLEEVES
(Make 2. Intarsia motif centered on sleeve.)
- Cast on 56 (60, 64, 68) sts with waste + ravel. Hang comb/weights. COR.
- RC000. MC, knit 19 rows for cuff. Rehang first MC row for double cuff hem (same method as body) or leave rolled. Reset RC000 after hem close.
- Increase plan (both sides):
- Final top stitch count: 124 (130, 136, 144) sts.
- Stitches to increase: 68 (70, 72, 76) total → 34 (35, 36, 38) sts each side.
- Work increases by bringing 1 new needle to WP at each edge (opposite carriage first, then both ends as convenient).
- Interval: Increase 1 st each side every 5 rows 34 (35, 36, 38) times.
- RC checkpoints: Inc at RC005, 010, 015… until all increases done (final inc around RC170 (175, 180, 190)).
- After increases complete, knit straight if needed to total sleeve length RC171 (175, 179, 179). End COR.
- Intarsia placement:
- Begin attached chart when sleeve measures approximately 8–10 cm above cuff (around RC030–038), centering the motif on the current stitch count.
- Follow the Attached Stitch Chart for all color changes.
- When chart rows are finished, resume solid MC to end of sleeve.
- Scrap off all 124 (130, 136, 144) sts on waste yarn. Label sleeves.
Increase math (S example): 56 + (34 × 2) = 124 ✓. Same for other sizes.
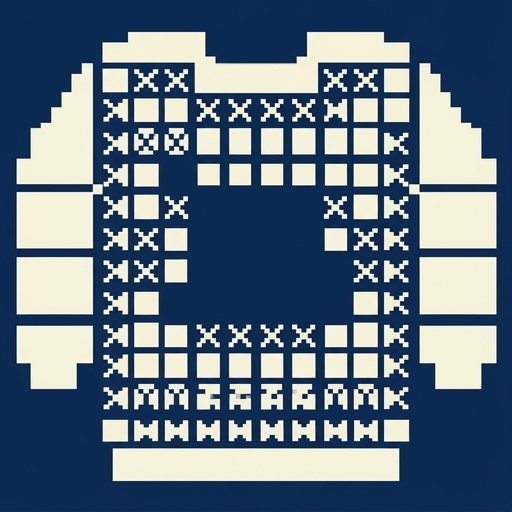
ATTACHED STITCH CHART
- Use the separate attached chart panel supplied with this pattern for the visual intarsia grid. Do not rely on any inline grid—none is printed here.
- Placement: The chart panel is the companion sheet labeled “Sleeve Intarsia Chart – Square-Drop Pullover.” Place it beside your machine while knitting sleeves.
- How to read (machine knitting):
- Each chart row = one carriage pass. Read right-to-left on RC odd rows (COR→COL) and left-to-right on RC even rows (COL→COR), or follow the arrow markings on the attached sheet.
- Work the chart in the center of the sleeve stitches; stitches outside the chart width remain MC.
- Color changes: Manual intarsia or intarsia carriage. At every color join, cross the two yarns to avoid holes. Secure long floats every 3–4 sts if your machine requires.
- Yarn management: Prepare separate small butterflies or bobbins of CC for each color block. Estimate 80–110 g CC total for both sleeves. When chart ends, break CC, weave ends in later, and continue MC.
- Stitch-count integration: Chart width is designed for the center 40–50 sts. As sleeve increases occur, always keep the motif centered (shift starting needle outward by half the increase when necessary). Total sleeve stitch count at any RC still follows the increase schedule above; the chart does not add or subtract stitches.
NECKBAND
- Join both shoulders with mattress stitch or by rehanging front & back shoulder sts onto machine (right sides together or wrong sides for decorative ridge) and binding off together with latch tool.
- With MC (or CC stripe), rehang entire neckline onto machine needles at gauge tension: pick up back neck 50 (52, 54, 56) sts from waste, then evenly pick up left front neck slope ≈ 28–32 sts, front neck base, right front slope same number—total approximately 110 (116, 122, 128) sts. Distribute evenly; do not stretch.
- Hang weights carefully. RC000. Knit 12–16 rows at TD one number tighter for a firm band (or work 1×1 mock rib by transferring every other stitch to adjacent needle and leaving empty needles in WP for ladder rib).
- Bind off loosely with latch-tool bind-off around gate pegs, or use sewn bind-off (tapestry needle through open loops). Remove from machine.
FINISHING
- Steam all pieces lightly on wrong side to measurements; do not flatten intarsia. Allow to dry fully.
- Shoulder joins: already completed in neckband step (or mattress-stitch if you scrapped shoulders).
- Side seams: Mattress-stitch back to front from hem to armhole mark (measure armhole depth 22 (24, 26, 28) cm down from shoulder).
- Sleeve seams: Mattress-stitch each sleeve from cuff to top.
- Set in sleeves: With mattress stitch, sew sleeve top bound-off/scrap edge into the square armhole opening, matching center of sleeve to shoulder seam and ends to side-seam top. Ease evenly—drop-shoulder has no sleeve cap curve.
- Weave in all ends, especially intarsia joins on WS.
- Final block: Steam assembled sweater or wet-block on a sweater board / blocking wires to finished measurements. Dry flat.
- Optional: Light steam again after 24 h.
ABBREVIATIONS
| Abbr. | Meaning |
|---|---|
| CC | Contrast color |
| COL | Carriage on left |
| COR | Carriage on right |
| HP | Holding position |
| MC | Main color |
| NWP | Non-working position |
| RC | Row counter |
| sts | Stitches |
| TD | Tension dial |
| WP | Working position |
| dec | Decrease |
| inc | Increase |
| rep | Repeat |
Disclaimer: This pattern was generated by AI and should be reviewed for accuracy before use. While we strive for quality, AI-generated content may contain errors. Please verify measurements, stitch counts, charts, and instructions before beginning your project. Generated by purlJam.uk
Love this pattern?
Save this pattern to your free PurlJam libraryAccess your pattern anytime
Bookmark this page to access your pattern anytime