Type
Knitting
Difficulty
intermediate
Category
hat
AI Thinking Process
Planning
Verification
Pattern
The Hero's Forest Cap
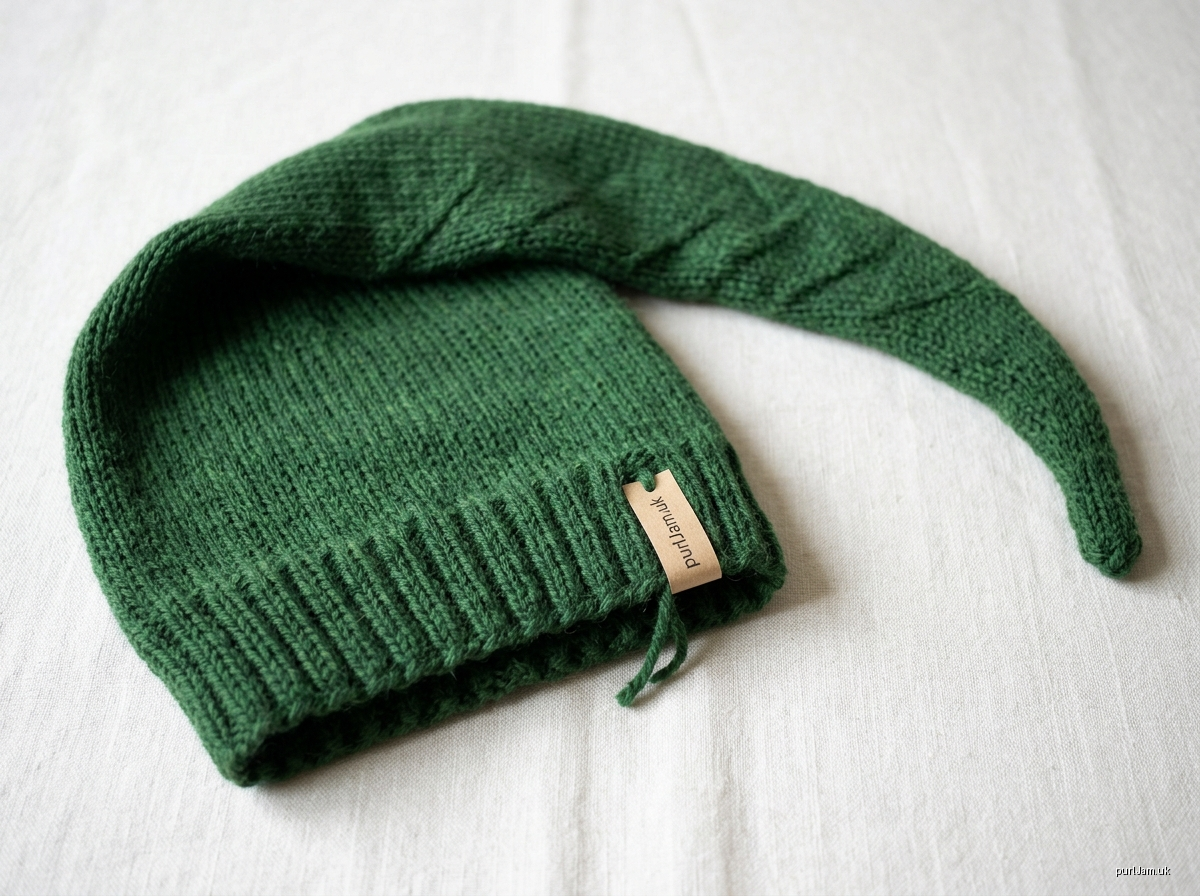
A fan-made knitted stocking cap inspired by the long green hat from the classic adventure game. This is an interpretation, not an official pattern. Proportions approximate the remake's look: a snug band and a long tapered tail that falls down the back.
Style: Shaped-crown stocking cap. This is an adaptation of the template's shaped-crown construction, with a long gradual taper replacing a brim. Construction: Seamless, in the round, bottom-up. Skill level: Intermediate. The knitting itself is beginner-friendly, but the long taper requires accurate round counting and working to gauge.
Sizes
Instructions are written as Baby (Child, Adult S/M, Adult L).
| Baby | Child | Adult S/M | Adult L | |
|---|---|---|---|---|
| Head circumference | 16 in (41 cm) | 18 in (46 cm) | 21 in (53 cm) | 23 in (58 cm) |
| Band circumference | 14.4 in | 16.8 in | 19.2 in | 21.6 in |
| Negative ease | 1.6 in | 1.2 in | 1.8 in | 1.4 in |
| Crown depth (cast-on to first decrease) | 3 in | 4 in | 5 in | 5.5 in |
| Tail length | 8.5 in | 10.25 in | 14 in | 16 in |
| Total length, laid flat | 11.5 in | 14.25 in | 19 in | 21.5 in |
Materials
- Yarn: Worsted weight (4) wool or wool blend in Forest Green, approx. 100 (140, 190, 230) yd / 91 (128, 174, 210) m.
- Band needles: US 6 (4 mm) 16 in circular. For Baby, use a 12 in circular, DPNs, or magic loop.
- Body needles: US 7 (4.5 mm) 16 in circular, plus a set of US 7 DPNs (or a long circular for magic loop).
- Notions: 6 stitch markers, with 1 in a contrasting color for beginning of round (BOR), and a tapestry needle.
Gauge
20 sts × 28 rnds = 4 in (10 cm) in stockinette, worked in the round on US 7, after blocking.
Gauge matters here. If your row gauge is off, the tail length will change noticeably.
Abbreviations
- k: knit
- p: purl
- k2tog: knit 2 together (1 st decreased)
- pm: place marker
- sm: slip marker
- rnd(s): round(s)
- BOR: beginning of round
- st(s): stitch(es)
Instructions
Band
- With US 6 needle, cast on 72 (84, 96, 108) sts using a stretchy cast-on (long-tail works well).
- Join in the round without twisting. Place the BOR marker.
- Rib rnd: *k1, p1; rep from * to end.
- Repeat the rib rnd until the band measures 1.5 in (4 cm) from the cast-on edge.
Body
- Change to US 7 needle.
- Setup rnd: *k12 (14, 16, 18), pm; rep from * 5 more times. The last marker placed is the BOR. You now have 6 sections of 12 (14, 16, 18) sts. (6 × 12 = 72, 6 × 14 = 84, 6 × 16 = 96, 6 × 18 = 108 ✓)
- Knit every rnd until the piece measures 3 (4, 5, 5.5) in from the cast-on edge.
Tail Shaping
The long, gentle taper is what gives the cap its signature droop. Switch to DPNs or magic loop when the stitches no longer fit comfortably on the circular.
Dec Rnd: *k to 2 sts before marker, k2tog, sm; rep from * to end. (6 sts decreased)
Baby and Child: Work the Dec Rnd, then knit 5 rnds plain. Repeat this 6-rnd sequence 10 (12) times total.
Adult S/M and L: Work the Dec Rnd, then knit 6 rnds plain. Repeat this 7-rnd sequence 14 (16) times total.
Running stitch counts after each Dec Rnd:
- Baby: 66, 60, 54, 48, 42, 36, 30, 24, 18, 12 (10 dec rnds; 72 − 60 = 12 ✓)
- Child: 78, 72, 66, 60, 54, 48, 42, 36, 30, 24, 18, 12 (12 dec rnds; 84 − 72 = 12 ✓)
- Adult S/M: 90, 84, 78, 72, 66, 60, 54, 48, 42, 36, 30, 24, 18, 12 (14 dec rnds; 96 − 84 = 12 ✓)
- Adult L: 102, 96, 90, 84, 78, 72, 66, 60, 54, 48, 42, 36, 30, 24, 18, 12 (16 dec rnds; 108 − 96 = 12 ✓)
Tail lengths:
- Baby: 60 rnds ≈ 8.6 in
- Child: 72 rnds ≈ 10.3 in
- Adult S/M: 98 rnds = 14 in
- Adult L: 112 rnds = 16 in
Final rnd: *k2tog; rep from * around, removing markers. (12 → 6 sts ✓)
Close the Tip
- Cut the yarn, leaving an 8 in tail.
- Thread the tail through the remaining 6 sts and pull tight.
- Pass the tail to the inside and secure it.
Colorwork Note
The original cap is a solid color, so no colorwork is used. If you'd like a contrast stripe, work it in the body section, where the fabric sits flat below the decreases. All cast-on counts are multiples of 6 and 12, so 2-, 3-, 4-, or 6-stitch motifs repeat evenly in every size. Keep floats under 5 sts.
Finishing
- Weave in the cast-on tail.
- Wet-block the band and body over a balloon inflated to your head size. Let the tail hang freely while it dries so it develops a natural downward drape.
- Optional: For extra swing, tuck a few grams of fiberfill or a small glass-bead pouch into the tip before closing it.
The game cap has no pompom, ties, or brim, so none are included. For the Baby size, add 10 in (25 cm) i-cord ties at the band edge if desired.
Notes
- Tail length: To make the tail longer or shorter, add or remove plain rnds between Dec Rnds. Each extra plain rnd per repeat adds about 0.14 in × the number of repeats.
- Fit: The band has negative ease so it grips the head and the long tail does not tug the cap off.
Disclaimer: This pattern was generated by AI and should be reviewed for accuracy before use. While we strive for quality, AI-generated content may contain errors. Please verify measurements, stitch counts, charts, and instructions before beginning your project. Generated by purlJam.uk
Love this pattern?
Save this pattern to your free PurlJam libraryAccess your pattern anytime
Bookmark this page to access your pattern anytime