Type
Knitting
Difficulty
intermediate
Category
custom
AI Thinking Process
Planning
Verification
Pattern
Two-Needle Scrunchie Bag
Easy gathered pouch • knitted flat
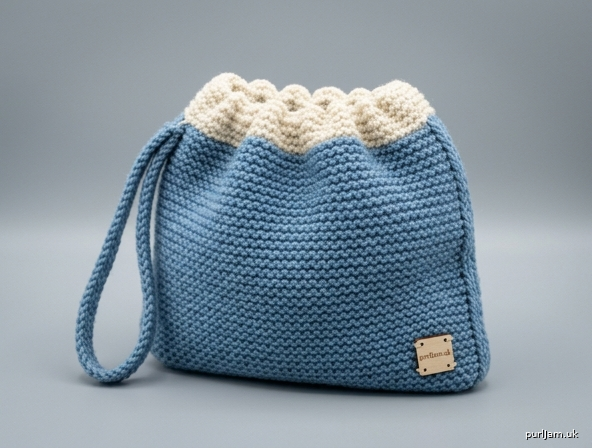
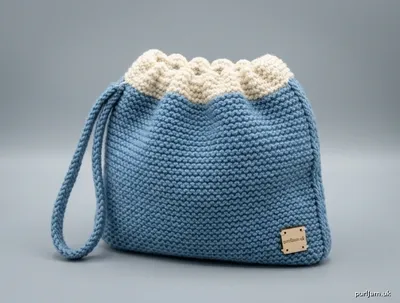
A small, squishy pouch knitted entirely on two straight needles. You knit one garter-stitch rectangle, fold it, sew the sides, and thread elastic through a casing so the top scrunches closed like a hair scrunchie. Stretch the opening to pop in keys, cards, lip balm, AirPods, or a slim phone. Beginner-friendly: knit every row, no shaping, no knitting in the round.
Skill level: Beginner
Finished Measurements
One size (after seaming, before elastic)
- Width: 8¾" (22 cm)
- Height: 8" (20.5 cm), including casing
- Opening circumference, unggathered: 17½" (44.5 cm)
- Opening after elastic: about 8½" (21.5 cm) around, and it stretches to put items in
The knitted rectangle measures 8¾" (22 cm) wide × 16" (40.5 cm) long before folding.
Materials
Yarn: Worsted weight (CYC 4), about 140 yd / 130 m. One standard skein (180–220 yd) is plenty. Smooth wool, acrylic, or a wool blend all work. Avoid very dark, highly textured, or novelty yarns for a first project — they hide stitches.
Needles: US 8 / 5 mm straight needles (dos agujas), or size needed to get gauge. A circular needle used flat is fine.
Notions:
- Tapestry needle
- Scissors
- 2 locking stitch markers or safety pins (optional, to mark the casing)
- ¼" (6 mm) braided elastic, 9" (23 cm) long
- Safety pin or bodkin, for threading elastic
- Sewing needle and strong thread (to join the elastic)
- Optional wrist strap: same yarn, plus 2 extra yards
Gauge
18 stitches and 36 rows = 4" (10 cm) in garter stitch, after a light steam or pat-block.
Garter stitch is knit every row. Count 18 ridges as 36 rows (1 ridge = 2 rows).
Check before you start: Cast on 22 stitches, knit 40 rows, and measure the center 18 stitches / 36 rows. If your swatch is wider than 4", go down a needle size. If it is narrower, go up a size. For this bag a little extra width is harmless; a much denser fabric will feel stiff.
Abbreviations (US)
| Abbrev. | Meaning |
|---|---|
| BO | bind off |
| CO | cast on |
| k | knit |
| RS | right side |
| st(s) | stitch(es) |
| WS | wrong side |
Garter stitch: knit every row.
Pattern Notes
- Worked flat on two needles. No circular knitting.
- Both sides of garter stitch look the same, so there is no true right or wrong side until you seam.
- Instructions use measurements first. Row counts are given so you can double-check.
- Casing rows at each end are part of the rectangle — do not treat them as extra fabric beyond the 16" length.
- Leave a long tail (about 24" / 60 cm) at both cast-on and bind-off to seam the sides.
- Elastic is what makes it a scrunchie bag. Do not skip it or the top will gape.
Optional contrast casing: Work the first 1" and last 1" in a second color. Cut the main color and join the contrast at those points, leaving tails to weave in.
Bag Body
With US 8 / 5 mm needles and worsted yarn, leaving a 24" (60 cm) tail, CO 40 sts. (40 sts ÷ 18 sts × 4 in = 8¾ in wide ✓)
Casing (first end): Knit 10 rows. Piece measures about 1" (2.5 cm) from the cast-on edge. (10 rows ÷ 36 rows × 4 in ≈ 1⅛ in ✓) Optional: clip a marker at the end of this section so you can find the fold line later.
Main section: Continue knitting every row until the piece measures 15" (38 cm) from the cast-on edge. That is 1" casing + 14" body. (15 in ÷ 4 in × 36 rows = 135 rows from CO ✓)
Casing (second end): Knit 10 more rows. Piece measures 16" (40.5 cm) from the cast-on edge. (16 in ÷ 4 in × 36 rows = 144 rows total ✓)
Leaving a 24" (60 cm) tail, BO all sts knitwise. Cut yarn.
You now have a rectangle 8¾" (22 cm) wide × 16" (40.5 cm) long, with about 1" of casing fabric at each short end.
Finishing
1. Fold and seam the sides
Lay the rectangle flat. Fold it in half so the cast-on edge meets the bind-off edge. The fold is the bottom of the bag. Each half is 8" (20.5 cm) tall. (16 in ÷ 2 = 8 in ✓)
The two casing sections now sit together at the top opening.
Seam each side from the bottom fold up to the start of the casing (stop 1" / 2.5 cm below the top edge). Do not sew the casing closed at the sides — each top edge must stay free so it can fold down.
Use the long tails. For beginners, whip stitch just inside the edge is plenty strong. If you are comfortable with it, mattress stitch on garter (picking up the bump of each ridge) gives a flatter seam.
You should have an open pouch, 8¾" (22 cm) wide × 8" (20.5 cm) tall, with 1" free at each top edge. (8¾ + 8¾ = 17½ in opening ✓)
Turn the bag so the seams are on the inside.
2. Make the scrunchie casing
On the front, fold the top edge 1" (2.5 cm) to the inside, using the first 10 rows as the fold. Pin.
On the back, fold the top edge 1" (2.5 cm) to the inside the same way.
With yarn and a tapestry needle, sew each hem down along the inner edge, catching the ridge of the fold. Leave a 1" (2.5 cm) gap on one side (near a side seam) so you can insert the elastic. You are sewing two separate hems — front and back — that together form one channel around the opening.
3. Insert the elastic
Cut ¼" (6 mm) elastic 9" (23 cm) long.
Fasten a safety pin to one end. Starting at the gap, thread the elastic through the front casing, around, and through the back casing, so it travels all the way around the opening and comes back out the same gap.
Overlap the elastic ends by ½" (1.3 cm). The finished elastic loop is 8½" (21.5 cm). (9 − ½ = 8½ in ✓) Sew the overlap firmly with sewing thread (a box of small stitches, or several passes). Stretch the opening once to check that the elastic is not twisted.
Tuck the join into the casing. Sew the 1" gap closed.
The 17½" opening now gathers in to about 8½" and will stretch open in use. (8½ in is roughly half of 17½ in — a firm scrunchie gather ✓)
4. Weave in ends
Weave remaining yarn tails along the seams on the inside. Trim.
Optional Wrist Strap
A simple garter strap turns the pouch into a wristlet.
CO 6 sts. Knit every row until the strap measures 12" (30.5 cm). (6 sts is about 1¼ in wide at this gauge ✓) BO. Weave in those two tails, or use them to sew.
Sew one end of the strap to the inside of the bag at one side seam, just below the casing. Sew the other end to the same side, about 1" (2.5 cm) away, to make a loop; or sew the second end to the opposite side seam for a short handle. Knot and weave in.
Optional Lining (hand-sew)
A fabric lining keeps small items from peeking through the stitches.
Cut a rectangle of cotton 9¼" × 16½" (23.5 × 42 cm) — ½" extra on all sides for seams. Fold in half (short ends together), sew the two side seams with ¼" seam allowance, and press. Nest the lining inside the knitted bag, WS together. Turn under the lining’s top edge so it sits just below the elastic casing, and hand-sew it in place. Do not catch the elastic.
Customizing the Size
Stay in garter stitch and keep the same construction.
| Cast on | Knit until (total length) | Elastic cut length | |
|---|---|---|---|
| Mini coin pouch | 28 sts (about 6¼" / 16 cm wide) | 12" (30.5 cm) | 7" (18 cm) |
| This pattern | 40 sts (8¾" / 22 cm) | 16" (40.5 cm) | 9" (23 cm) |
| Large clutch | 50 sts (about 11" / 28 cm wide) | 18" (45.5 cm) | 11" (28 cm) |
Cast-on check for mini: 28 ÷ 18 × 4 = 6¼ in ✓ Cast-on check for large: 50 ÷ 18 × 4 ≈ 11 in ✓ Always cut elastic to about half the unggathered opening, plus ½" to overlap.
Care
Follow the yarn label. Most acrylics machine-wash cold, gentle, and lie flat to dry. Wool: hand wash, cool water, squeeze (do not wring), and dry flat. Do not put the elastic through a hot dryer.
Disclaimer: This pattern was generated by AI and should be reviewed for accuracy before use. While we strive for quality, AI-generated content may contain errors. Please verify measurements, stitch counts, charts, and instructions before beginning your project. Generated by purlJam.uk
Love this pattern?
Save this pattern to your free PurlJam libraryAccess your pattern anytime
Bookmark this page to access your pattern anytime