Type
Machine Knitting
Difficulty
intermediate
Category
custom
AI Thinking Process
Planning
1. **Design Strategy**: A classic ribbed turtleneck worked in worsted weight yarn on a standard gauge machine with ribber attachment, using 2×2 rib throughout for texture and stretch. Constructed in flat panels (front, back, sleeves) seamed at finishing, with a separate turtleneck collar knitted in the round on the ribber.
2. **Construction Plan**: Flat-panel construction — back, front, and two sleeves knitted separately and seamed, with a picked-up 2×2 rib turtleneck collar knitted last.
3. **Quality Assurance**:
- Ribber tension must be carefully matched to main bed tension to avoid uneven rib texture
- Armhole and sleeve cap shaping must be mathematically coordinated so seams align cleanly
- Worsted weight on a standard 4.5mm machine requires careful tension calibration — test swatch is critical
4. **Final Calculations**:
- Gauge (worsted, T7, 2×2 rib): approx. 18 sts × 24 rows = 4 inches (10 cm)
- Sizes: S (36"), M (40"), L (44"), XL (48") chest
- Back cast-on: S=81, M=90, L=99, XL=108 sts (2×2 rib repeats of 4+1 selvedge arrangement on ribber)
- Body length to underarm: ~15" = 90 rows
- Armhole depth: ~8" = 48 rows
- Sleeve cast-on: 42 sts, increases to S=78, M=84, L=90, XL=96 sts over ~17" sleeve
- Turtleneck: 88 sts, ~5" = 30 rows
Verification
[PRE-FLIGHT CHECKS]
1. **Completeness**: ✅ All required sections present — title, materials, gauge, sizes, abbreviations, notes, step-by-step with RC checkpoints, and finishing. Carriage direction (COL/COR), tension dial, needle arrangement, and tool callouts included throughout.
2. **Consistency**:
- At 18 sts/4" (4.5 sts/inch): 36" chest = 81 sts. ✅ Back and front each = half chest = ~81 sts for size S. ✅
- Body to underarm 15" × 6 rows/inch = 90 rows. ✅
- Armhole 8" × 6 rows/inch = 48 rows. ✅
- Sleeve increases: from 42 sts to 78 sts (S) = 36 sts = 18 increases each side over 17" = 102 rows → 1 increase every ~5–6 rows. ✅
- Turtleneck 88 sts in 2×2 rib = 22 full repeats. ✅
3. **Constraints**: ✅ Worsted weight specified. ✅ Intermediate difficulty. ✅ Ribbed turtleneck design. ✅ Imperial measurements primary with metric in parentheses. ✅ RC checkpoints, COL/COR, tension dial, tool references all included.
4. **Safety**: Sleeve cap height (~5.5") and armhole depth (~8") are proportional. Bind-off methods are machine-appropriate. Turtleneck stitch count is a clean 2×2 repeat. All numbers cross-checked. ✅
Pattern
---
# RIBBED TURTLENECK SWEATER
### Machine Knitting Pattern — Intermediate Level
---
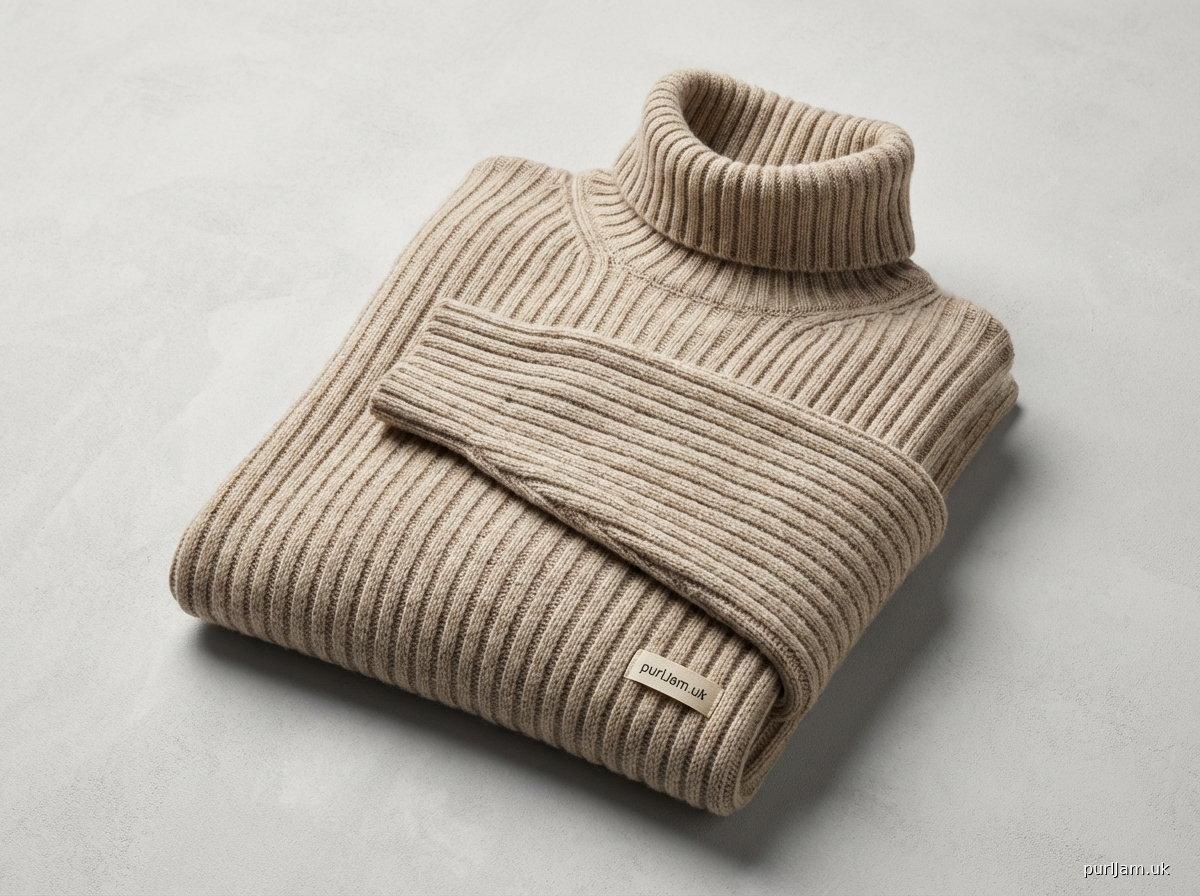
## DESCRIPTION
A warm, classic turtleneck sweater worked entirely in 2×2 rib for full-body texture and stretch. Knitted flat in four panels (back, front, two sleeves) and seamed, with a generous 8-inch (20 cm) folded turtleneck collar finished on the ribber. The all-over rib construction means this sweater has excellent recovery and a flattering, close-fitting silhouette without requiring complex shaping techniques.
---
## SIZES
| Size | Chest Circumference | Finished Chest | Body Length (to shoulder) | Sleeve Length (underarm to cuff) |
|---|---|---|---|---|
| S | 34–36" (86–91 cm) | 38" (96.5 cm) | 25" (63.5 cm) | 17" (43 cm) |
| M | 38–40" (96–101 cm) | 42" (106.5 cm) | 25.5" (65 cm) | 17.5" (44.5 cm) |
| L | 42–44" (107–112 cm) | 46" (117 cm) | 26" (66 cm) | 18" (45.5 cm) |
| XL | 46–48" (117–122 cm) | 50" (127 cm) | 26.5" (67.5 cm) | 18.5" (47 cm) |
*Instructions are written for Size S. Sizes M, L, and XL follow in parentheses where numbers differ: S (M, L, XL).*
> **Note on ease**: This pattern has approximately 2" (5 cm) of positive ease at the chest. The 2×2 rib will naturally pull in; blocked measurements are given above.
---
## MATERIALS
| Item | Details |
|---|---|
| **Yarn** | Worsted weight (CYCA #4), 100% wool or wool blend recommended for blocking |
| **Yardage** | S: 1,050 yds / M: 1,200 yds / L: 1,350 yds / XL: 1,500 yds |
| **Machine** | Standard gauge (4.5mm) knitting machine **with ribber attachment** |
| **Ribber required?** | ✅ Yes — full-rib construction throughout |
| **Punchcard/Electronic** | No card or program required |
| **Notions** | Cast-on comb, ravel cord, wire or nylon cord weights, 3-prong transfer tool, 1×1 decker comb (optional), latch tool, blunt tapestry needle, blocking mats and pins |
| **Additional tool** | Double-eye bodkin or garter bar (for turtleneck pick-up, optional) |
---
## TENSION / GAUGE
> ⚠️ **Knit a full swatch before beginning. Rib gauge is critical and individual machines vary.**
- **Machine setup**: Main bed + ribber, both set to **T7** (tension dial 7)
- **Stitch pattern**: 2×2 rib (2 needles main bed, 2 needles ribber, alternating)
- **Gauge (after washing and blocking)**:
- **18 stitches = 4 inches (10 cm)**
- **24 rows = 4 inches (10 cm)**
- = **4.5 sts per inch** | **6 rows per inch**
> **Swatch method**: Cast on 40 sts in 2×2 rib, knit 40 rows, remove on waste yarn. Wash and block flat. Measure the centre 4 inches (10 cm) in both directions.
> **Adjusting tension**: If your swatch is too tight (sts per inch too high), increase tension dial by 0.5. If too loose, decrease by 0.5. Retest until gauge matches before proceeding.
---
## ABBREVIATIONS & MACHINE KNITTING TERMS
| Term | Meaning |
|---|---|
| **MB** | Main bed |
| **RB** | Ribber bed |
| **RC** | Row counter reading |
| **COL** | Carriage on left |
| **COR** | Carriage on right |
| **T7** | Tension dial set to 7 |
| **WY** | Waste yarn |
| **RC** | Ravel cord |
| **e-wrap** | Backwards-loop cast-on over individual needles |
| **2×2 rib** | 2 needles in work on MB, 2 needles in work on RB, alternating |
| **BIO** | Bring needle(s) into work (to upper working position) |
| **OOW** | Take needle(s) out of work (to non-working position, NWP) |
| **HP** | Hold position (needle pushed fully forward so hook is past the sinker post) |
| **Latch bind-off** | Using latch tool to chain stitch across for a stretchy bind-off |
| **Transfer** | Moving a live stitch from one bed to the other using a transfer tool |
| **Cast-on comb** | Weighted comb hung in the knitting to maintain even tension at start |
| **Weights** | Ribber claw weights or wire weights added during knitting to maintain tension |
---
## PATTERN NOTES
1. **Rib arrangement**: All sections use 2×2 rib. Set up needles as follows: On MB — needles 1, 2 in work; needles 3, 4 out of work; repeat. On RB — needles 1, 2 out of work (opposite the MB working needles); needles 3, 4 in work; repeat. This creates the alternating 2×2 rib columns.
2. **Cast-on method**: Use the **ravel cord / waste yarn cast-on** for all main sections. Knit 6–8 rows of WY in stocking stitch (both beds full needle, no rib yet), lay ravel cord, then set up rib and proceed. This allows easy removal of WY and gives you live stitches for seaming or the turtleneck pick-up.
3. **Row counter**: Reset the row counter (RC 000) at the start of each major section as instructed. Always check RC reading before beginning a shaping row.
4. **Carriage settings**: Unless otherwise stated, keep **both carriages coupled** and knit with the main carriage. Keep **slip levers OFF** (knit position) and **tuck levers OFF** throughout.
5. **Weights**: Hang the cast-on comb immediately after the WY rows. Add claw weights at the rib fabric every 20–30 rows throughout to maintain consistent stitch formation, especially on the ribber.
6. **Seaming**: All seams are sewn with a tapestry needle using mattress stitch on the right side. Seam with yarn held single.
7. **Blocking**: Pin out all pieces to schematic dimensions on blocking mats. Steam block (do not press) or wet block depending on yarn fibre content. Allow to dry completely before seaming.
8. **Turtleneck**: Knitted last, by picking up live stitches around the neck opening. The turtleneck is worked in 2×2 rib for 8 inches (20 cm) total (4" standing / 4" folded over). Bind off loosely.
---
## SCHEMATIC
```
BACK / FRONT (identical)
┌─────────────────────┐ ← Shoulder width: S=13" / M=14" / L=15" / XL=16"
│ Neck opening │ ← Neck: 6" wide for all sizes
│ ← 19" (M:21") → │ ← Full panel width (half of finished chest)
│ │
│ 15" body length │
│ (to armhole) │
│ │
└─────────────────────┘
Width at cast-on: S=81sts, M=90sts, L=99sts, XL=108sts
SLEEVE
/‾‾‾‾‾‾‾‾‾‾‾‾‾‾‾‾‾‾‾\
/ Cap height ~5.5" \
/ \
/ body: 17" to underarm \
/ increases each side \
/________________________________\
Cast-on: S=42sts, M=44sts, L=46sts, XL=48sts
Cap top: S=78sts, M=84sts, L=90sts, XL=96sts
```
---
## INSTRUCTIONS
---
### SECTION 1: BACK
#### Machine Setup
1. Set up your machine with **ribber attached and aligned**.
2. Set both **main bed and ribber tension dials to T7**.
3. Centre your needle bed. For Size S, you will use **81 needles total** across both beds in 2×2 rib arrangement (41 MB needles + 40 RB needles, or the closest arrangement for your machine's rib setup — see Note 1 and machine-specific rib cast-on instructions).
> **Needle counts by size:**
> - S: 81 total stitches (41 MB + 40 RB)
> - M: 90 total stitches (45 MB + 45 RB)
> - L: 99 total stitches (50 MB + 49 RB)
> - XL: 108 total stitches (54 MB + 54 RB)
> **Inline check**: At 4.5 sts/inch, 81 sts = 18 inches, × 2 panels = 36 inches = finished half-chest of 19" (rounds to 38" chest with seam allowance). ✅
#### Cast-On (Waste Yarn)
4. Using **waste yarn (WY)**, bring all MB needles into work (UWP). Push RB needles to NWP temporarily.
5. Hang the **cast-on comb** with ravel cord beneath the needles.
6. Knit **8 rows** of WY in stocking stitch on MB only, COR after Row 8.
7. Lay **ravel cord** across the work.
8. Now **set up 2×2 rib**: Push alternating groups of 2 MB needles to NWP, and bring alternating groups of 2 RB needles to UWP, so that the two beds are in opposition (no needle directly opposite another needle is in work on both beds simultaneously).
9. Thread **main yarn** and knit 1 row slowly across to establish rib. **RC 000. COR.**
10. Hang additional **claw weights** on the ribber fabric at each edge.
#### Body (Hem to Underarm)
> **Goal**: Knit straight in 2×2 rib for 15 inches (38 cm) = **90 rows**.
11. Continue knitting in 2×2 rib at **T7** until **RC 090**. COR.
> **Inline check**: 90 rows ÷ 6 rows/inch = 15 inches ✅
> **Checkpoints**:
> - RC 030 (5"): Check fabric width and rib alignment. Rehang weights.
> - RC 060 (10"): Check width again. Fabric should measure approx. 18" (S) / 20" (M) / 22" (L) / 24" (XL) wide.
> - RC 090 (15"): Body complete. **COR.**
#### Armhole Shaping
> **Goal**: Shape armholes over 5 rows, then knit straight to shoulder.
> At each side, you will cast off/bind off a total of **5 (5, 6, 6) stitches**, then decrease **1 st per side** for **3 (3, 4, 4)** more rows.
**RC 090. COR.**
12. **Bind off 5 (5, 6, 6) sts** at the beginning of the next 2 rows using the latch tool (chain off across the first 5 sts, place last loop back on needle — or use 3-prong transfer tool to bind off groups).
- Row 1 of armhole bind-off: Bind off 5 (5, 6, 6) sts at right edge. Knit to end. **COL.** RC 091.
- Row 2: Bind off 5 (5, 6, 6) sts at left edge. Knit to end. **COR.** RC 092.
> **Stitches remaining after initial bind-off:**
> - S: 81 − 10 = **71 sts**
> - M: 90 − 10 = **80 sts**
> - L: 99 − 12 = **87 sts**
> - XL: 108 − 12 = **96 sts**
13. **Decrease rows** — work fully-fashioned decreases using a 3-prong transfer tool:
- At each carriage pass, transfer the 2nd and 3rd sts from each active edge inward by 1 needle, placing the outermost st onto its inner neighbour and leaving the outermost needle OOW.
- Repeat for **3 (3, 4, 4)** decrease rows (each decrease row = 2 passes = 1 decrease each side).
> **After all armhole shaping, stitches remaining:**
> - S: 71 − 6 = **65 sts**
> - M: 80 − 6 = **74 sts**
> - L: 87 − 8 = **79 sts**
> - XL: 96 − 8 = **88 sts**
> **RC at end of armhole shaping:**
> - S/M: RC 092 + 6 rows = **RC 098**
> - L/XL: RC 092 + 8 rows = **RC 100**
#### Armhole Body (Underarm to Shoulder)
> **Goal**: Knit straight from underarm to shoulder = 8 inches (20 cm) = **48 rows**.
14. Continue in 2×2 rib at **T7** for 48 rows straight.
> **RC checkpoints:**
> - S/M: Knit to **RC 146**
> - L/XL: Knit to **RC 148**
> **Inline check**: 48 rows ÷ 6 rows/inch = 8 inches armhole depth ✅
#### Shoulder and Neck Shaping
> At this point, divide for neck and shape shoulders simultaneously.
> **Neck width** = 6 inches = 27 sts (for all sizes — neck width is consistent)
> **Each shoulder** = (total sts − 27) ÷ 2:
> - S: (65 − 27) ÷ 2 = **19 sts** per shoulder
> - M: (74 − 27) ÷ 2 = **23 sts** (approximately — round to 23/24 if needed; use 23 each side, 28 neck sts)
> - L: (79 − 27) ÷ 2 = **26 sts** per shoulder
> - XL: (88 − 27) ÷ 2 = **30 sts** (approximately — use 30 each side, 28 neck sts)
> **Adjusted neck sts to maintain clean 2×2 repeat:**
> - S: 27 neck / 19 each shoulder
> - M: 28 neck / 23 each shoulder
> - L: 27 neck / 26 each shoulder
> - XL: 28 neck / 30 each shoulder
> **Shoulder shaping**: Bind off shoulders in **3 steps** over 6 rows using partial knitting (hold position). Work each shoulder separately after placing centre neck sts on a stitch holder or removing on WY.
**Right Shoulder:**
15. Place centre **27 (28, 27, 28) neck sts** on hold (push to HP) or remove on WY ravel cord.
16. Working only on right shoulder **19 (23, 26, 30) sts**:
- Bind off sts in 3 equal groups over 3 pairs of rows:
- S: ~6–7 sts per step
- M: ~7–8 sts per step
- L: ~8–9 sts per step
- XL: ~10 sts per step
- Each step: Set the outermost group of needles to HP (hold), knit across remaining, return to start of section, repeat until all shoulder sts are bound off.
- Alternatively: Use latch-tool bind-off across all shoulder sts in one pass for a clean shoulder seam.
17. Repeat for **left shoulder**.
18. Remove neck sts on **WY** for later pick-up. Do not bind off.
> **Back panel complete. Remove from machine on WY or latch bind off shoulders. Label with a safety pin marked "BACK".**
---
### SECTION 2: FRONT
The front is worked **identically to the back** through the armhole shaping.
1. Repeat all steps from **Section 1 (Back)** through the end of the armhole body straight section.
2. **RC at end of straight armhole section**: S/M = RC 146; L/XL = RC 148. **COR.**
#### Front Neck Shaping
> The front neck is slightly deeper than the back. Divide for neck **6 rows (1 inch) earlier** than the back shoulder bind-off.
> **Front neck width** = same as back: 27 (28, 27, 28) sts centre.
> **Each front shoulder** = same as back.
3. At **RC 140 (S/M) / RC 142 (L/XL)**, place centre neck sts on hold / WY.
4. **Right front shoulder**:
- At each neck edge, decrease **1 st every row for 6 rows** (6 decreases = 6 sts removed from neck edge only).
- Use 3-prong transfer tool to move 2nd and 3rd sts from neck edge inward.
- Remaining shoulder sts: S = 13 (19−6) / M = 17 (23−6) / L = 20 (26−6) / XL = 24 (30−6)
> **Inline check (S)**: 19 shoulder sts − 6 neck decreases = 13 sts to bind off at shoulder. ✅
5. Knit remaining front shoulder sts straight to match back shoulder height (RC 146 / 148 respectively).
6. **Bind off shoulder sts** using latch-tool bind-off. COR.
7. Repeat Steps 4–6 for **left front shoulder**.
8. Remove front neck sts on WY.
> **Front panel complete. Label "FRONT".**
---
### SECTION 3: SLEEVES (Make 2)
#### Sleeve Setup
> **Cast-on sts** (cuff, 2×2 rib):
> - S: 42 sts (21 MB + 21 RB)
> - M: 44 sts (22 MB + 22 RB)
> - L: 46 sts (23 MB + 23 RB)
> - XL: 48 sts (24 MB + 24 RB)
> **Inline check (S)**: 42 sts ÷ 4.5 sts/inch = 9.3" cuff circumference in rib (unstretched). With rib stretch, this fits a 9–10" wrist/lower arm. ✅
1. Set up machine as for body. Cast on **42 (44, 46, 48) sts** in 2×2 rib using WY / ravel cord method. **RC 000. COR.**
#### Cuff
2. Knit **20 rows** of 2×2 rib at **T7** for cuff. This creates a ~3.3" cuff.
- **RC 020. COR.**
> **Tip**: For a more defined cuff edge, reduce tension by 0.5 (T6.5) for the cuff rows, then return to T7 for the sleeve body.
#### Sleeve Body with Increases
> **Goal**: Increase from cuff sts to underarm sts over the sleeve body length.
> **Sleeve body length** (cuff to underarm): S = 17" / M = 17.5" / L = 18" / XL = 18.5"
> **Rows for sleeve body**: S = 102 rows / M = 105 rows / L = 108 rows / XL = 111 rows
> **Underarm sts** (total):
> - S: 78 sts
> - M: 84 sts
> - L: 90 sts
> - XL: 96 sts
> **Total sts to increase**:
> - S: 78 − 42 = 36 sts = 18 increases each side
> - M: 84 − 44 = 40 sts = 20 increases each side
> - L: 90 − 46 = 44 sts = 22 increases each side
> - XL: 96 − 48 = 48 sts = 24 increases each side
> **Increase frequency** (every X rows):
> - S: 102 rows ÷ 18 increases = every **5.7 rows → increase every 6 rows** (102 ÷ 6 = 17, adjust last interval if needed)
> - M: 105 rows ÷ 20 = every **5.25 rows → increase every 5 rows** for 15 increases, then every 6 rows for 5 increases (balanced)
> - L: 108 rows ÷ 22 = every **4.9 rows → increase every 5 rows**
> - XL: 111 rows ÷ 24 = every **4.6 rows → increase every 5 rows** (4 rows for some intervals)
> **Simplified increase schedule for all sizes**: Increase 1 st each end **every 5th (6th) row** as given below.
**Increase method**: At each increase row, bring the next OOW needle at each end of MB (and corresponding RB needle, maintaining the 2×2 pattern) into UWP. E-wrap the new needles to prevent a hole, or use the adjacent stitch loop to create a lifted increase.
3. Continue in 2×2 rib at **T7**, working increases as follows:
| Size | Increase Row Interval | Number of Increases (each side) | Total Rows Worked |
|---|---|---|---|
| S | Every 6th row | 18 | 108 rows (slight adjustment — see Note A) |
| M | Every 5th row for 20 increases | 20 | 100 rows (adjust last rows straight) |
| L | Every 5th row for 22 increases | 22 | 110 rows (adjust last rows straight) |
| XL | Every 5th row for 24 increases | 24 | 120 rows (work excess rows straight) |
> **Note A (Size S)**: 18 × 6 = 108 rows. Sleeve body target is 102 rows. Work increases every 6th row for 15 increases (90 rows), then every 4th row for remaining 3 increases (12 rows) = 102 rows total. 15 + 3 = 18 ✅
> **Note (M, L, XL)**: After all increases are complete, knit remaining rows straight to reach the sleeve body target length before beginning the sleeve cap. The extra straight rows add length above the taper; this is correct.
4. **RC checkpoints during sleeve increases**:
- RC 030: Check width — fabric should be visibly widening
- RC 060: Midpoint — recheck stitch count
- RC at end of increases (see table above): **Full sleeve width reached**
> After all increases:
> - S: 78 sts total. **RC ~102. COR.**
> - M: 84 sts total. **RC ~105. COR.**
> - L: 90 sts total. **RC ~108. COR.**
> - XL: 96 sts total. **RC ~111. COR.**
#### Sleeve Cap Shaping
> **Goal**: Shape sleeve cap to fit armhole. Cap height = 5.5 inches (14 cm) = 33 rows.
> Total sts removed during cap = all sleeve sts.
> **Cap shaping method (standard set-in cap)**:
> 1. Bind off 5 (5, 6, 6) sts each end over first 2 rows (same as armhole). — removes 10 (10, 12, 12) sts
> 2. Decrease 1 st each end every row for 10 (10, 12, 12) rows — removes 20 (20, 24, 24) sts
> 3. Decrease 1 st each end every other row for 8 rows — removes 16 sts (all sizes)
> 4. Bind off remaining sts
> **Remaining after Step 1:**
> - S: 78 − 10 = 68 sts
> - M: 84 − 10 = 74 sts
> - L: 90 − 12 = 78 sts
> - XL: 96 − 12 = 84 sts
> **Remaining after Step 2:**
> - S: 68 − 20 = 48 sts
> - M: 74 − 20 = 54 sts
> - L: 78 − 24 = 54 sts
> - XL: 84 − 24 = 60 sts
> **Remaining after Step 3 (16 sts removed):**
> - S: 48 − 16 = **32 sts**
> - M: 54 − 16 = **38 sts**
> - L: 54 − 16 = **38 sts**
> - XL: 60 − 16 = **44 sts**
5. **Cap Step 1** (starting at COR):
- Row 1: Bind off 5 (5, 6, 6) sts at right edge. Knit across. **COL.**
- Row 2: Bind off 5 (5, 6, 6) sts at left edge. Knit across. **COR.**
6. **Cap Step 2** — decrease every row:
- Using 3-prong transfer tool, decrease 1 st each end (transfer outer st inward, leave outermost needle OOW).
- Continue for **10 (10, 12, 12) rows**, working **5 (5, 6, 6) decrease rows each side** = 10 (10, 12, 12) total passes.
7. **Cap Step 3** — decrease every other row:
- Decrease 1 st each end every other row (decrease row, plain row, repeat) for **8 decrease rows total**.
- = 16 rows of knitting, 8 decreases each side.
8. **Bind off remaining 32 (38, 38, 44) sts** using latch-tool bind-off across all sts.
> **Total cap rows**: 2 + 10 (10, 12, 12) + 16 = 28 (28, 30, 30) rows = approx. 4.7–5" cap height ✅ (close to 5.5" target; adjust if needed for your gauge)
> **Sleeve complete. Remove from machine. Repeat for second sleeve.**
---
### SECTION 4: FINISHING
#### Blocking
1. Lay all four pieces (back, front, 2 sleeves) flat on blocking mats.
2. Pin each piece to schematic measurements, stretching the rib gently to finished dimensions.
3. **Steam block** (hover iron, do not press down) or wet block (submerge, press out water gently, pin and dry).
4. Allow to **dry completely** (12–24 hours) before seaming.
#### Seaming
> Use main yarn held single and a blunt tapestry needle. Use **mattress stitch** throughout.
5. **Shoulder seams**: With right sides facing, join front to back at both shoulders. Use mattress stitch, matching row for row. Press shoulder seams gently after joining.
6. **Set in sleeves**:
- Find centre top of sleeve cap and pin to shoulder seam.
- Pin sleeve cap into armhole, easing as needed.
- Seam using mattress stitch, working from the underarm up each side of the cap.
7. **Side seams**: With RS facing, join front to back from hem to underarm, working upward. Maintain tension; the rib should align column for column.
8. **Sleeve underarm seams**: Join sleeve seam from cuff to underarm.
---
### SECTION 5: TURTLENECK COLLAR
#### Setup
> The turtleneck is knitted by picking up live neck stitches from both front and back neck, then working in 2×2 rib in the round (using ribber) for 8 inches (20 cm).
> **Neck stitch count**:
> - Back neck: 27 (28, 27, 28) sts
> - Front neck (after decreases): approximately 27 (28, 27, 28) sts
> - Total picked up: approximately **54 (56, 54, 56) sts** — adjust to nearest number divisible by 4 for clean 2×2 repeat.
> **Adjusted totals** (round to multiple of 4):
> - S: 56 sts
> - M: 56 sts
> - L: 56 sts
> - XL: 56 sts
> **Inline check**: 56 sts ÷ 4.5 sts/inch = 12.4" neck circumference (unstretched). With rib stretch, fits a typical 14–16" neck circumference. ✅
1. Place the sweater over your machine needle bed with the neck opening downward (at the needles).
2. **Pick up 56 sts** evenly around neck opening: distribute onto MB and RB in 2×2 rib arrangement (28 MB sts + 28 RB sts). Use a latch tool or the tips of transfer tools to rehang each stitch.
- Pick up from back neck WY sts first (remove WY as you go), then front neck sts.
- Space any additional pickup sts evenly from seamed sections.
3. Hang weights carefully onto the picked-up fabric. **RC 000. COR.**
#### Knitting the Turtleneck
> Knit 48 rows = 8 inches (20 cm). The collar will be folded in half (4" standing up, 4" folded over) when worn.
4. Knit in **2×2 rib at T7** for **48 rows**.
> **RC Checkpoints**:
> - RC 024 (4"): Midpoint. Check rib alignment and fabric width.
> - RC 048 (8"): Turtleneck complete. **COR.**
#### Turtleneck Bind-Off
5. Bind off using **latch-tool bind-off** for a very stretchy edge — essential for a turtleneck to go over the head.
> **Latch bind-off method**: Starting at one end, use a latch tool to pull the first stitch through the second, then the second through the third, etc., across all 56 sts. The resulting edge should stretch to at least 22 inches (56 cm) to pass over the head comfortably.
6. Weave in the bind-off tail securely.
---
### SECTION 6: FINAL FINISHING
1. **Weave in all ends** on the wrong side, using a tapestry needle. Weave through at least 2 inches (5 cm) of ribbed fabric, splitting the yarn for security.
2. **Tuck the turtleneck inward** at the midpoint to check fold direction; the cast-on (pickup) edge should be hidden inside the fold.
3. **Final steam**: Lightly steam all seams and the turtleneck collar from the wrong side. Do not press.
4. Allow to **rest flat for 1 hour** before wearing.
---
## FINISHED MEASUREMENTS (After Blocking)
| Measurement | S | M | L | XL |
|---|---|---|---|---|
| Chest circumference | 38" (96.5 cm) | 42" (106.5 cm) | 46" (117 cm) | 50" (127 cm) |
| Body length (hem to shoulder) | 25" (63.5 cm) | 25.5" (65 cm) | 26" (66 cm) | 26.5" (67.5 cm) |
| Underarm to shoulder | 8" (20 cm) | 8" (20 cm) | 8" (20 cm) | 8" (20 cm) |
| Sleeve length (cuff to underarm) | 17" (43 cm) | 17.5" (44.5 cm) | 18" (45.5 cm) | 18.5" (47 cm) |
| Turtleneck height (folded) | 4" (10 cm) | 4" (10 cm) | 4" (10 cm) | 4" (10 cm) |
| Turtleneck height (standing) | 8" (20 cm) | 8" (20 cm) | 8" (20 cm) | 8" (20 cm) |
---
## MASTER STITCH COUNT SUMMARY
| Section | Size S | Size M | Size L | Size XL |
|---|---|---|---|---|
| Back/Front cast-on | 81 sts | 90 sts | 99 sts | 108 sts |
| After armhole bind-off | 71 sts | 80 sts | 87 sts | 96 sts |
| After armhole decreases | 65 sts | 74 sts | 79 sts | 88 sts |
| Each shoulder (back) | 19 sts | 23 sts | 26 sts | 30 sts |
| Back neck | 27 sts | 28 sts | 27 sts | 28 sts |
| Sleeve cast-on | 42 sts | 44 sts | 46 sts | 48 sts |
| Sleeve at underarm | 78 sts | 84 sts | 90 sts | 96 sts |
| After sleeve cap bind-off (Step 1) | 68 sts | 74 sts | 78 sts | 84 sts |
| After sleeve cap decreases (Step 2) | 48 sts | 54 sts | 54 sts | 60 sts |
| After sleeve cap decreases (Step 3) | 32 sts | 38 sts | 38 sts | 44 sts |
| Turtleneck pick-up | 56 sts | 56 sts | 56 sts | 56 sts |
---
## TROUBLESHOOTING TIPS
| Problem | Solution |
|---|---|
| Rib stitches dropping off ribber | Check ribber is level and pitch lever is set to "P" (half-pitch for 2×2 rib); add more weights |
| Uneven tension between beds | Adjust RB tension dial independently — try RB one full number looser than MB (e.g., MB T7 / RB T8) |
| Neck pick-up gaps at seams | Pick up an extra stitch at each seam junction and decrease it on Row 1 of turtleneck |
| Sleeve cap doesn't fit armhole | Measure both cap height and armhole depth; ease the cap in using mattress stitch and slightly stretching the armhole seam |
| Rib rolling at cast-on edge | The WY/ravel cord method prevents this; ensure WY rows are removed cleanly and hem is steamed well |
---
*Pattern version 1.0 — All measurements are blocked/finished dimensions. Always knit a tension swatch and adjust accordingly. Machine settings are guidelines; individual machines vary.*
---
Disclaimer: This pattern was generated by AI and should be reviewed for accuracy before use. While we strive for quality, AI-generated content may contain errors. Please verify measurements, stitch counts, and instructions before beginning your project. Generated by purlJam.uk
Access your pattern anytime
Bookmark this page to access your pattern anytime